Atomic Skylark (Modular Model Rocket Kit)


Print Profile(1)

Description
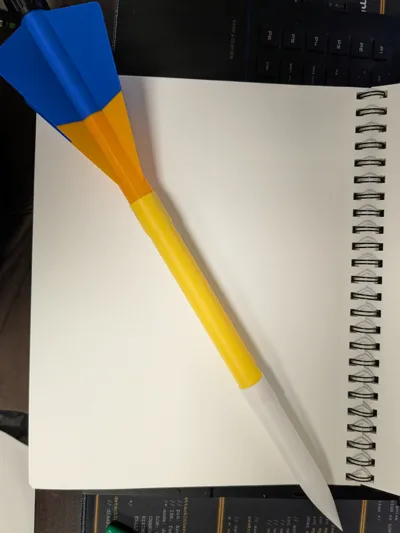
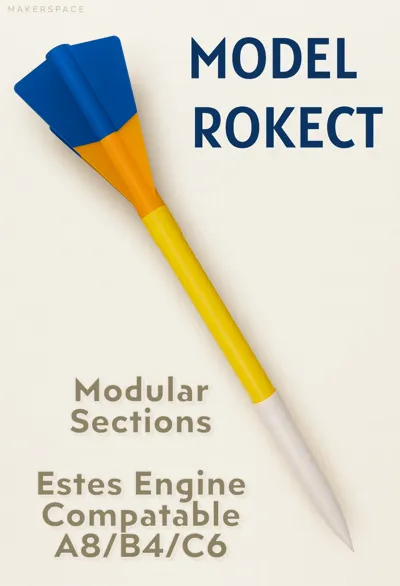
Meet the Atomic Skylark: a fully 3D-printed, modular model rocket that’s equal parts retro charm and modern maker magic. Inspired by a Jetsons-era vibe, this rocket’s modular sections let you mix and match its length and fin designs on the fly—no supports needed. It's compatible with A8, B4, or C6 Estes engines, so you can send it soaring to the stars—well, at least to the local park’s stratosphere. Just snap together your preferred configuration, pick your engine, and watch this Atomic Skylark take flight with that nostalgic, space-age flair!
Caution
When assembling your Atomic Skylark, keep in mind that different 3D printing materials will affect how well the modular sections fit and hold up during flight. For best results, avoid using silk filaments, as they tend to delaminate mid-air and can make your rocket a one-hit wonder. PETG can also be a bit brittle during the parachute deployment, so handle with care. We recommend good old PLA or PVA for reliable and sturdy prints. TPU is still untested, and of course, any experimental materials are at your own adventurous risk. Keep it fun and safe up there!
nstructions
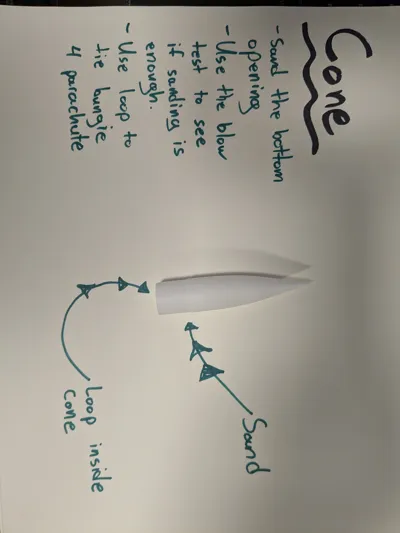
- Prepare the Nose Cone:
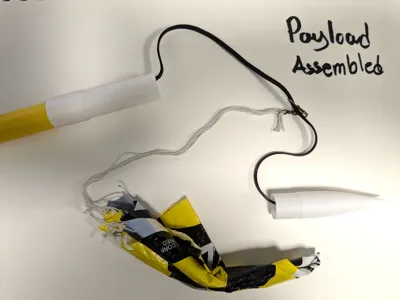
Start by taking the nose cone and sanding the bottom of its opening. Different materials can expand or not expand uniformly, so sanding ensures a good fit. Once sanded, do a simple "blow test" by placing the cone on the payload section and blowing from the bottom. If the cone pops off easily, you’ve sanded enough for a smooth release. - Attach the Bungee:
The nose cone has a loop where you tie one end of the bungee (a rubber band). Tie the other end of the bungee through the top of the payload section. You can now attach either a parachute or a ribbon to the bungee. Roll the parachute or ribbon neatly and tuck it inside the payload section along with the bungee. - Assemble the Body Sections:
Once your payload section (with cone and parachute) is ready, just click it onto the top of the main tube. The tube sections are modular; ideally, you can stack one to three sections for stability. More than that gets a bit wobbly, and fewer might not stabilize well, but you can experiment to find your perfect length. - Choose and Attach the Fins:
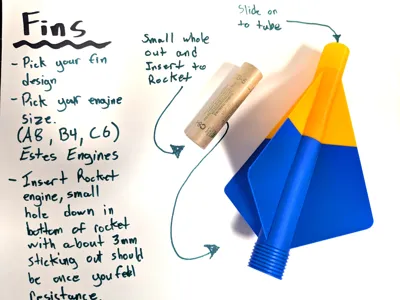
Select one of the three stable fin designs included, or design your own if you’re feeling creative. Once you’ve picked your fin set, attach them to the bottom tube section. - Insert the Engine:
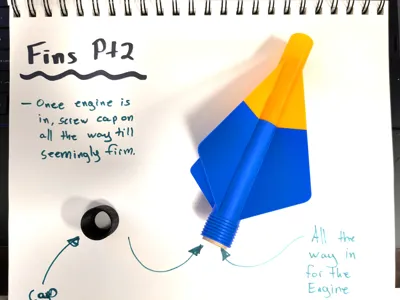
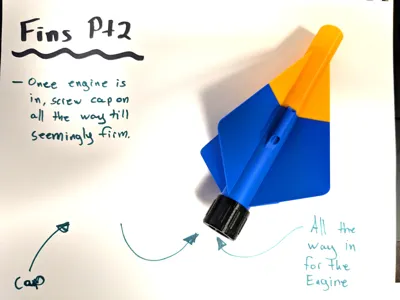
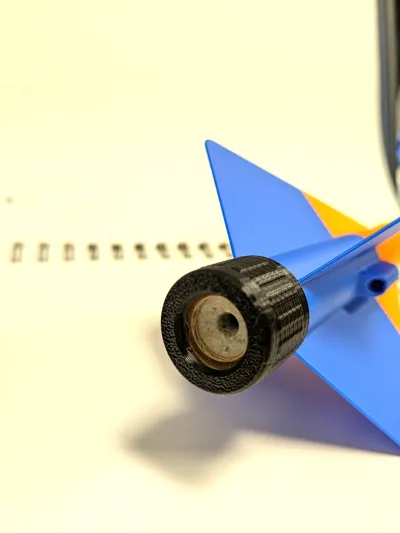
Choose your engine (A8, B4, or C6 from Estes). Insert it with the small hole facing downward so that the thrust goes the right way. Cap the engine by twisting the threaded cap onto the bottom of the fin section. Then place the igniter in as needed. - Final Assembly and Check:
Finally, click the fin section into the bottom of the tube. Make sure the igniter isn’t bent towards the rocket launch holder. Once everything’s snug, you’re all set. Refer to the included pictures for a visual guide.
Comment & Rating (0)