Search models, users, collections, and posts

Rear Outlet for Sovol / Comgrow SH02 Dryer

Print Profile(1)

All
X1 Carbon
H2S
H2C
H2D Pro
A1
X1E
P1S
X1
H2D
P2S
P1P
X2D
A2L

0.2mm layer, 2 walls, 15% infill
Designer
1.3 h
1 plate
5.0(7)

Open in Bambu Studio
Boost
64
211
39
5
192
72
Released 

Description

Overview

The Sovol / Comgrow SH02 filament dryer comes with only two PTFE exits located on the top cover.
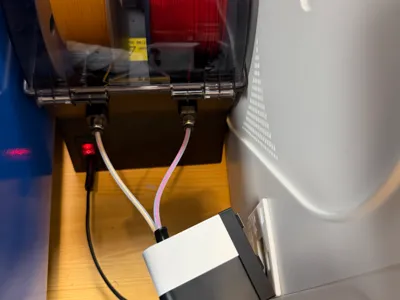
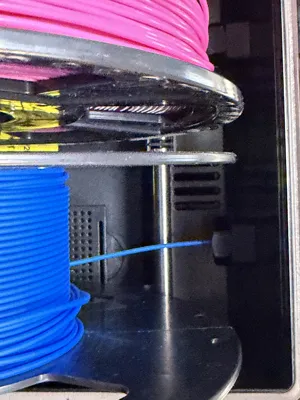
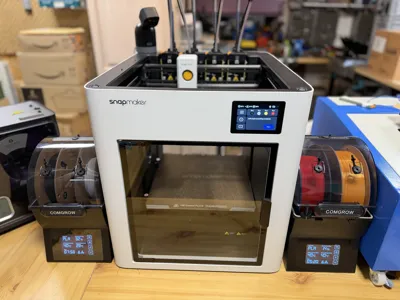
For setups where rear PTFE outlets are required—such as Snapmaker U1 dual-side spool feeding—this printable adapter provides the ideal solution.

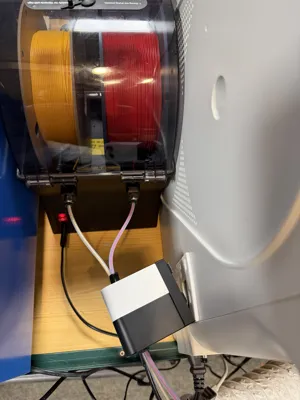
This design adds two rear PTFE ports, allowing clean and low-friction filament routing behind the dryer.

What’s Included

This model set contains:

  • Rear PTFE Outlet Adapter (outer side)
    Designed to fit the curved back panel of the SH02.
  • Internal Backing Plate (inner side)
    Locks the adapter in place from the inside.
  • M10 Lock Nut (printed)
    Used to secure the assembly.
  • Drilling Template
    Ensures perfectly placed mounting holes on the SH02 housing.

Compatible PTFE Fittings

The design uses standard PC4-M10 pneumatic PTFE fittings:

  • Thread: M10 × 1.0
  • Type: PC4-M10 push-fit connector
  • Tube size: 4 mm outer diameter PTFE tube

(These connectors are typically labeled “PC4-M10” in 3D-printing shops.)

Function

The adapter allows you to insert a 4 mm OD PTFE tube directly into the drying chamber.
This creates a controlled filament path that guides the filament upward and out the back, ideal for printers such as the Snapmaker U1 that feed filament from behind the machine.

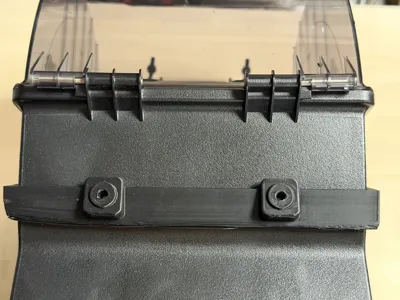
Drilling Template Instructions

The included drilling jig helps you create the two necessary holes.

Steps:

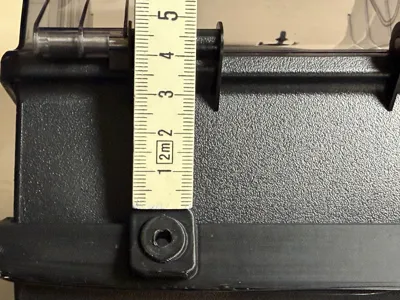
  1. Align the template on the SH02 rear housing.
    • The distance from the top edge of the dryer to the centerline of the holes should be approx. 4.5 cm.
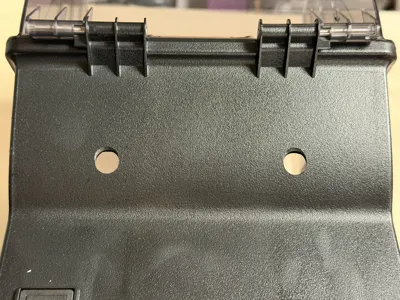
  2. Pre-drill both holes with a 4 mm drill bit.
  3. Enlarge each hole to 10 mm to fit the M10 thread sockets.

Installation Instructions

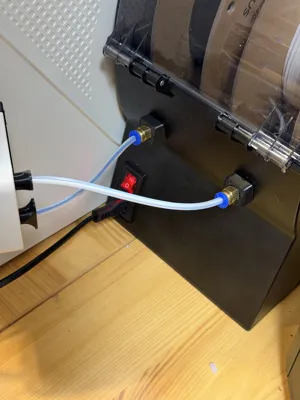
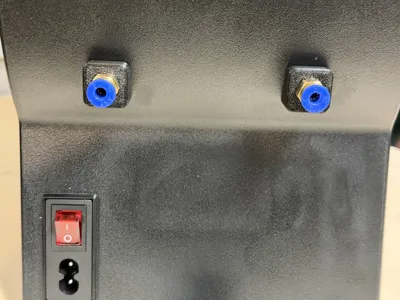
  1. Screw a PC4-M10 pneumatic fitting into the printed outer adapter.
  2. Insert the adapter from the outside through the newly drilled 10 mm holes.
  3. Place the inner backing plate onto the inside of the dryer case.
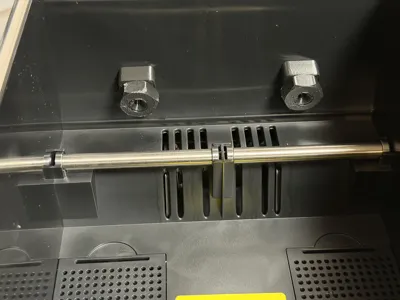
  4. Secure everything using the printed M10 lock nut.
  5. Insert a 4 mm PTFE tube through the fitting and push it all the way into the dryer interior.

The filament path is now fully guided through the PTFE tube.

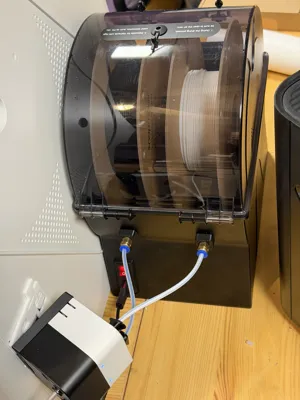
Using the Dryer With the New Rear Outlets

Because the filament is fed from below:

  1. Pull off a small length of filament from the spool.
  2. Feed the filament from underneath into the PTFE tube.
  3. Then insert the spool into the holder.
  4. Make sure the spool unwinds forward when the printer pulls filament.

This ensures smooth feeding without tangles.

Recommended Print Settings

  • Material: PETG, ASA or ABS (recommended for heat resistance)
  • Layer height: 0.2 mm
  • Infill: 15 %
  • Supports: Only for drilling template required (all other parts are designed support-free)

Notes

  • Designed specifically for Sovol / Comgrow SH02.
  • Fully compatible with Snapmaker U1 or any rear-feed printer setup.
  • No modifications to the dryer internals are required.

Comment & Rating (39)

(0/1000)

This worked great! did both units in less than an hour. thanks ❤️
The designer has replied
designer
1
Reply
Thank you ver much! Looks great with the orange filament! 😍
0
Reply
Perrrrfect!
The designer has replied
designer
1
Reply
That makes me happy👍😀
0
Reply
Boosted
Print Profile
0.2mm layer, 2 walls, 15% infill
great design, thanks a lot! :)
The profile uploader has replied
profile
1
Reply
Cool, thank you very much for your praise and the beautiful picture of your conversion. I am particularly pleased with the boost, thank you very much for that!
0
Reply
Print Profile
0.2mm layer, 2 walls, 15% infill
I am very satisfied. The drill spacer allows for proper hole positioning. I use one slot for filament loading and the other for drying. It has improved convenience by eliminating the need to handle filament when opening the lid. This dryer is a very interesting device with many possible modifications, but I find this print to be particularly outstanding.
The profile uploader has replied
Show original
profile
1
Reply
Thank you very much for the great feedback! I'm glad the drilling spacer helped you place the holes correctly. I also think the filament dryer itself is a very well-designed and thoughtful device — the only thing missing were rear filament outlets. With this design, that small limitation can finally be solved. I really appreciate you sharing your experience!
0
Reply
Print Profile
0.2mm layer, 2 walls, 15% infill
love this
(Edited)
profile
1
Reply
Wonderful! Thank you for posting this. The drilling spacer was a real confidence booster. I used a bit of tape to keep it positioned for both holes while I futzed with the drill. It kept the drill bit parallel to the bottom of the dryer, not perpendicular to the curved part. Drilling at slow speed with no intentional pressure cleanly cut the holes with no cracking. The 9/64 bit fit the guide the best. I expanded the hole with a step bit. Same process. Slow speeds, no discernable pressure. No cracking or chipping, just clean holes. All the parts (printed in PETG) fit together flawlessly. The PC-M10s were a bit snug toward the bottom of their sockets, but that should be expected. I only hand-tightened the PETG nuts but they seem secure. Really pleased with the design. Directly addressed real concerns of mine (no straight path from my Comgrow dryer to the U1, weird pulling angle, dryer facing away from me, etc.) Greatly appreciate you sharing this. Thank you.
(Edited)
The designer has replied
0
Reply
Hello Whizzard, I'm very glad that you like the solution so much and, secondly, that it is exactly what you wished for. Because those were exactly my wishes too, and I had looked at several filament dryers online and finally came across the SH02, where I immediately realized that a modification must be possible. Have fun with it! RVfan
Show original
0
Reply
perfetto!!!!
The designer has replied
0
Reply
Thank you! 😍
0
Reply
Print Profile
0.2mm layer, 2 walls, 15% infill
Super, I put the outlets in the front though
Show original
0
Reply
Hi, what Adapter to disconct the feeder in this a Angle?
The designer has replied
0
Reply
Replying to @RVfan :
Thx! 🙂 Looks like a Hinge?! Supports needed, I assume...
0
Reply
Replying to @s.basoral :
Yes, it’s a hinge and yes you need support for it. I used the 3MF file, where the support is already activated a configured. But take care, as I can remember only for one side. For the other side you need to activated it manually.
0
Reply
Works as designed. Excellent
The designer has replied
designer
1
Reply
Perfect, thank you! 😍👍
0
Reply
Perfect :-)
0
Reply