Castles of Burgundy SE- 3D hex tiles


Print Profile(1)

Bill of Materials
- Exacto knife(s) x 1: Here's the exacto knifes that I used. Their blades are quite thin and the cutting jig's guide lines are very narrow to match. https://www.amazon.com/dp/B0D47PKNZF
- Transparent stickers x 1: These sticker sheets are optional and are used as overlays on top of the hex tile stickers to protect them. Nothing is printed on them. DO NOT buy inkjet or laser printable transparent stickers as these sticker papers are not truly transparent and will add a milky appearance to the printed stickers beneath them. https://www.amazon.com/dp/B0CCRZRL33
- Inkjet/Laser printable sticker paper with a white background x 1: Most likely any printable sticker paper will work, but this is one that I used successfully. https://www.amazon.com/dp/B08BPL81M9
Description
UPDATE: I've got an alternate version of this design that I've nearly completed. It requires using a 0.2mm nozzle, so that the help text is actually 3D printed rather than applied with stickers. I think it produces a more polished looking result, but requires more effort and significantly more time to print (although I have been experimenting with using a 0.4mm nozzle as, at least, in theory, it should be able to produce the necessary detail). Take a look at the end of this BGG thread for a preview of the new design: https://boardgamegeek.com/thread/3618582/a-cheapstakes-3d-printed-hex-tokens.
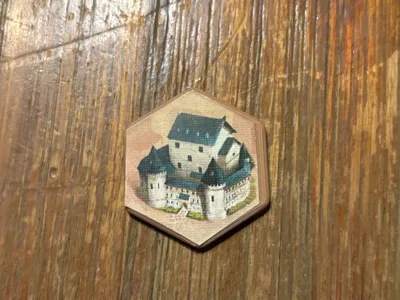
These are 3D printable replacements for the cardboard hex tiles used in Castles of Burgundy Special Edition. Stickers must be applied to the top and (optionally) the bottom of each tile. Ideally, the hex tiles should be printed with a filament matching the background color of the corresponding sticker that will be affixed to the tile, but it's not absolutely necessary.
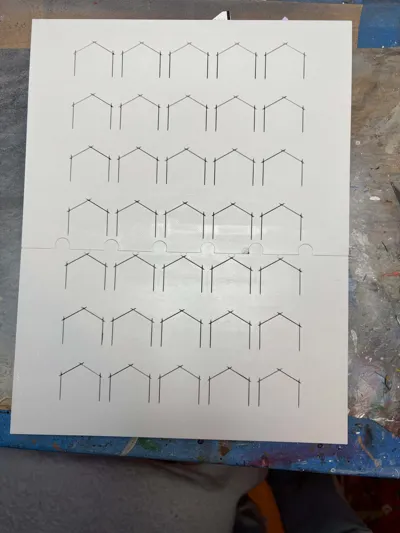
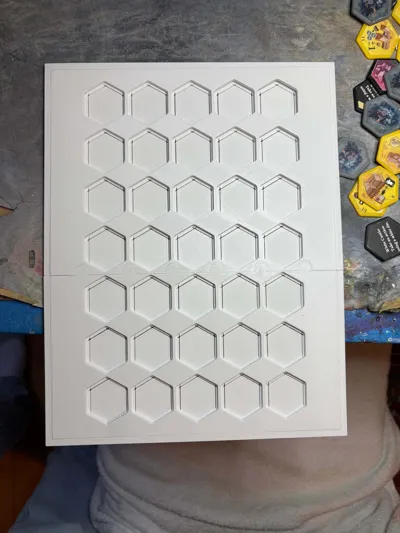
Included are two jigs. The first (tile jig) is used to hold the hex tiles in the proper positions in order to apply a printed sheet of stickers to the tiles. The second jig (cutting jig) slides on top of the tile jig and provides cut line guides for the cutting the stickers to the proper size.
The sticker sheets are available here: https://drive.google.com/file/d/1nTUSrZzQqfuYOMCtnqGQk4H9od01MOiJ/view?usp=sharing
Note: The help text stickers were originally created by a BGGer. Their intended use was for AR's acrylic tokens that were sold during the COB SE campaign that omitted the text (even though it was present on the cardboard equivalents). I capitalized on his file layout and created stickers of the tiles and my jigs based on that layout. Reference: https://boardgamegeek.com/filepage/263881/official-acrylic-hex-tile-stickers-updated.
Instructions:
3D print all of the hex tiles and the jig parts in the 3mf file. The different colors of the tiles are intended to match the colors of the stickers that will be placed on them. This is “a quality of life” improvement and not necessary if you don't have all the necessary colors. It helps make the tile type more easily identifiable.
Print out the 2 sticker sheets for a set of tiles. The stickers on every other page are intended to go on the other side of the tiles on the previous page. These help stickers are optional, but again, offer a quality of life improvement.
Take one of the sticker sheets, partially peeling off its back and using a backlight (lamp, etc.) to line up the sticker sheet as accurately as possible with the hex tile jig (don't insert any of the tiles into the jig yet) and attach the sticker sheet to the jig. The holes of the jig should line up with each of the cut outlines of the sticker images. Simply lining up the corners of the sticker sheet and the jig should get you most of the way there. If applied improperly, you should be able to pull the sticker back off and try again. Once you've successfully completed this step, I'd suggest adding another transparent sticker sheet on top of the one you just applied. This clear sheet will offer a layer of protection for the ink/toner of the image on the sticker beneath.

While the transparent sheet just needs to cover the tile images (it does need to line up as perfectly as the tile sticker sheet). Apply it carefully. Don't try to pull the transparent sticker back off to fix it being misaligned. It will ruin the sticker sheet underneath. Instead, cut any overhangs flush with the jig using an exacto knife .
Flip over the hex tile jig, lay it down on flat surface and insert the appropriate colored hex tiles into the jig, pressing the tiles against the sticker paper and the hard surface below it. Flip the hex tile jig over again, with the sticker side facing up and push the cutting jig over the hex tile jig, If you need to pick both jigs up to work the tile jig into the opening of the cutting jig.
Lay the cutting jig on flat surface and using an exacto knife trace each of the cut lines in the jig to cut 4 of the 6 hex sides of each of the tile. Once done, you can remove the cutting jig and inspect the sticker sheet, making sure that all the lines were cut. If not, put the cutting jig back on and cut any missed lines.

With the cutting jig removed, rotate the cutting jig 180 degrees and place back over the tile jig to cut the remaining 2 (top or bottom) sides of the hex of each tile. Once done, remove the cutting jig and re-inspect the sticker sheets looking for any missed cut lines. Once you've verified that each line has been cut. Hold up the tile jig, sticker sheet side facing up, and push downward on each tile in the jig to remove it with the cut sticker now attached.
Repeat this process with the sticker sheet for the backsides of the tiles. When you insert the tiles into tile jig (after attaching the sticker sheet) make sure to insert the right tiles in the proper spots so the correct help text is stuck onto the right tile.
Good luck!
Comment & Rating (0)