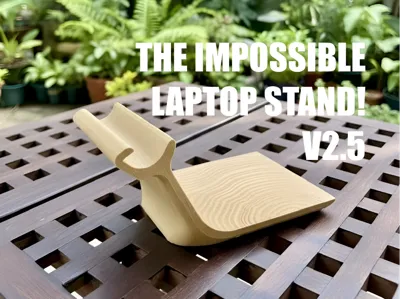
The Impossible Laptop Stand v2.5 [Woodgrain]


Print Profile(7)


Description
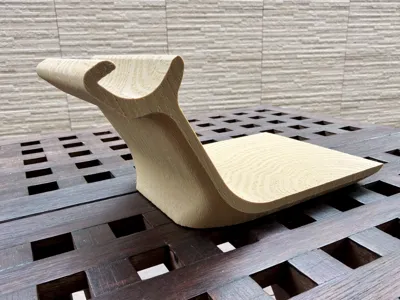
Looks impossible? Think again!
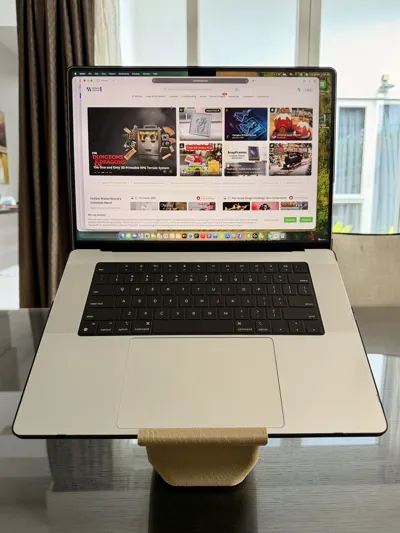
Instantly elevate your bland office desk and get rid of your boring laptop risers and stands!
Watch your envious colleagues' jaws drop as they struggle to process a laptop floating in mid air!
Design has been tested with a 13" HP Elitebook and a 16" Macbook Pro. Most laptops should fit provided that the bottom half is not too thick. Works great with iPads and other tablets too, especially for looking at recipes in the kitchen!
This is a further refined version of V2 with the following improvements made:
- Refined geometry to accommodate slightly thicker laptops
- Top lip is now curved for design consistency
- Added print profiles with wood grain (based on the fantastic work done by PandaN here)
The following features from V2 are retained in the update:
- Good stability with no load / loads of different sizes (phones, tablets, laptops, etc)
- Good grip - design includes a printable TPU foot that fits in a cutout on the base (version with no cutout remains available. No more sliding around the desk!
- Printable in one piece with no supports
- Fits on A1 Mini!
Printing
The pictured model was printed using the woodgrain profile, with wood-coloured PLA, but any material should work. Use a heat resistant material if using in a hot environment.
- 4 walls
- 30% crosshatch infill
- No supports required
I have found that the above is sufficent to produce a nice strong print. Increase the number of walls / infill at your discretion if you wish to add even more strength.
Do not change the print orientation! Model must be printed side down to maximize strength at stress points.
Assembly
Attach the rubber foot to the base of the model with superglue.

Happy printing! Share your makes!
Boost Me (for free)
A boost would be much appreciated if you enjoyed the model :)
Membership
License
You shall not share, sub-license, sell, rent, host, transfer, or distribute in any way the digital or 3D printed versions of this object, nor any other derivative work of this object in its digital or physical format (including - but not limited to - remixes of this object, and hosting on other digital platforms). The objects may not be used without permission in any way whatsoever in which you charge money, or collect fees.
Comment & Rating (112)