


Print Profile(1)


Description
⭐ Product Overview ⭐
This elegant Kumiko Lantern (or Christmas Ornament) combines traditional Japanese woodworking design with modern 3D printing technology. The model consists of intricate parts and is specially designed for use with small LEDs (e.g., battery-operated balloon lights or fairy lights). It is perfect as a stylish decoration for outdoor, a Christmas ornament, or a cozy, small lantern.
I use
Boost Me (for free)
🔑 Key Features & Design Advantages 🔑
| Feature | Detail |
|---|---|
| Dimensions | Approx. 14cm in height (assembled). |
| Print Comfort | No Supports and No Brim required. |
| Compatibility | Tested and compatible with all Bambu Lab printers (X1C, P1S, A1, A1 Mini, etc.) |
⚙️ Recommended Print Settings ⚙️
The attached .3mf file contains all necessary presets.
I recommend using Bambu Lab PLA Basic Filament for the best results.
| Parameter | Recommended Value |
|---|---|
| Filament Type | Bambu Lab PLA Basic |
| Layer Height | 0.2mm |
| Supports | OFF |
| Brim | OFF |
🛑 Crucial Tips for a Successful Print 🛑
1. Turn OFF the AUX Fan to Prevent Warping:
For this print, which includes relatively large, flat parts, we strongly recommend turning OFF the AUX Fan (Auxiliary Part Cooling Fan) in Bambu Studio. The powerful airflow can lead to uneven and too-rapid cooling, potentially causing warping (lifting of the corners from the build plate).
2. Optimal Bed Adhesion is Essential:
Since the star and other small parts have a small footprint, optimal bed adhesion is critical:
- Cleaning: Thoroughly clean the build plate before printing with warm water and dish soap and a clean sponge. Then, dry the plate carefully with a clean microfiber cloth.
🎨 Filaments Used (2 Colors) 🎨
| AMS Slot | Color & Application |
|---|---|
| Color 1 | Bambu Lab PLA Jade White |
| Color 2 | Bambu Lab PLA Bronze |
🛠️ Assembly Instructions (Step-by-Step) 🛠️
Step 1: Fold and Glue the Lantern Panels
| Image | Instruction |
|---|---|
 | 1.1 Take the lantern body (the large, flat piece with the Kumiko lattice pattern) and place it flat in front of you. |
 | 1.2 Fold it along the designated folding lines, as shown in the photo. Tip: It may help to place the lantern body on the warm build plate briefly to make the material more flexible. Bambu Lab PLA Basic could be folded cold without any issues. |
 | 1.3 Now apply some super glue to the ends of the lantern body. It is sufficient to apply it only to the central part.
⚠️You can find the precision tips here: https://amzn.eu/d/7cktXtg
|
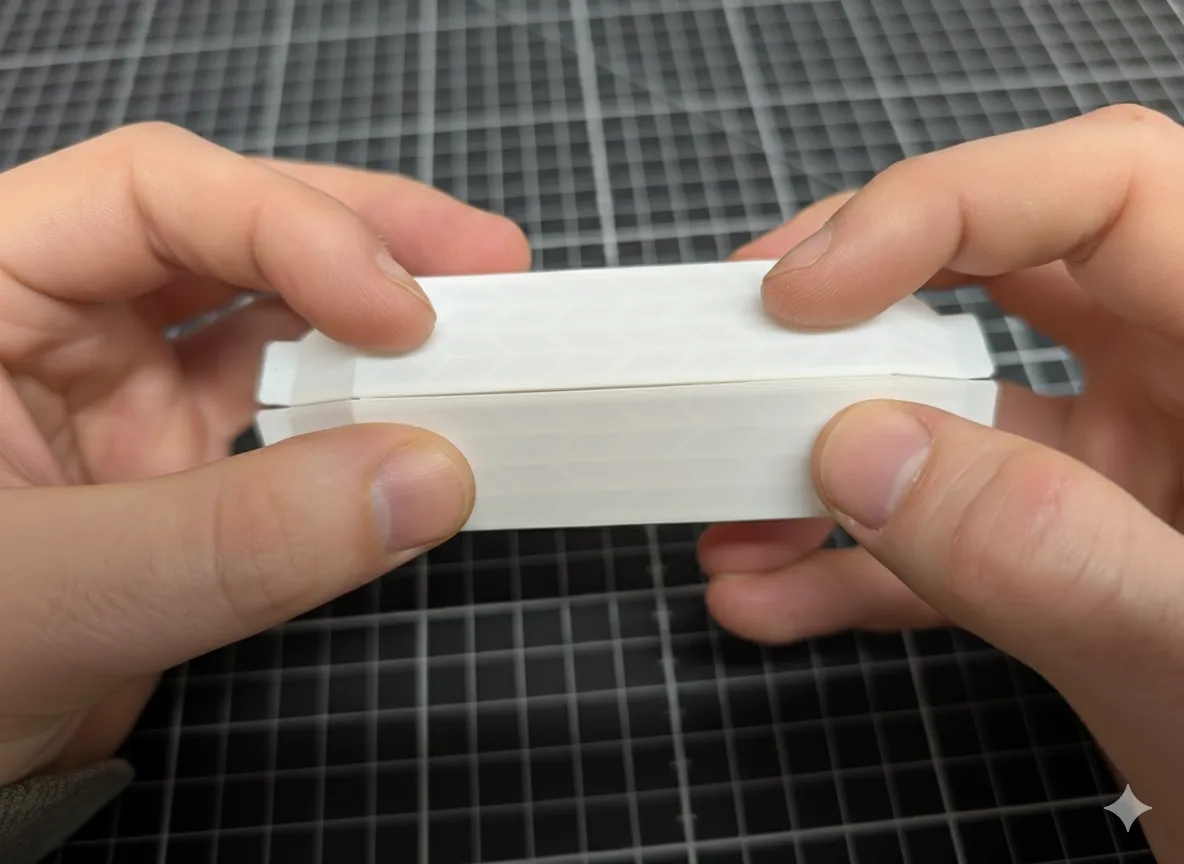 | 1.4 Now press the ends together and hold them briefly. The lantern body is designed so that the surfaces fit together perfectly at an angle of 60 degrees.
Orient yourself along the top and bottom edges to glue the lantern body perfectly. |
Step 2: Preparing the Top Lid and LED
| Image | Instruction |
|---|---|
 | 2.1 Take the top lid and the LED component.
⚠️You can find the LED component here:
|
 | 2.2 Press the LED firmly into the dedicated cutout in the top lid. The fit should hold the LED securely in place. |
Step 3: Final Assembly and Gluing
| Image | Instruction |
|---|---|
 | 3.1 Now take the prepared top lid, the bottom lid, and the glued lantern body and lay them out in front of you. Apply some super glue again with the precision nozzle into the hexagonal groove in the bottom lid.
Now carefully insert the Lantern Body into the bottom lid. You may want to test the fit without glue beforehand. The fit allows for a little tolerance, and a slight rotation may also be helpful for seating the body.
Repeat the procedure for the top lid in the same manner. |
 | 3.2 Your Kumiko Lantern is now complete and can optionally be used with a nice ribbon or the included hook. I hope you enjoyed the assembly process! |
Boost Me (for free)
⚠️ IMPORTANT SAFETY WARNING ⚠️
Use LED Lights ONLY: This model is designed exclusively for use with battery-operated LED lights. NEVER use real candles or open flames, as this poses a fire hazard and can melt the PLA filament.
Choking Hazard (Small Parts): This kit contains small parts, especially the small ornaments. I would like to point out that these may be swallowed by small children or pets. Please keep the finished model out of their reach. Use is at your own risk.
💖 Happy Holidays 💖
I hope you enjoy this small project and that it brings a festive atmosphere to your home!
I would greatly appreciate a Like, a Boost, or Sharing my work, as well as a constructive comment in the community.
I wish you all a Merry Christmas, happy printing, and all the best!
Boost Me (for free)
License
You shall not share, sub-license, sell, rent, host, transfer, or distribute in any way the digital or 3D printed versions of this object, nor any other derivative work of this object in its digital or physical format (including - but not limited to - remixes of this object, and hosting on other digital platforms). The objects may not be used without permission in any way whatsoever in which you charge money, or collect fees.
Comment & Rating (0)