Cobb Vanth's HF-94 Blaster - Moving Trigger


Print Profile(1)

Bill of Materials


Description
Thanks for checking out my model! Interested in supporting my work or selling prints?
Support Crew – Show some love and help keep the projects flowing
Galactic Maker Foundry – Sell physical prints of my original designs
Foundry License+ – Sell prints and use my photos for listings
🎉 Supporter-only Discord coming soon – get early access, tips, and sneak peeks!
Membership
Join here to support or get a license
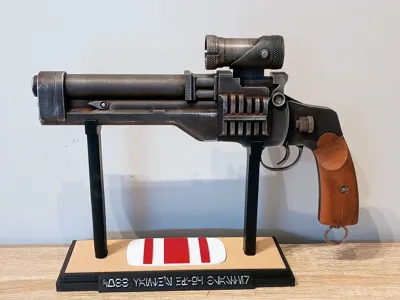
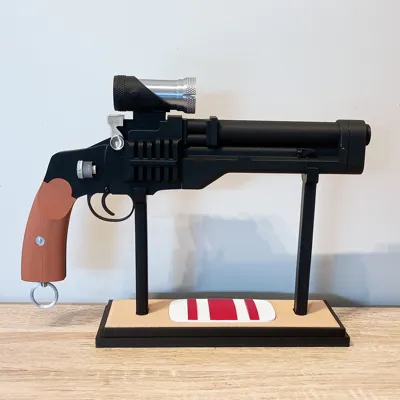
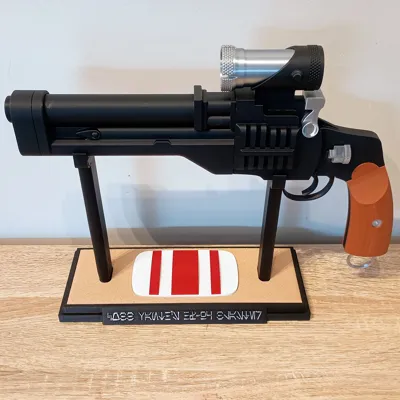
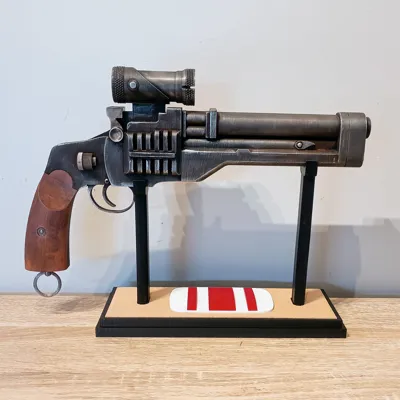
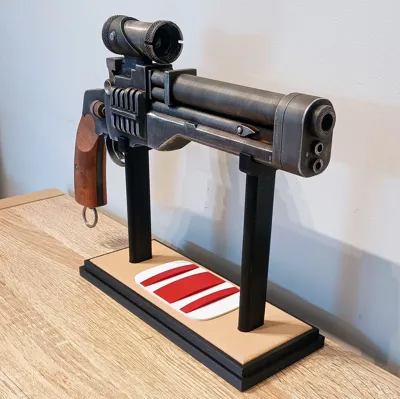
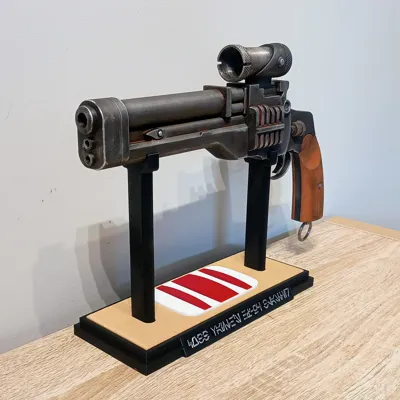
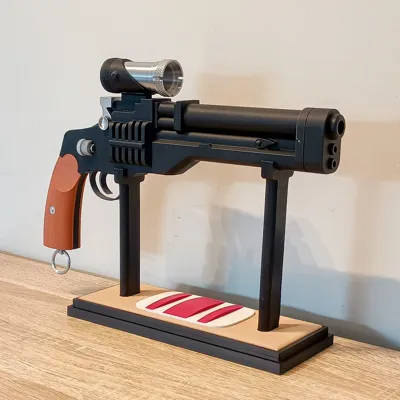
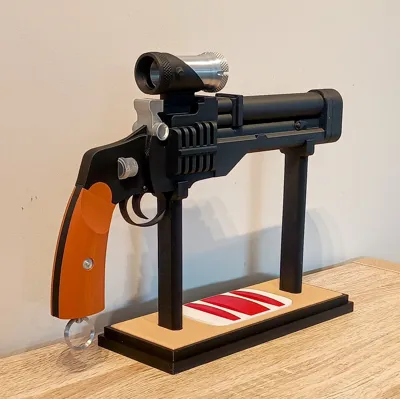
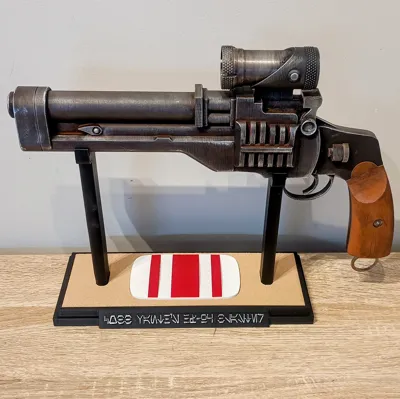
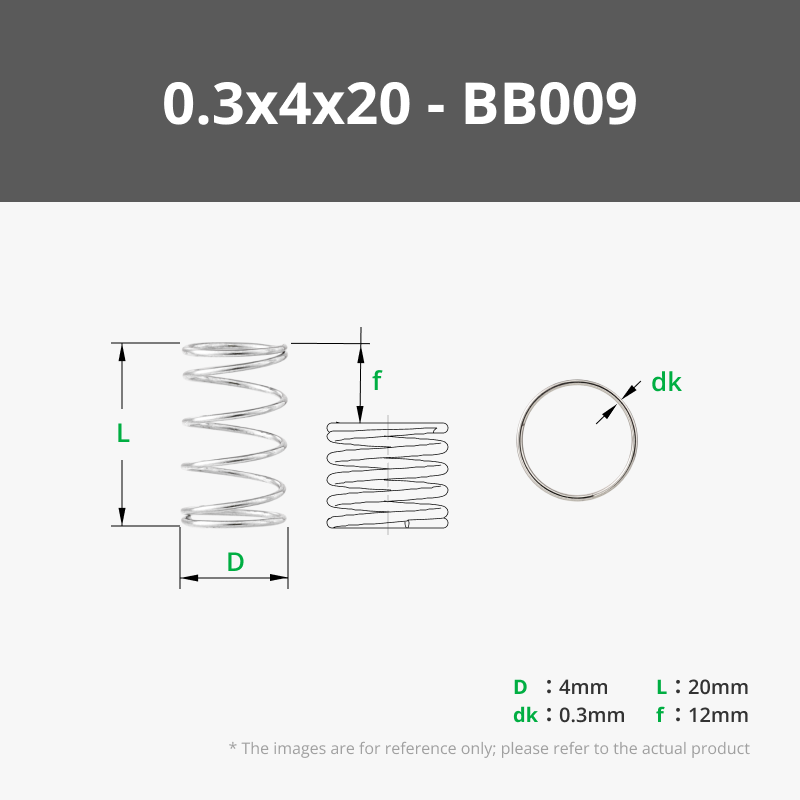
After doing a full rewatch of The Mandalorian and The Book of Boba Fett, I wanted to make a proper version of Cobb Vanth’s HF-95 blaster — the slim, sharpshooter sidearm carried by the Marshal of Mos Pelgo. There aren’t many printable versions around, so I decided to take a crack at it. And because Cobb Vanth is a gunslinger through and through, I gave this one a short, snappy moving trigger using a 4×20 mm compression spring. He wouldn’t have put up with a mushy trigger pull.
The display stand includes a fuzzy-skin sand insert (prints great on the Bambu using fuzzy skin mode), plus a Marshal Badge plate that drops into the top. Everything is designed to be easy to print and easy to assemble with strong alignment pins and clean joins.
The grips can be printed in either brown PLA or wood-filled PLA for a more authentic look. I was out of wood PLA when I printed mine, so the brown version is shown here — but wooden grips look amazing on this model.
🛠️ Assembly Instructions
- Install the Trigger
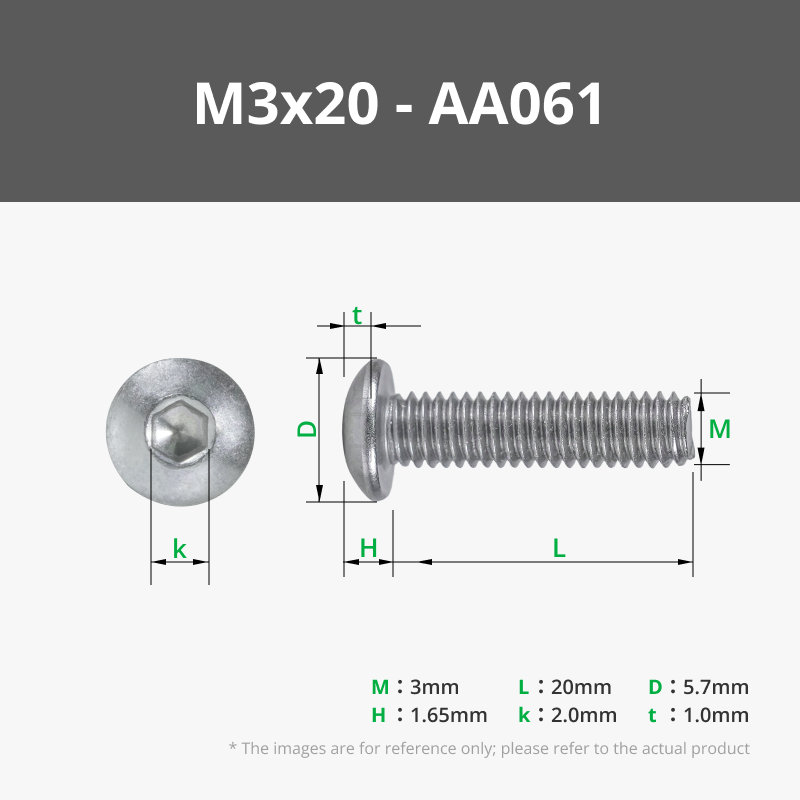
Add the 4×20 mm compression spring to the trigger, slide the trigger into the Main Body, and let the spring seat itself in the slot.
Secure the trigger using 2× M3 6 mm screws through the holes on each side. - Install the Grip Mid Section
Insert the Grip Mid piece into the Main Body and glue it in place using a generous amount of CA glue.
This piece carries the structural load of the grips, so make sure to coat the inside walls of the slot and all mating surfaces. - Attach the Trigger Guard
Glue the trigger guard to the Main Body.
The flat side of the guard faces toward the back of the blaster. - Prepare and Install the Grips
Glue the Grip Inserts into the left and right grips.
Then glue the grips onto the handle using the 5 mm alignment pins so everything lines up perfectly. - Assemble and Install the Barrel
Use the three 8 mm alignment pins to glue the barrel onto the Main Body.
Make sure the barrel seats evenly on all sides. - Install the Hammer
Glue the hammer onto the Main Body.
This must be done before adding the scope. - Assemble the Scope
Glue the front and rear scope parts together — they’re keyed and will only align correctly one way.
Then glue the complete scope onto the Main Body. - Add the Main Body Greeblies
Glue the two greeblie pieces into the cutouts on each side of the Main Body. - Install the Lanyard Ring
Insert the Lanyard Pin into the bottom of the grip.
Then push the Lanyard Ring into the pin.
I kept mine friction-fit so it can still move, but you can glue it if you want — just note it won’t swivel anymore. - Weathering (The Fun Part)
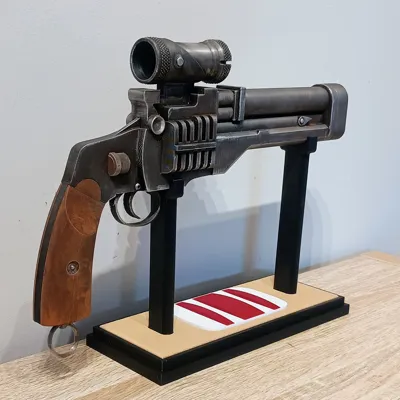
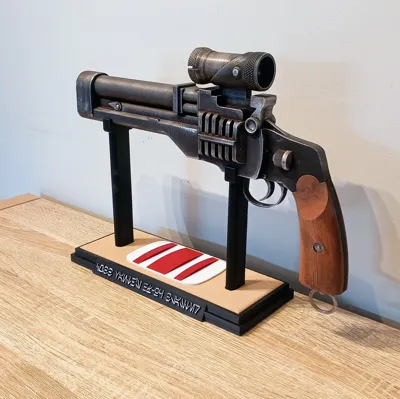
Cobb Vanth’s blaster is mostly black with a worn metallic sheen and lots of dings and scratches.
Here’s what I used:
• Raw umber + burnt sienna wash over most of the blaster
• Black wash on silver/silk parts
• Wipe/dry after each pass — do multiple thin washes instead of one heavy one
• Silver Leaf Rub ’n Buff on a rag to add metallic highlights
• Heavier Rub ’n Buff on the edges to sell the wear - Stand Assembly
Glue the sand-textured insert into the base (printed using fuzzy skin mode).
Insert the two stand legs and secure them with 4× M3 screws (anything from 10–20 mm works).
Drop the Marshal Badge into the front cutout.
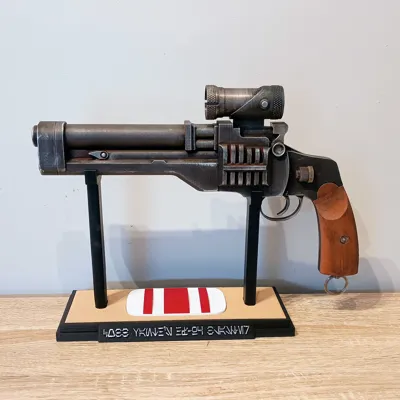
For extra pop, lightly Rub ’n Buff the Aurebesh text.
The stand text reads: “Cobb Vanth’s HF-95 Blaster” in Aurebesh. - Weathering the Stand (Optional)
A little raw umber + black wash really sells the sand effect.
Cobb Vanth’s belt buckle/Marshal badge is pretty beat up in the show, so adding some paint chips and scuffs on the badge makes it look screen-used.
Once you’ve finished your weathering and detail work, the HF-95 is ready for display. The stand and badge really help complete the look, and the sand texture on the base gives it that perfect Tatooine/Mos Pelgo vibe. Hope you enjoy printing and building this one as much as I did designing it.
If you enjoy this build, please post a Make — I love seeing everyone’s prints. Boosts help me keep designing more Star Wars blasters and props. And if you’ve got ideas, suggestions, or a blaster you’d like to see me make next, just drop a comment and let me know!
License
You shall not share, sub-license, sell, rent, host, transfer, or distribute in any way the digital or 3D printed versions of this object, nor any other derivative work of this object in its digital or physical format (including - but not limited to - remixes of this object, and hosting on other digital platforms). The objects may not be used without permission in any way whatsoever in which you charge money, or collect fees.
Comment & Rating (10)