Parametric enclosure for 2× MAX7219 LED modules


Print Profile(1)

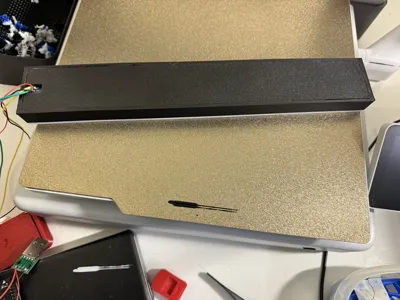
Description
MAX7219 LED Matrix Enclosure - User Guide

📦 What's Included
- Body (main_body) - Holds the LED modules with friction-fit grooves
- Cover - Slides into grooves with cable management slot
- Source file (.scad) - Fully parametric and customizable
🎯 Quick Start
Print Settings (Bambu Lab A1 recommended)
- Material: PLA Basic (white for body/diffuser, black for cover)
- Layer height: 0.20mm
- Infill: 15-20%
- Wall loops: 3
- Supports: None required ✅
- Print time: ~6-7 hours total
- Filament: ~75g total
Assembly
- Insert LED modules into body from the top
- Route cables through the slot in the cover (left side)
- Press cover into groove until flush
- Friction holds it securely in place
⚙️ Customization Guide
The design is fully parametric. Open the .scad file in OpenSCAD to modify parameters.

🔧 Main Parameters (lines 7-13)
modules = 2; // Number of 4-in-1 modules mod_len = 131.5; // Length of each module section mod_height = 32; // Height of LED module mod_thickness = 15.5; // Depth of LED module side_margin = 4; // Side margins front_margin = 2; // Front margin (diffuser side) back_margin = 2; // Back margin
Common modifications:
| What you want | Parameter to change | Example |
|---|---|---|
| Longer/shorter enclosure | mod_len | 140 = longer, 120 = shorter |
| More modules (3 or 4) | modules | Change to 3 or 4 |
| Taller enclosure | mod_thickness | 18 = taller, 12 = shorter |
| More diffusion space | front_margin | 5 = more space in front |
🎚️ Fine-Tuning Fit (lines 19-24)
cover_thick = 2; // Cover thickness groove_tolerance_len = 5.0; // Length fit adjustment groove_tolerance_wid = 1.0; // Width fit adjustment
If your printed cover doesn't fit:
| Problem | Solution | Parameter | Adjust to |
|---|---|---|---|
| Cover too long | Increase length tolerance | groove_tolerance_len | 6.0 or 7.0 |
| Cover too short | Decrease length tolerance | groove_tolerance_len | 4.0 or 3.0 |
| Cover too wide | Increase width tolerance | groove_tolerance_wid | 2.0 or 3.0 |
| Cover too narrow | Decrease width tolerance | groove_tolerance_wid | 0.5 or 0.3 |
| Cover too loose | Reduce both tolerances | Both | Decrease by 0.5mm |
| Cover too tight | Increase both tolerances | Both | Increase by 0.5mm |
📏 Module Pocket Adjustments (lines 15-17)
pocket_clearance_len = 0.3; // Length clearance pocket_clearance_wid = 1.0; // Width clearance pocket_clearance_dep = -1.5; // Depth (negative = closer to front)
Adjust if modules don't fit:
- Modules too tight? Increase pocket_clearance_len and pocket_clearance_wid to 1.5 or 2.0
- Modules too loose? Decrease to 0.2 and 0.5
- LEDs not visible enough? Make pocket_clearance_dep more negative (-2.0 or -2.5)
🔌 Cable Slot Position (lines 27-29)
cable_slot_w = 12; // Slot width cable_slot_h = 8; // Slot height cable_slot_offset = 10; // Distance from left edge
To adjust cable slot:
- Move left/right: Change cable_slot_offset (smaller = more left)
- Larger cables: Increase cable_slot_w and cable_slot_h
- Different position: Move slot to right side (modify code in cover module)
🖨️ How to Export Modified Design
- Open in OpenSCAD: Load the .scad file
- Modify parameters: Edit the values at the top
- Preview: Press F5 to see changes
- Render: Press F6 (this may take 30-60 seconds)
- Export Body:
- Comment out cover line: // cover();
- Menu: Design → Export as STL
- Save as Body.stl
- Export Cover:
- Comment out body lines
- Uncomment: cover();
- Export as STL → Cover.stl
📐 Verify Dimensions
After rendering (F6), check the console output:
=== BODY DIMENSIONS === Length: 271 mm Width: 41 mm Height: 18.5 mm === COVER DIMENSIONS === Length: 266 mm Width: 36 mm Height: 2 mm
💡 Tips & Tricks
Multi-Color Printing (with AMS)
- Body: Print in white PLA for better LED diffusion
- Cover: Print in black PLA for contrast
- Use "Paint" tool in Bambu Studio to assign colors
- use 100% infill for layers 0 to 3.4mm to avoid seeing infill patern on white part
Print Orientation
- Both parts print flat on bed
- No supports needed
- Grooves face up on body
📄 License
This design is released under Creative Commons Attribution 4.0 International (CC BY 4.0)
- ✅ You can remix, adapt, and build upon this work
- ✅ Commercial use allowed
- ℹ️ Attribution required
🙏 Credits
Designed with parametric flexibility in mind. Special thanks to ChatGPT and Claude for the heavy lifting and myself for testing and refining it (lol).
Enjoy your custom LED matrix enclosure! 🎉
License
You shall not share, sub-license, sell, rent, host, transfer, or distribute in any way the digital or 3D printed versions of this object, nor any other derivative work of this object in its digital or physical format (including - but not limited to - remixes of this object, and hosting on other digital platforms). The objects may not be used without permission in any way whatsoever in which you charge money, or collect fees.
Comment & Rating (1)