Search models, users, collections, and posts

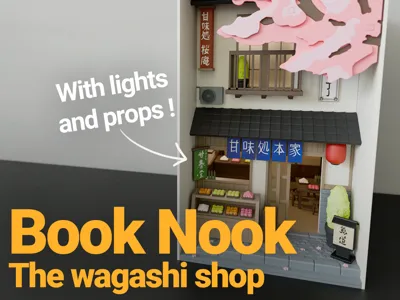
Japanese wagashi shop Book Nook

IP Report

Print Profile(1)

All
A1

0.2mm layer, 2 walls, 10% infill
Designer
22.5 h
16 plates
4.9(8)

Open in Bambu Studio
Boost
869
2374
28
48
431
66
Released 

Bill of Materials

Bambu Filaments
Select all
Matte Apple Green (11502) / Refill / 1kg
Pink (10203) / Refill / 1kg
Matte Sakura Pink (11201) / Refill / 1kg
Cocoa Brown (10802) / Refill / 1kg
Matte Latte Brown (11800) / Refill / 1kg
Matte Bone White (11103) / Refill / 1kg
Black (10101) / Refill / 1kg
Matte Mandarin Orange (11300) / Refill / 1kg
Red (10200) / Refill / 1kg
Blue Grey (10602) / Refill / 1kg
Matte Dark Green (11501) / Refill / 1kg
List other parts
  • 2mm leds x 2: I used evemodels leds
  • battery box + wire x1 x 1:
  • AA battery x 2:

Description

This project is fully handmade, no AI was used! 
(excepted for the backplate image)


You can access to commercial license via my patreon or if you want to one-time support me you can buy me a coffee or just :

Boost Me (for free)

If you like the series and want more, you can support me by boosting my work! Thanks!


Hello everyone!
 

Here is my latest project: my Wagashi Shop Book Nook!
 

Following the success of my first model, the “Japanese Alleyway Book Nook”, and in response to numerous requests, I am pleased to continue this series with this new scene.
 

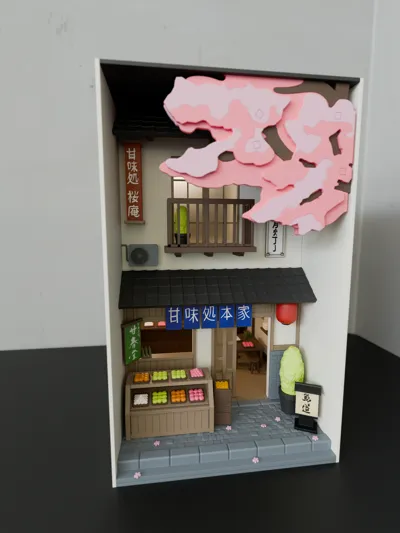
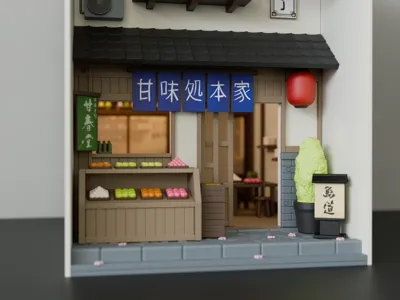
The idea this time was to recreate the cozy atmosphere of a traditional Japanese townhouse, featuring a wagashi (Japanese sweets) shop on the ground floor and the apartment above. I wanted to capture the elegance of traditional architecture while adding the softness and colors of wagashi and cherry blossoms.
 

This is a superb decorative piece that will fit perfectly on a shelf or in a bookcase.
 

For the design, I maintained the principle of my previous model: the entire structure is entirely modeled by me to be assembled using 3 mm interlocking plates.
 

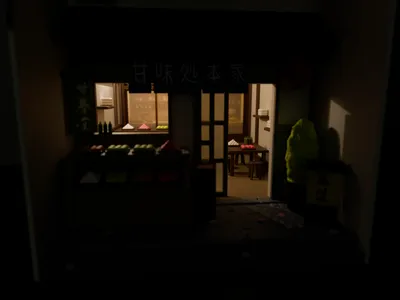
For lighting, the book nook is designed to easily integrate a 2mm LED system, powered simply by two AA batteries. To diffuse the light and achieve a soft rendering, baking paper works wonderfully in the designated slots, especially for the windows and sliding doors.

Regarding assembly, no glue is normally required thanks to the snap-fit systems, but a few dabs of glue can help secure the whole thing. The visuals for the signs, panels and the back plate visual (this is IA generated) are provided as files to print and glue directly onto the supports.


I hope you like this new addition to the series! Don't hesitate to share your creations, I can't wait to see them come to life!


PS: To make assembly easier, I have created a step-by-step manual. I would love to hear some of your feedbacks about it !
PS_2: Once again, big thank you to Ilmanu for his help with these prints!


Documentation (2)

Assembly Guide (1)
AssemblyManual.pdf
Other Files (1)
Visuals for panels.pdf

Comment & Rating (28)

(0/1000)

Boosted
I'm very happy with the result. Considering I'm not an expert model maker it was a bit challenging for me but really worth it. I just have to put some lights.
2
Reply
Boosted
I used scotch tape for the upstairs window and downstairs door. Worked well and was easy to apply.
0
Reply
here are some images of the build.
2
Reply
Boosted
Hi again, there are two pieces on plate 6 that are supposed to have holes in for pegs but don't. Can you fix this?? If not I suppose I can just use glue.
(Edited)
The designer has replied
designer
1
Reply
Thanks for the feedback, it's fixed now ! =)
1
Reply
Boosted
Hi, I'm in the process of printing and building this model. It looks great and I hope I can make it look as good as the pictures. When I finally finish it I will post a pic and review, but I just wanted to comment about something I found. On plate 6 the interior floor has some small holes that penetrate right through the model and cause the print time to be around 4 hours. I managed to remove these holes for most layers in the slicer, and the print time reduces to less than 2 hours. I'm not sure why those holes are there but if you could get rid of them in the model it would make it a bit less time consuming. I enclose screen caps so you can see what I am talking about. Thanks!
The designer has replied
designer
1
Reply
Thanks for the feedback, it's fixed now ! =)
1
Reply
Congratulations on being chosen as MakerWorld's Featured Model! As a showcase for top-tier excellence, you'll receive perks such as greater visibility, profile recognition and in the near future, higher point rewards! We believe your work will inspire fellow creators by demonstrating the high standards MakerWorld sets for its best models.
The designer has replied
designer
5
Reply
Oh wow ! Thanks a lot !!!
1
Reply
Came out really nice. Printed as a gift for a friend. I did seem to end up with an extra left piece and missing the back part of the tree. Thank you.
0
Reply
Boosted
Great project! Truly magnificent and very well designed. All that's left is to add lights 😉
Show original
0
Reply
Boosted
Print Profile
0.2mm layer, 2 walls, 10% infill
My manga bookshelves really needed some bookends or book nooks and the wagashi shop book nook fit very nicely. This is such a wonderful design. Thanks a lot for sharing this. It was the first book nook I ever built and I totally enjoyed it. Since you seid that you would love to get some feedback, here it is: The step-by-step manual was very helpful in getting everything assembled. It helped to get things going, but the "final assembly" section could have been more detailed. There were two small issues with the build plates as well. In "S-STEP 06" of the manual (Page 28) you were supposed to assemble the tree and it mentions you need "x1 Tree foliage back", but this does not exist on any of the build plates. I had to modify the front part and print that again. Also after assembling everything I realized there was a part left. The large piece on plate 8 is not used anywhere and should be removed. Now I just need to add some lighting, but I don't have the parts for that yet.
0
Reply
The branch was a bit too big for the flowers for my taste, so I modified it slightly, printed the small flowers in 2 colors, and randomly glued them to the branch
Show original
0
Reply
Print Profile
0.2mm layer, 2 walls, 10% infill
I had some issues with the interference fit of the pins. I’m not sure if it was because I was using a 0.6 nozzle, but some didn’t fit so I had to shave them down and use glue.
0
Reply

License

This user content is licensed under a Standard Digital File License.

You shall not share, sub-license, sell, rent, host, transfer, or distribute in any way the digital or 3D printed versions of this object, nor any other derivative work of this object in its digital or physical format (including - but not limited to - remixes of this object, and hosting on other digital platforms). The objects may not be used without permission in any way whatsoever in which you charge money, or collect fees.