Skull Christmas - Xmas Zkull Multipart


Print Profile(2)


Description
Boost Me (for free)
Thank you for your support, each boost encourages me a little more ! :)

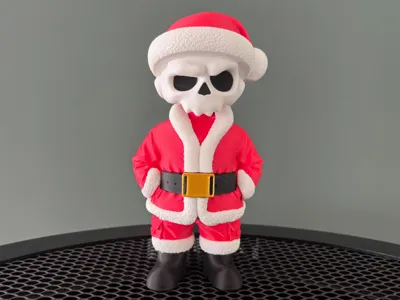
Modular multi-part skull figurine (ZKULL edition). Single-extruder compatible (no AMS), friction-fit pins, optional glue, easy color-swaps. Files include optimized print orientations and Bambu Studio profiles.
- Je vous invite à suivre la collection d'autres modèles ZKULL ici -


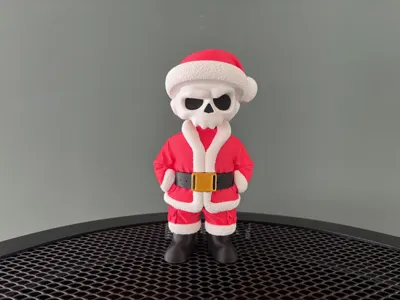
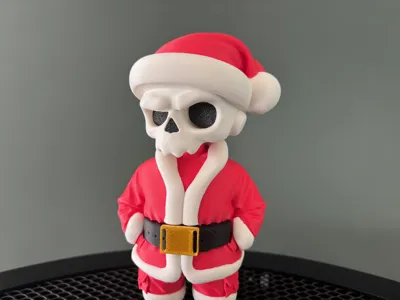
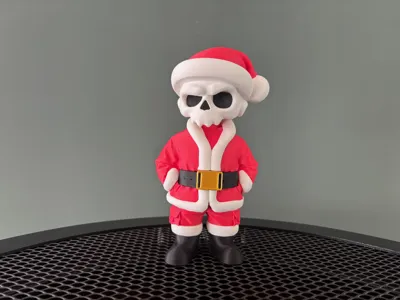
SKULL Christmas Edition
“Many ZKULL fans asked for a Christmas edition, so here it is: a new special model designed to decorate your tree with a unique little figurine.”
Discover ZKULL, a new collection of modular figurines inspired by urban culture and designer toys.
The concept is straightforward: skip the AMS and reduce filament waste by offering multi-part models that let anyone choose their own colors with a single-extruder printer, no purge tower, no forced material changes.


Each part is designed to be easy to print, assemble, and customize to match your style.
This first release, Urban Ghost (ZKULL Edition), sets the tone: street attitude, iconic silhouette, full customization.
New versions of the ZKULL edition will be released regularly, and you’re welcome to share your ideas.
Hope you enjoy the collection. I’m excited to see your prints.
_______________________________________________________________________
Summary
“Two print profiles are included: a “classic” version, and another that adds a subtle irregular surface texture to the white parts (except the skull) for a more interesting visual effect.”
For assembly, refer to the part names to match each piece correctly.
The white sleeve sections of the jacket must be clipped first, before attaching the two belt parts. Make sure to respect left and right orientation.
For the hat: the white base piece must be clipped onto the head first. Then the red part clips onto the white section and into the slot on the head. You will need to apply slight pressure; this is intentional, as the tolerance is adjusted for a secure fit. After that, position the red part of the hat correctly in relation to the pom-pom.
For the white parts of the pants and shoes: the connectors have different dimensions between the pants and the shoes to prevent any assembly mistakes.
For positioning each element, you can align the visible seams on the back of the pieces; this helps achieve precise alignment.
This model is designed in multiple parts assembled with friction-fit connectors.
All parts can be assembled without glue, provided your printer calibration and filament tolerances are accurate.
The supplied files already include optimized orientations (supports and positioning). Do not reorient parts unless you know exactly what you’re doing.
Printing Instructions
Keep the provided settings: the included Bambu Lab / Bambu Studio profiles have been tested and can be used as-is for reliable printing.
Orientation and Supports
All pieces are pre-oriented to minimize supports and simplify post-processing.
If you reorient a piece, always check how it affects support generation.
Assembly – Recommended Method
Perform a dry fit first: assemble all parts without glue to verify alignment and tolerances.
Cleanup: trim or lightly sand the pegs and edges if needed (fine file or hobby tool).
Optional glue: only for a permanent assembly.
Recommended Print Settings
Layer height: 0.12–0.20 mm (use 0.12 mm for fine details).
Perimeters (walls): 2–3.
Infill: 10–20% (increase for load-bearing parts).
Top/bottom layers: 4.
Supports: use the provided orientations; the included profiles already handle them efficiently.
Temperatures: keep profile defaults or adjust to suit your filament.
Additional Note on Gluing
Each part may be glued for extra long-term stability or left unglued if you want to swap color variations.
However, it is strongly recommended to glue the black eye inserts and the nose, as these are the only parts not designed with friction-fit tolerance.
Specific Notes and Best Practices
Tolerances vary depending on the filament, always test on your target printer.
Do not glue immediately; always prefer a dry assembly to allow color swapping and adjustments.
Labeling: keep the part names and positions as indicated in the files; this makes reassembly and troubleshooting much easier.
Membership
Are you a 3D print seller? Get a commercial license to legally use my models in your shop. Choose the option that fits your needs: Lite License: covers around ten selected models. Standard License: gives you access to all my models for commercial use. Whether you're selling online or at local markets, these licenses allow you to print and sell physical copies of my designs. Support independent creators and grow your business with original models made for makers like you.
License
You shall not share, sub-license, sell, rent, host, transfer, or distribute in any way the digital or 3D printed versions of this object, nor any other derivative work of this object in its digital or physical format (including - but not limited to - remixes of this object, and hosting on other digital platforms). The objects may not be used without permission in any way whatsoever in which you charge money, or collect fees.
Comment & Rating (97)