Search models, users, collections, and posts

Ocktron Compact 10‑inch Mini Rack 5U by 6U by 8U

Print Profile(2)

All
P1P
H2S
H2D
X1 Carbon
X1
H2C
A1
X1E
P1S
P2S
H2D Pro
X2D
A2L

0.2mm layer, 4 walls, 20% infill
Designer
69.3 h
23 plates
4.5(2)

Rack Top - 0.2mm layer, 2 walls, 15% infill
3.2 h
1 plate
5.0(1)

Open in Bambu Studio
Boost
296
957
19
10
383
66
Released 

Description

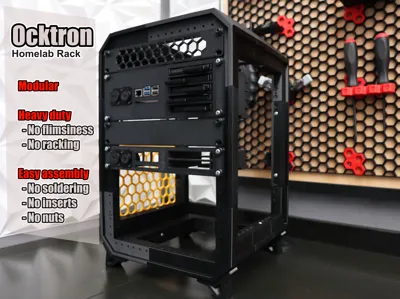
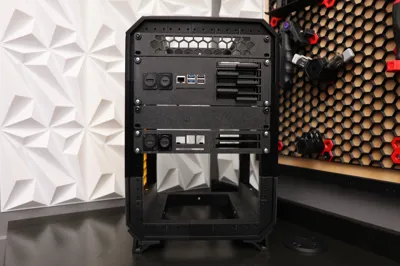
A 10 inch server rack, designed for home labs and small bench setups. The Ocktron frame balances rigidity and printability, offering modular assembly, clean cable routing, and reliable support for networking devices, small servers, and test gear. 


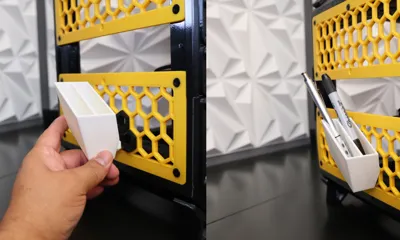
It supports mounting plates for Raspberry Pi and other microcomputers, mini‑ITX motherboards, SSDs and HDDs, SFX and Flex ATX power supplies, 7‑inch displays, and additional modules planned.


No soldering, threaded inserts, or costly rack screws required. Ocktron uses off the shelf, economical hardware and a single screw size for the assembly.


Dimensions (working area):

WidthLengthHeight
5U6U6U
8.75in10.5in10.5in
22.22cm26.67cm26.67cm


3D Print Profile:

  • PETG: for structural strength.
  • Layer height: 0.2 mm
  • Print speed: use standard for optimum results, or 40–60 mm/s (slower for fine details).
  • Wall loops: 4 layers for optimal outer strength.
  • Top layers: 5.
  • Bottom layers: 3.
  • Infill: 20% for optimal quality/strength of the pieces.
  • Material support: yes
  • Brim: not required.


BOM:

Pick one of these two screw types, you need 75 screws for full frame and panels assembly, and 25 spare screws for front plates attachment, one box of 100 screws will be enough:


QtyItem 
1 box#6 3/4 inches self tapping screws(American standard)
1 boxM4x16mm self tapping screws (Metric standard)M4x16mm self tapping screws (Metric standard)


View our video assembly in the gallery.

Comment & Rating (19)

(0/1000)

Boosted
I could not screw it in with an M4 screw. It worked with an M3 screw. However, if I use an M3 screw, I cannot attach panels and other parts. What should I do?
The designer has replied
Show original
0
Reply
Hi @yoyodayo The rack is designed to be assembled without need of nuts or threaded inserts. You must use m4 or #6 sizes and must be self tapping screws, details are in the BOM section, see the attached photos and links to the required screw: 50 x #6 3 / 4 inches self tapping screws(American standard): https://amzn.to/4aoxzqn Or 50 x M4x16mm self tapping screws (Metric standard): https://amzn.to/3MQUWyZ
0
Reply
Boosted
Replying to @carlosbyte :
im Sorry. I didn't use "self-tapping" screws. However, even though they weren't self-tapping screws, the M4 screws I used still passed right through the panel's slots and couldn't secure it. What else should I check...?
0
Reply
Replying to @yoyodayo :
The screw you used could pass through the hole, but is not going to hold or grip to the structure because is not a self tapping screw. Self tapping means it will open and pass through a hole in the size the of the screw. You just need the check you're using self tapping screws, that solve the issue.
0
Reply
Great print
The designer has replied
designer
1
Reply
Thanks @user_3833310542 .. happy printing.. 👍
0
Reply
Nice modell! What Panel did you use on the side?
The designer has replied
0
Reply
Hi @joshuamagdas thanks for the feedback. I just updated the model and .stl files, I added the Honeycomb wall panel and the required inserts for attaching objects in the panel.. is a pegboard like. Please download the latest update.
1
Reply
Replying to @carlosbyte :
thx you a lot 🙏🏻
0
Reply
wow this looks great
The designer has replied
designer
1
Reply
The top fronte plate with the the honey com pattern, and the half size side panel, that is shown on the picture. Where can i find those ? Still printing the rack it self ... cant wait for the final result
0
Reply
thank you for the project!! I don't understand which file I should print to make the 5u model and which for the 6u. can you specify it better please?
Show original
0
Reply
I do not see the assembly video :(. one suggestion would to put assembly letters on each connection. that way A to A. and B to B. great design for sure. has anyone attempted to make this with more Us?
0
Reply
can I adapt the project for the A1 mini
Show original
0
Reply
Print Profile
Rack Top - 0.2mm layer, 2 walls, 15% infill
0
Reply
Boosted
Print Profile
0.2mm layer, 4 walls, 20% infill
0
Reply

License

This user content is licensed under a Standard Digital File License.

You shall not share, sub-license, sell, rent, host, transfer, or distribute in any way the digital or 3D printed versions of this object, nor any other derivative work of this object in its digital or physical format (including - but not limited to - remixes of this object, and hosting on other digital platforms). The objects may not be used without permission in any way whatsoever in which you charge money, or collect fees.