Panasonic Microwave Door Latch Fix


Print Profile(1)

Bill of Materials


Description
If you don't have a 3D printer, I've uploaded the design to Portals for you to purchase directly: https://teleportpod.com/portal/ba4f9db7-ce47-4ecc-8102-9866d8735a18?item=3043

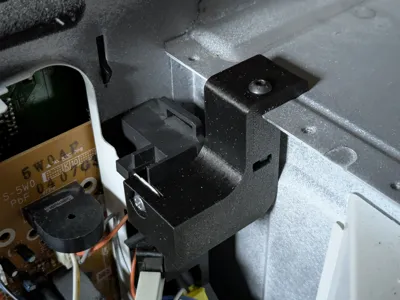
Have a Panasonic microwave oven similar to this one from the 2010s? Is it difficult to close (or open) the door? Do you have to slam the door? This is a common problem in nearly all Panasonic microwaves from this era. The root cause? The door latch assembly is mounted to two small tabs of thin, folded sheet metal. Each time you close the door, it gets pushed & bent until eventually the latch is out of alignment. You can see this movement from the inside when the door is being closed:

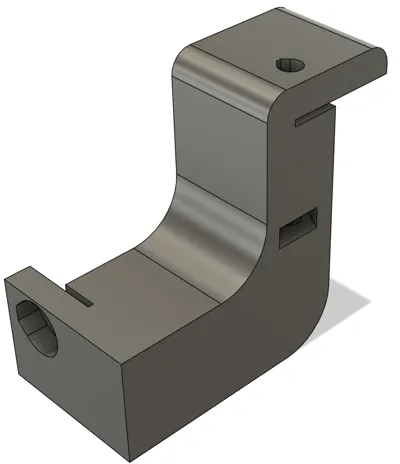
A temporary solution is to simply bend the metal tabs back into place. A permanent solution is to hold the entire latch assembly with these custom-designed braces. I designed one for the upper portion of the latch and one for the lower. You can print both braces on a modern printer with 6 walls for strength and no supports needed in about an hour. Installation re-uses the existing screws, 2× M4 nuts, and 1× M4×30mm machined screw.
Warning
Installing this requires removing the cover of the microwave oven. Attempting to repair a microwave oven can be extremely dangerous due to the risk of electric shock and potential exposure to microwave radiation. Please do not attempt this if you are not comfortable. I take no responsibility for your actions.
That said, if you use common sense, unplug the oven, are careful to not damage anything inside, do not override the built-in safety systems interlocks, and are careful with re-assembly of the cover, you should have nothing to worry about. This is simply installing mechanical braces that do not interfere with or defeat any safety systems.
Installation Instructions
Installation should be fairly obvious, but the detailed instructions below can help if needed.
Step 1: Print the upper and lower braces using the included printer profile. If you're not using my profile, make sure to use at least 6 walls for extra strength.

Step 2: Open microwave cover. Mine had 6 screws (5 of which had security torx T20 heads. Inspect the latch assembly and the sheet metal mount. If the sheet metal is severely bent (no longer perpendicular to the front of the microwave) you may need to bend it back into position before proceeding with installing the braces.


Step 3: Remove the screw securing the upper section of the latch assembly.

Step 4: Slide the upper brace over the protruding sheet metal of the main oven cavity. It's intended to be a tight fit.

Step 5: Slide the upper brace towards the front of the oven and over the upper portion of the latch mount sheet metal. It's intended to be a tight fit.

Step 6: Ensure alignment with both holes.


Step 7: Re-install the screw to secure the upper portion of the latch assembly to the bracket. Careful to not cross-thread the screw. Ensure the latch assembly is sitting flush to the front of the microwave oven.
Step 8: Insert an M4 nut in the slot of the upper brace. The slot is diagonal.


Step 9: Insert and tighten an M4×30mm machined screw into the top of the brace. It should grab the nut and tighten down nicely.

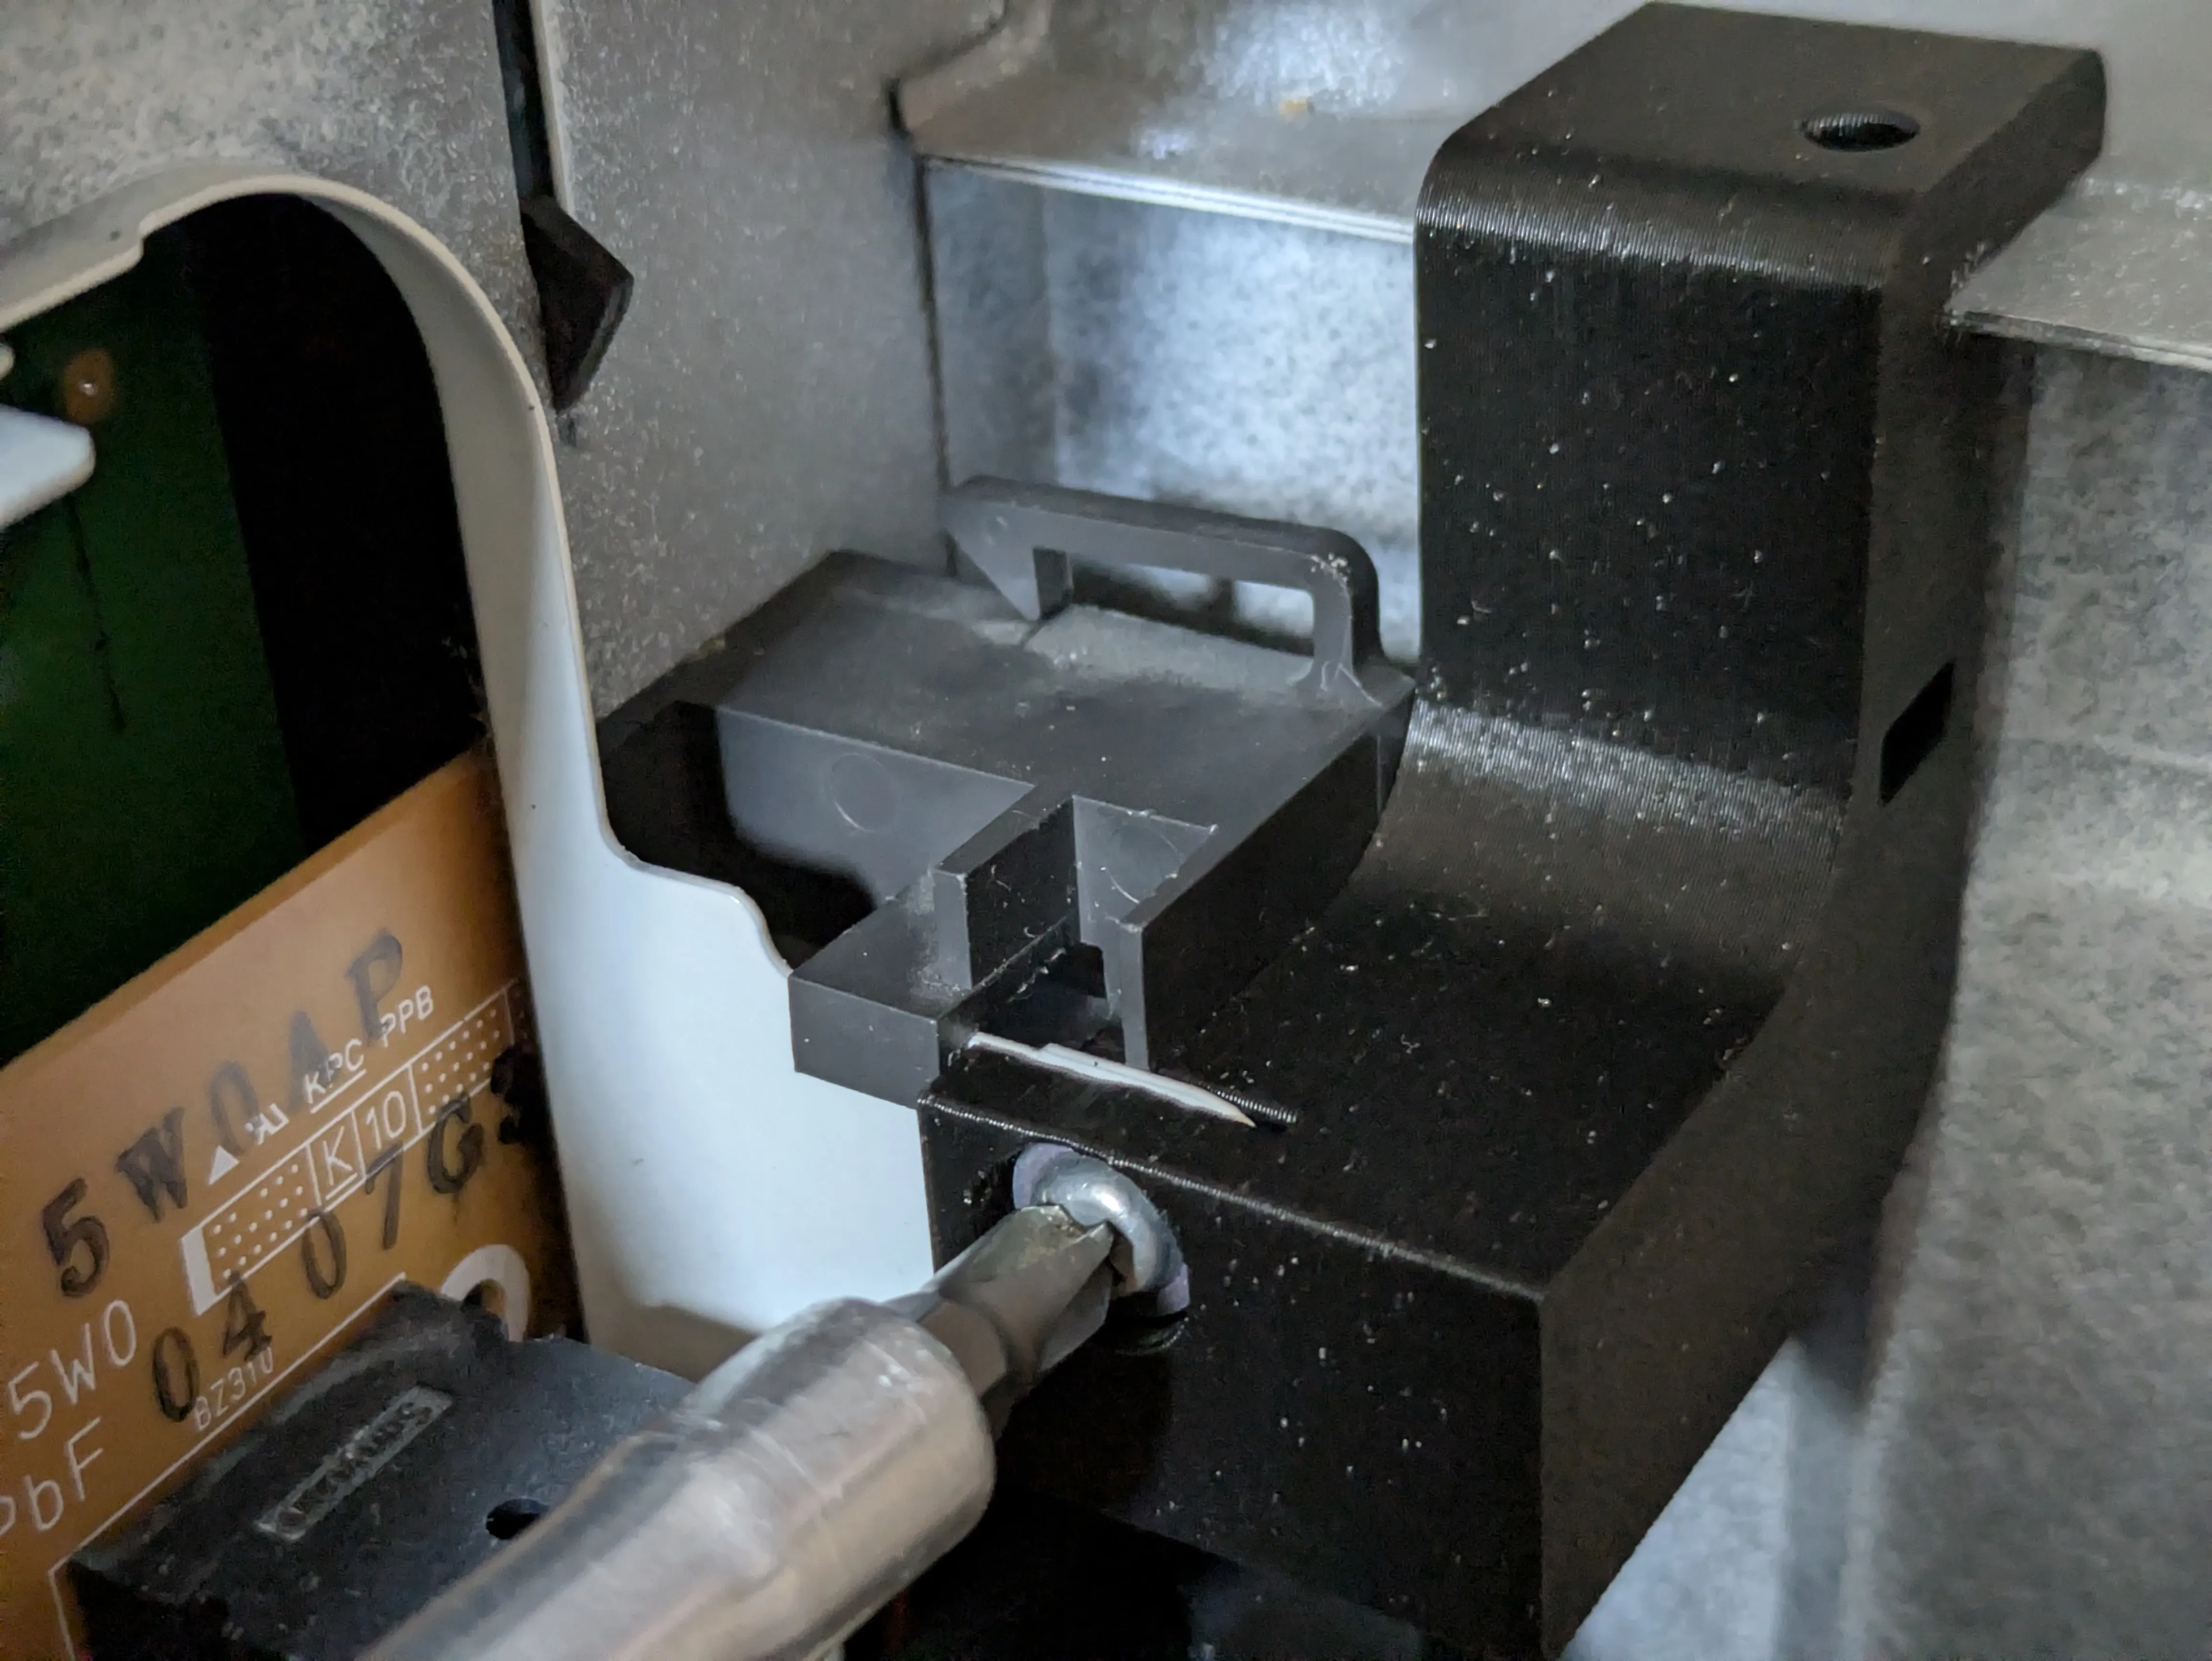
Step 10: This is the completed installation of the upper brace. Inspect and ensure it looks like this.

Step 11: Remove the screw securing the lower section of the latch assembly.

Step 12: You may need to loosen this grounding bolt and temporarily disconnect this wire assembly from the connector to make it easier to install the lower brace.

Step 13: Insert the lower brace between the latch assembly mount sheet metal and the outer casing sheet metal. It should be a tight fit. Re-install the screw to secure the lower portion of the latch assembly to the bracket. Careful to not cross-thread the screw. Ensure the latch assembly is sitting flush to the front of the microwave oven.

Step 14: If you removed the grounding screw, re-install it (and the wire) to the threaded hole. This is an M4 screw, so secure the brace to it with an M4 nut. The connector we removed earlier helps with securing the nut with a tool (socket driver or small ratchet). Be sure to re-connect the cable that you removed earlier.


Step 15: This is the completed installation of the lower brace. Inspect and ensure it looks like this.

Step 16: Test the door latch by opening and closing it a few times. You may also want to add a dab of lubricant to the door latch or hooks to ensure smooth operation.
Step 17: Re-assemble the cover/lid of the microwave oven. It can be a bit tricky, so make sure the cover is properly fitted. Repair complete!
License
You shall not share, sub-license, sell, rent, host, transfer, or distribute in any way the digital or 3D printed versions of this object, nor any other derivative work of this object in its digital or physical format (including - but not limited to - remixes of this object, and hosting on other digital platforms). The objects may not be used without permission in any way whatsoever in which you charge money, or collect fees.
Comment & Rating (7)