Car Tire Valve Replacement Tool


Print Profile(1)

Description
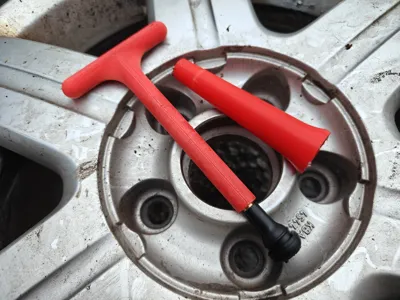
This is a 3D-printable tool set designed for installing full Schrader-type tire valves without removing the tire. It serves as a quick, easy-to-print alternative to commercial tools. The tool has been tested by installing 4 valves, and it performed super well during installation. Check instructional images below or this quick video!
Disclaimer
This design is meant as a quick, one-time solution for installing valves. It is not intended for long-term or repeated use. Use it at your own responsibility.
Installing Schrader valves requires significant force, and the tool may snap or fail unexpectedly. Improper use can damage your valve, rim, tire, or cause injury.
Change Schrader Valve Without Tire Removal
Check for leaks around the existing valve hole using soapy water.

Empty the tire using a screwdriver or any deflation tool (printable versions exist on MakerWorld).

Remove the old valve. I used pliers, but a proper valve-removal hook tool is recommended.

Clean the hole with a small wire brush and brake cleaner to remove dirt, rust, and rubber residue.

Prepare the new valve by threading it onto the printed installation tool. Make sure it goes on straight to properly clean the threads.

Lubricate the valve tip with a rubber-safe lubricant such as basic petroleum jelly (Vaseline).

Align the guide tube over the valve hole.

Push the valve into place. Apply steady force until it “snaps” into position then pull the tool back slightly until it “snaps” again, confirming the valve is fully seated. Unscrew the tool from the installed valve.

Check that the valve is seated properly. Inflate the tire and test with soapy water for leaks. Install the cap.

November 18, 2025
- First release
Check my other household items here!
Your feedback and ratings are incredibly valuable and help refine future designs. Thank you! 🚗🛞
License
You shall not share, sub-license, sell, rent, host, transfer, or distribute in any way the digital or 3D printed versions of this object, nor any other derivative work of this object in its digital or physical format (including - but not limited to - remixes of this object, and hosting on other digital platforms). The objects may not be used without permission in any way whatsoever in which you charge money, or collect fees.
Comment & Rating (7)