Fox/Predator call, wailing rabbit


Print Profile(2)


Description
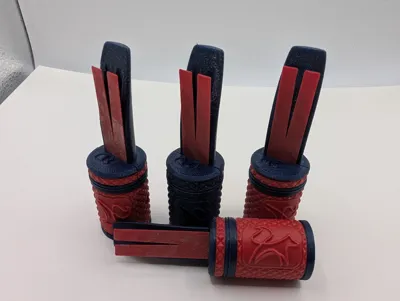
Fox/Predator call, wailing rabbit
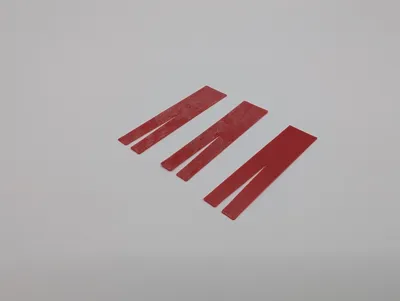
Why not continue the predator call collection with an open reed call. This is using my unique screw wedge solution which should make it less dependent on exact print settings. As with all reed calls, I do recommend cutting a reed from another plastic like mylar-A or any other thin plastic you can find (thin food/vegetables container in a super market is a tip), you should aim for something like 0.2mm thick. But in this case, I also know that printed ones in at least PLA can actually work ok (at least use a smooth print surface).
My other predator calls:
https://makerworld.com/en/collections/15321382-fox-predator-calls
All my game calls:
https://makerworld.com/en/collections/3444293
Printing
I normally suggest PLA or another stiff material for my calls but in this case I actually think most materials will be ok. Although softer materials might damping the sound a little bit. If you are going to use the printed reed I suggest PLA. (avoid CF/GF materials since you are going to breath in around it, you do not want small CF particles in your lungs).
All parts are designed for 3d-printing and no supports needed.
I suggest using 0.4 mm or finer nozzle.
The default print profile includes a brim on one part but it quite easy to print without it if you have a good bed adhesive. I include it because otherwise you always get complains…
First print profile includes everything except reeds that should be printed in 0.08 mm layer height. Therefore its in its own profile (with multiple since their might need some testing).
Assembling
Place the reed on the tone board and place the wedge above. Then screw the whole package into the exhaust to lock it all. Some might find it easier to wait with the reed and just screw the wedge and tone board into the exhaust but not the whole way. Then push the reed between them and screw the last turn to lock it all. That is also the easiest way to adjust the reed: Unscrew it just a little bit, maybe half to one turn, adjust the reed, then screw it in to lock it again. A tip is to use a marker pen on the reed (draw a line against the wedge) when you are satisfied with the tuning and it will be easy to find the same place again if you need to disassembly the call for some reason.
You can try leaving different length of the reed outside for different result but a good start is to have it end at the same place as the groves in the tone board. This call is very dependent on the reed and you will get everything from totally silent (when its not a good reed/placement of it) to something that will upset the whole neighborhood… Continue to adjust will bring great results.

Usage
Try biting down on different parts of the soundboard and blow away. You can adjust a lot on how you use it and really try to sound like a rabbit in a fair bit of distress.
A video with better instructions on similar calls:
License
You shall not share, sub-license, sell, rent, host, transfer, or distribute in any way the digital or 3D printed versions of this object, nor any other derivative work of this object in its digital or physical format (including - but not limited to - remixes of this object, and hosting on other digital platforms). The objects may not be used without permission in any way whatsoever in which you charge money, or collect fees.
Comment & Rating (125)