


Print Profile(1)


Description
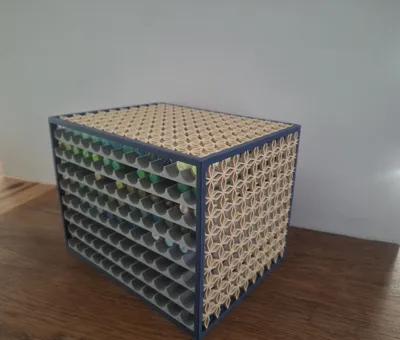
ACRYLIC PENCIL BOX
Faced with a problem of clutter in the original box with each use, I developed a solution to obtain a container that is both functional and aesthetic for their storage. That's why I offer you a model of a box to store acrylic pencils.
Assembly
Step 1:
Start by checking that the dowels fit correctly into the designated holes. It may be necessary to use a drill bit to slightly widen some holes. In the absence of a drill bit, use 120 or 240 grit sandpaper to lightly sand the dowels so they can be inserted.
Next, proceed with gluing using super glue, starting by fixing the dowels into the uprights, then assemble the entire structure onto the base before finishing with the lid.
Pay close attention to the position of the uprights between the front and the back.
Exploded view of the structure assembly:

Adhesive used:

Step 2:
We move on to assembling the walls. Before gluing, check their fit in their respective slots. If necessary, sand one side evenly on a flat surface using sandpaper. Then apply glue to all edges of each plate to ensure uniform adhesion.
Once again, pay close attention to the pattern orientation on each side to ensure uniformity. (An orientation error will not affect the alignment of the drawer runners)


All that's left is to put the drawers into their slots and fill them with your pencils. Each box offers a capacity of 96 slots.
I hope you like the design! Please leave a comment or rating if you like it and share your feedback!
License
You shall not share, sub-license, sell, rent, host, transfer, or distribute in any way the digital or 3D printed versions of this object, nor any other derivative work of this object in its digital or physical format (including - but not limited to - remixes of this object, and hosting on other digital platforms). The objects may not be used without permission in any way whatsoever in which you charge money, or collect fees.
Comment & Rating (12)