Search models, users, collections, and posts
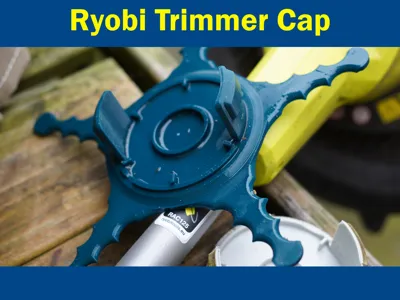
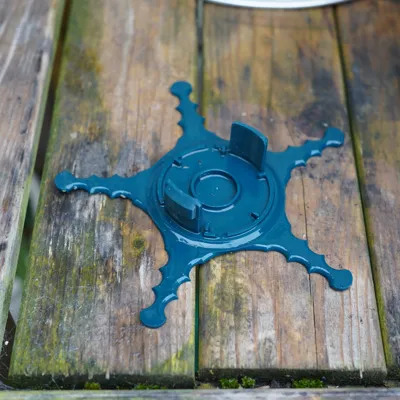
Ryobi Strimmer/Trimmer Star Weed Eater Cap
IP Report


Print Profile(1)

0.2mm layer, 2 walls, 15% infill
Designer
1.2 h
1 plate
Open in Bambu Studio
Boost
79
330
13
1
202
163
Released
Description
🌿 Ryobi Star Strimmer / Weed Eater Cap Replacement 🌿
No supports needed!
🧩 Custom-fit | 🛠️ Easy Install | ♻️ Durable Design
This cap replaces the standard cap and when you need a little extra cutting, push the trimmer closer to the brush. 💪.
Boost Me (for free)
Boost me for free!
Features:
- ✅ Precision fit for Ryobi models
- 🧵 Designed to hold trimmer line securely
- 🔄 Replaces broken or lost bump caps
- 🌍 Eco-friendly alternative to buying new parts
🛠️ Installation Instructions (Step-by-Step) 🛠️
Before You Start:
- 🔌 Disconnect power (remove battery)
- 🧤 Wear gloves and safety glasses
- 🔧 Have a screwdriver or wrench ready
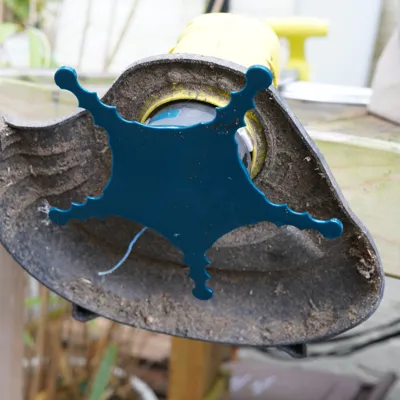
Step 1: Remove the Old Cap
- Press the two sides in.
- Slide off the old cap carefully.
Step 2: Clean the Area
- 🧽 Wipe down the shaft and head area to remove debris.
- 🧼 Ensure the surface is clean for a snug fit.
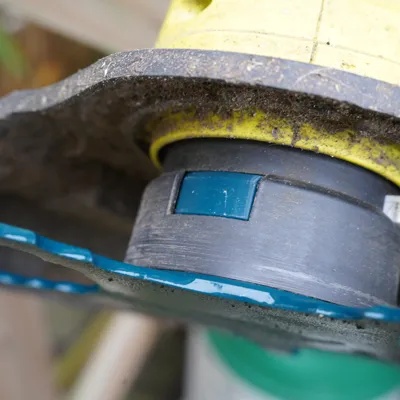
Step 3: Install the New Cap
- Align the new cap with the trimmer head.
- Press it into place firmly.
- Make sure the ‘wings’ click into place.
Step 4: Test It Out
- 🔋 Put the battery back in.
- ▶️ Start the trimmer and check for smooth operation.
License
This user content is licensed under a Standard Digital File License.
You shall not share, sub-license, sell, rent, host, transfer, or distribute in any way the digital or 3D printed versions of this object, nor any other derivative work of this object in its digital or physical format (including - but not limited to - remixes of this object, and hosting on other digital platforms). The objects may not be used without permission in any way whatsoever in which you charge money, or collect fees.
Comment & Rating (13)