Search models, users, collections, and posts

Invader Zim: Minimoose!!! for HuuuMans

Print Profile(1)

All
A1
P1P
P1S
H2D
X1 Carbon
X1
P2S
A1 mini
X1E
H2D Pro
H2S
H2C
X2D
A2L

0.2mm layer, 2 walls, 15% infill
Designer
5.1 h
7 plates

Open in Bambu Studio
Boost
37
87
5
1
30
14
Released 

Description

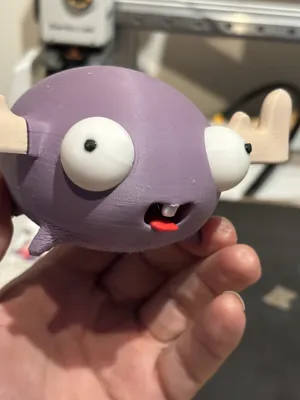
Been on a bit of a Invader Zim modelling tear, of late. This is the great Minimoose, from Invader Zim. I broke it into parts so that it can be printed in color without the AMS. Pieces fit together pretty well but you'll likely want to glue them for the long run. The tooth takes some effort to get in because it's small and an awkward angle. But once it's all together it looks pretty sweet. 

Filiments used for the photos: Bambu Basic White PLA, Eryone Matte Forest Green, Bambue Basic Red PLA, Bambu Gray PETG HF

Comment & Rating (5)

(0/1000)

Finally got it put together! I had to reprint the antlers because they split when I tried to snip them. The tooth I ended up using an iron to carve out hole.
0
Reply
The antlers don't have a place to insert in the body. Everything printed well but I'm going to snip off the nub on the antler and glue it.
The designer has replied
designer
1
Reply
Ohh, you know what? I just learned something. I went back to the file and the holes for the antlers were there in my Bambu Slicer, but when I downloaded the STL files and imported the file instead, the holes were gone. Weird right? I originally cut the holes in Bambu before uploaded the file, so it kind of makes sense that there'd be that data in the .3MF file, but I guess it strips out that information if it's exported before importing. That's lame. Sorry about that! I may have to go back into blender and add the cuts and holes natively; Just to make sure it doesn't catch anyone else off guard. I hope it turned out alright otherwise. Thanks!
(Edited)
0
Reply
Replying to @eric_fenton :
I had an issue with some inserts I intended for magnets. I thought they would translate from one object to another to the next but they did not! Everything else went well though. I’m going to use a soldering iron to get the tooth in by clearing a little more room. I think it would go but I’ve got big fingers.
0
Reply
Replying to @Inky.Campbell :
I hear ya 👐🏼me too! it took some working getting that because of the angle. I think I lined it up with my pliers and then used my finger nail 💅 ha! I’m the creator. you’d think I’d make it easier for people. You’ll have to post a photo when you get it done. sounds rad
0
Reply
No more

License

This user content is licensed under a Standard Digital File License.

You shall not share, sub-license, sell, rent, host, transfer, or distribute in any way the digital or 3D printed versions of this object, nor any other derivative work of this object in its digital or physical format (including - but not limited to - remixes of this object, and hosting on other digital platforms). The objects may not be used without permission in any way whatsoever in which you charge money, or collect fees.