Automatic Baby Stroller Rocker


Print Profile(1)

Description
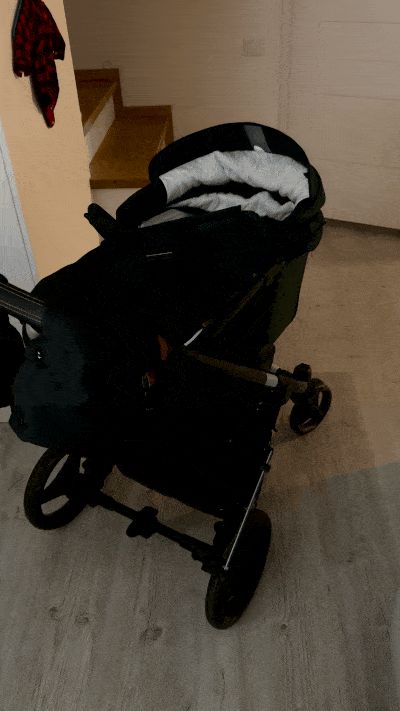
This is my first proper 3D printed project, an automatic baby stroller rocker designed to gently move the stroller back and forth so parents can take a short break.
It might not look perfect, but it works beautifully — and that’s what really matters!
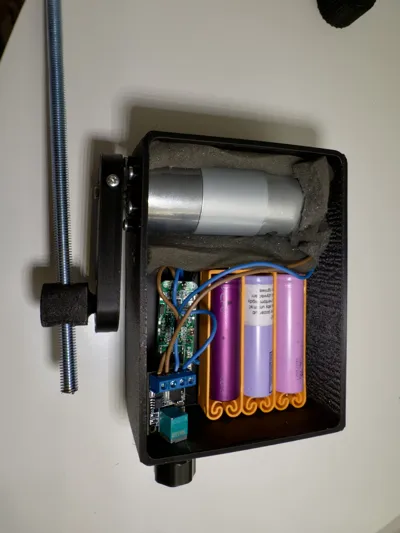
The system is powered by a JGB37-550 DC motor (168:1), controlled through a HW-070 PWM module and a 3-cell 18650 battery pack with BMS (for the battery I've used this project).
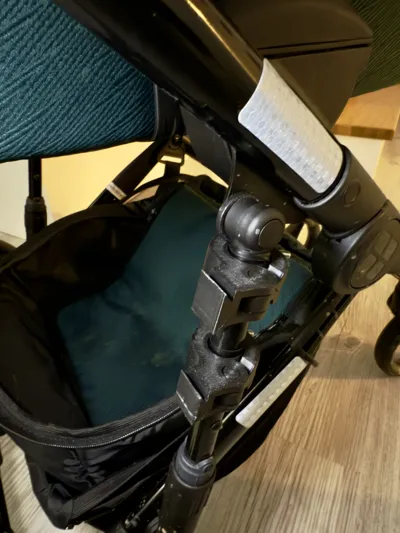
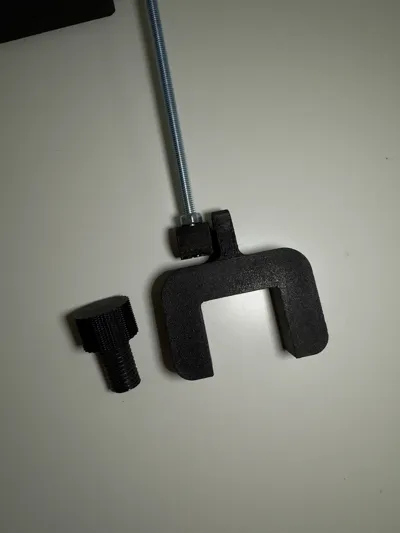
Mechanically, it uses two 608ZZ bearings, a threaded M8 rod with two M8 nuts, one square M3 nut (5.5 mm), M5x30 with nut, and a M3x20 screw.
The design includes:
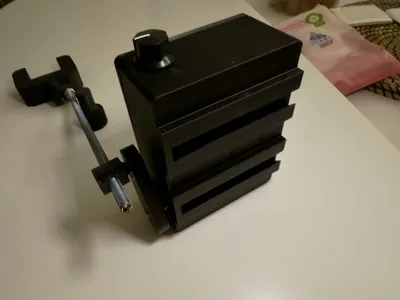
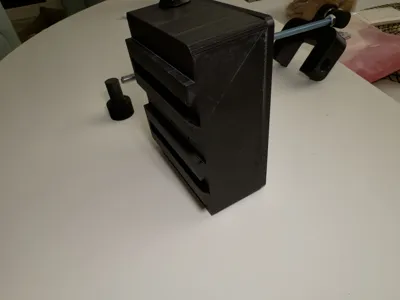
- a main housing (connected with a dovetail joint),
- a motor arm with a bearing and square nut (to tighten to the motor shaft),
- two adapters for the M8 threaded rod (each fits into a bearing and have inserted nut),
- mounts with integrated bearings and knobs for attaching to the wheel,
- and two clips with dovetail for securing the system to the stroller frame also with screw and nut.
The PWM control makes the motor a bit noisy, but my son actually seems to enjoy the gentle humming sound — so I’ll count that as a feature 😄
Currently, the motor speed is used in the lower range of the PWM adjustment, so the 168:1 gearbox (≈86 RPM) is actually too fast for ideal motion.
A smaller gear ratio (around 30–40 RPM) would provide a smoother and more natural rocking movement.
🧩 Parts List — Automatic Baby Stroller Rocker
🧠 Electronics
- JGB37-550 DC motor, I've used 168:1 gearbox (≈86 RPM) but i suggest 30-40RPM
- HW-070 PWM speed controller
- 3 × 18650 Li-ion cells
- 3S BMS (Battery Management System) for the 18650 pack
- Wires
⚙️ Mechanical Components
- 2 × 608ZZ bearings (8 mm inner diameter, 22 mm outer diameter, 7 mm thick)
- 1 × Threaded rod M8 (length depends on your stroller setup, e.g. ~150–200 mm)
- 2 × M8 nuts (for securing the rod)
- 1 × Square M3 nut (5.5 mm width) — fits in the motor arm
- 1 × M3×20 mm screw (for fastening the motor arm)
- 2 × M5×30 mm screw + nut (for the stroller frame clamps)
- 6 x M3x12 mm screw to secure motor in the box
- 4 x M3x6 countersunk self tapping screw to secure 18650 holder to the box
- Some wires
NOTE:
- bearing adapter plate - pause on 70 layer to insert nut
- motor arm plate - pause on 40 layer to insert square nut
Boost Me (for free)
If you like this project, feel free to boost it — it would really motivate me to keep creating and sharing more ideas!.
Comment & Rating (8)