Prototype Magnetic Motor


Print Profile(0)
Description
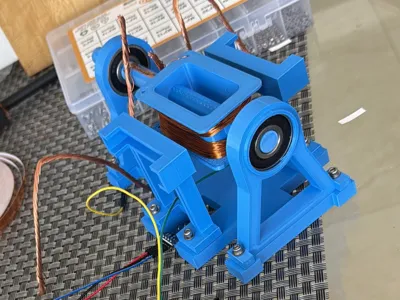
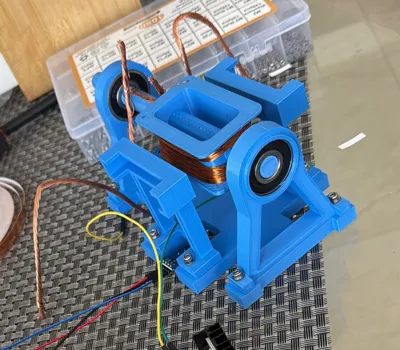
Magnetic Motor - 3D Printed (DIY Educational Model)
A printable magnetic-motor model designed for classroom demos, makers, and hobby experiments. The frame is fully 3D printed; hardware is standard and easy to source. The coil is hand-wound, and the rotor uses common 6201 bearings for smooth, low-friction motion.
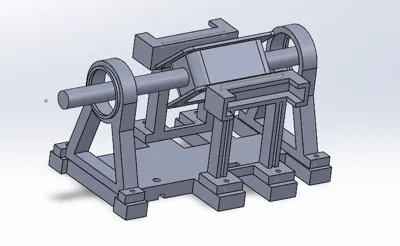
What’s included (STLs)
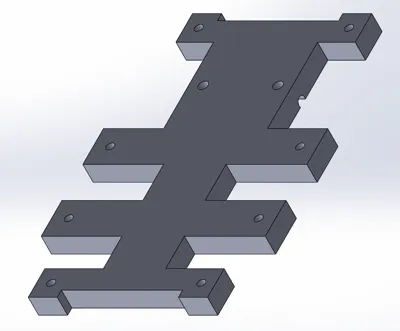
Motor Base
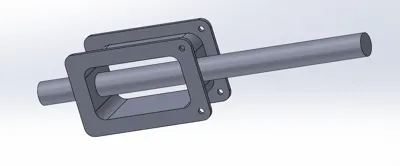
Magnet Base
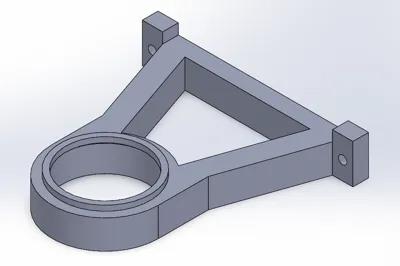
Bearing Support
Motor post
You will need (hardware & consumables)
Bearings
2× 6201 bearings
Magnets
6× Neodymium magnets, 60×10×5 mm
(“3 magnets per side,” total 6)
Threaded inserts & screws
Heat-set brass inserts, M3
M3 screws and a few M3 washers as needed
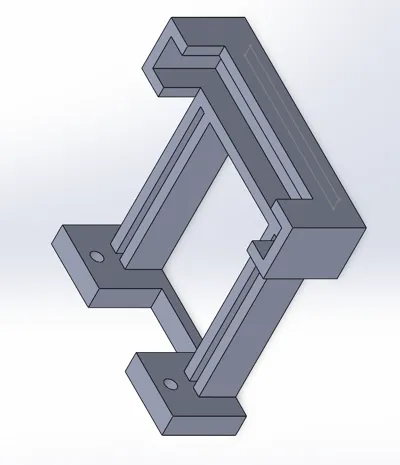
Coil & conductor
Enameled copper magnet wire, 27 AWG
– 100 turns per side of the coil former (i.e., wind 100 turns on each of the two long faces)
5 mm conductive copper adhesive tape (for terminals/contacts and neat wiring)
Recommended print settings (guide)
Material: PLA or PETG
Layer height: 0.20–0.28 mm
Infill: 25–35% (gyroid or grid)
Walls: 3–4 perimeters
Supports: Off for most parts; enable only where your slicer indicates bridging risk on the coil former
Assembly overview
Print all parts and clean up holes. Heat-set the M3 inserts in the Base, Bearing Support, and Posts.
Press-fit bearings (2× 6201) into the circular housings. Ensure they seat squarely.
Install magnets: place 3 magnets per side in the Magnet Base pockets with matching polarity across the gap. Secure mechanically—do not rely on tape alone.
Wind the coil: on the printed former, make 100 turns per side with 27 AWG wire. Leave enough lead length for connections.
Route & terminate leads. Use the 5 mm copper adhesive tape to create neat pads/terminals if desired.
Bolt the frame together with M3 screws. Verify the rotor spins freely in both bearings and that the magnet gap is uniform.
Test & tune: small changes in magnet spacing, coil alignment, and bearing preload noticeably affect performance.
Tips
Mark magnet polarities before installation to keep pairs symmetric.
If a fit is tight, lightly ream printed bores rather than forcing bearings or magnets.
Keep the windings compact and even; neat coils reduce resistance and friction at the edges.
Safety & use notes
Strong neodymium magnets can pinch and may affect electronics, bank cards, and medical implants—handle with care. This is an educational/experimental model; it is not a certified motor or a toy for unsupervised children.
Comment & Rating (4)