Kill-Switch Internal & Button — Fits Ski-Doo+


Print Profile(1)

Description
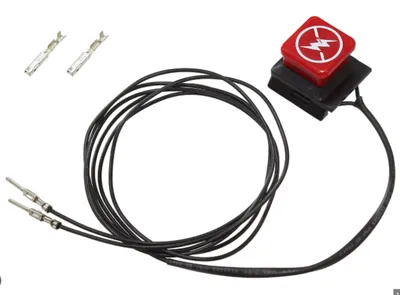
This This download contains a 3D-printable internal replacement for a snowmobile kill switch — designed around Ski-Doo geometry but sized to fit most common snowmobile brands. The package includes the internal housing STL and a separate STL for the push button. It was created because the correct replacement part was hard to find online — this may be the only downloadable file that restores the internal mechanism.
The internal housing accepts the original hardware from a broken switch: two springs and a ball bearing (salvaged from the damaged switch). The design captures the original functional features so the button actuates reliably and returns correctly under spring tension. Intended for repair-minded riders, modelers, and fabricators who want to restore a working kill switch without sourcing an expensive OEM assembly.
What’s included
- Internal housing piece (holds springs & ball bearing)
- External push button cap (prints separately)
Key features
- Designed for Ski-Doo fitment; commonly compatible with other brands when OEM outer shell dimensions are similar.
- Accommodates two small compression springs and one standard ball bearing from the original switch.
- Compact, robust geometry for reliable actuation and long print life.
- Prints as two pieces for easy assembly and maintenance.
Recommended print settings & materials
- Material: PETG or ABS recommended for better toughness and heat resistance; PLA ok for prototyping but not ideal for long-term outdoor use.
- Layer height: 0.12–0.2 mm for a good balance of detail and strength.
- Infill: 30–50% (use higher for added durability).
- Wall/Perimeter: 3–4 perimeters.
- Supports: Minimal — orient so features that need support are printed with support under them, or print button upright.
- Tolerances: If you plan press-fit parts, allow ~0.15–0.25 mm clearance depending on your printer calibration. Consider a test-fit print for critical mating dimensions.
- Optional: use small metal inserts or epoxy for threaded mounting points if exposed to repeated torque.
Assembly notes
- Reuse the two springs and ball bearing from the broken switch when possible; confirm their condition before reuse.
- Insert the ball bearing into the pocket, position springs in their cavities, then seat the button and test free play before final installation.
- Light post-print sanding or chamfering of mating surfaces may improve smooth operation.
Safety & legal disclaimer (please include)
This is a repair part for a safety-critical control. Use at your own risk. Always test the switch thoroughly on the stand before trusting it in the field. If you’re not confident in the repair or the part’s fit/function, seek a certified mechanic or use an OEM replacement. The creator and uploader are not liable for damage, injury, or loss resulting from the use of this file.
License
You shall not share, sub-license, sell, rent, host, transfer, or distribute in any way the digital or 3D printed versions of this object, nor any other derivative work of this object in its digital or physical format (including - but not limited to - remixes of this object, and hosting on other digital platforms). The objects may not be used without permission in any way whatsoever in which you charge money, or collect fees.
Comment & Rating (5)