Search models, users, collections, and posts
Designer Mood Lamp, WS2812b + ESP32 + MIC
Remixed by


Print Profile(1)

0.2mm layer, 1 walls, 0% infill
Designer
7.9 h
3 plates
Open in Bambu Studio
Boost
11
41
1
0
14
6
Released
Bill of Materials
List other parts
- WS2812B Module Strip 24 Bits 24 X WS2812 x 1: https://a.aliexpress.com/_mtu42lX
- Wemos S2 mini x 1: https://a.aliexpress.com/_mKOA0Wh
- I2S INMP441 MEMS x 1: https://a.aliexpress.com/_m0A0Vq9
Description
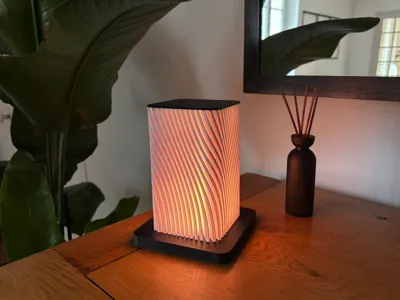
💡 Audio-Reactive WLED Mesh Lamp (WS2812B & ESP32-S2 Mini)
This model is a rework of the stunning Designer Mood Lamp (LED 001) by Printek 3D, adapted to use a more versatile and feature-rich setup for vibrant lighting effects.
Key Features and Upgrades 🚀
- WLED Integration: This version is designed specifically for WLED firmware, allowing for powerful customization, network control, and a vast library of lighting effects.
- WS2812B Addressable LEDs: It utilizes an easily sourced WS2812B LED ring (or similar compatible strip/matrix) instead of the original LED 001 module.
- Audio Reactive Capability: When paired with a compatible microphone and the WLED firmware, this lamp supports stunning audio-reactive effects, making the light dance to your music!
- Dedicated Slot: The design includes a perfectly sized slot for an ESP32-S2 Mini (or Wemos S2 Mini), simplifying the electronics integration and wiring.
What You'll Need (Bill of Materials) 🛠️
This is a simple, beginner-friendly project that produces fantastic results.
- Controller: ESP32-S2 Mini (or Wemos S2 Mini)
- LEDs: WS2812B LED Ring (e.g.,24LEDs, depending on the desired brightness/density)
- Optional (for Audio): A compatible digital or analog microphone (e.g., INMP441)
- Power: 5V Power Supply
- Wiring: Thin gauge wire
Note: All necessary electronic components, including links to AliExpress listings, are provided in the comprehensive list of parts!
Build and Setup 🔧
- Print the mesh body and base components.
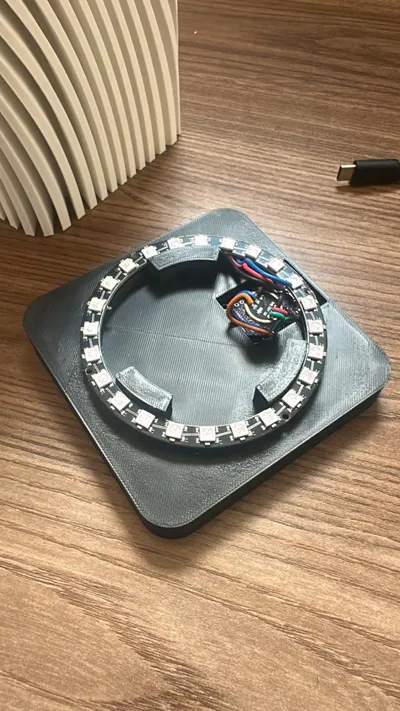
- Mount the WS2812B ring inside the lamp body.
- Solder the LEDs and the optional microphone to the ESP32-S2 Mini.
- Flash the ESP32-S2 Mini with the latest WLED firmware.
- Assemble the electronics into the designated slots in the base.
- Plug it in and enjoy a fully customizable, mesmerizing LED experience!
This remix is based on
License
This user content is licensed under a
Creative Commons Attribution-Noncommercial-Share Alike
Comment & Rating (1)