
Sliding Window Exhaust Pipe Adapter (with Wind Block, Insect Net, Rain Strip)
Print Profile(3)


Description
【1. Features】、【2. Part and Dimension Description】、【3. Printing and Installation Guide】、【4. Exhaust Pipe Specifications】Please read to the end before printing!
2026.5.4 UpdateV3.1 Version:
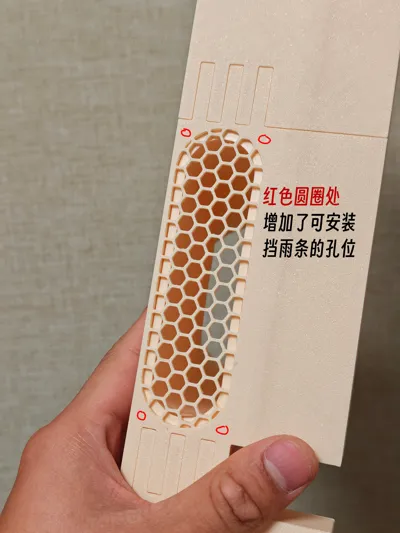
1. Added 2L block, with a 70% larger cross-section compared to block 2! 8cm exhaust pipes can achieve full exhaust effect! 10cm exhaust pipes can also have enhanced exhaust effect! (2L block is still compatible with older versions of wind baffles)
2. Optimized the diameter of the connection between the exhaust pipe and the 3D printed part to accommodate the tolerances of mainstream aluminum foil exhaust pipes on the market.
3. Optimized pre-plated, making it more convenient for A1 mini users and users initiating prints from their phones!
【1. Features】
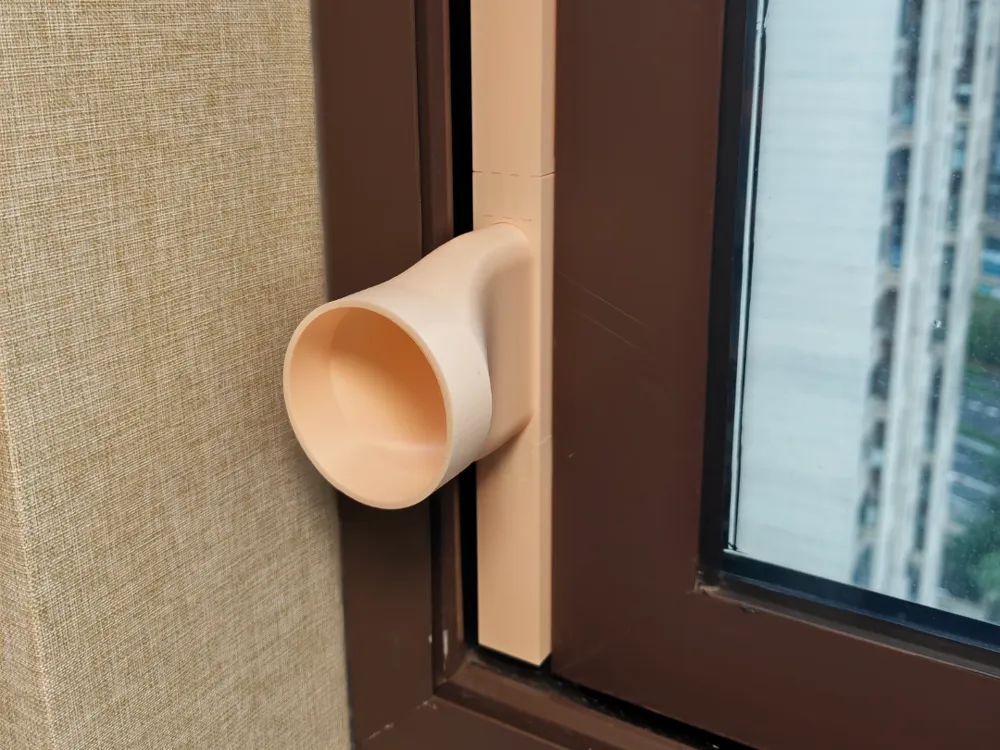
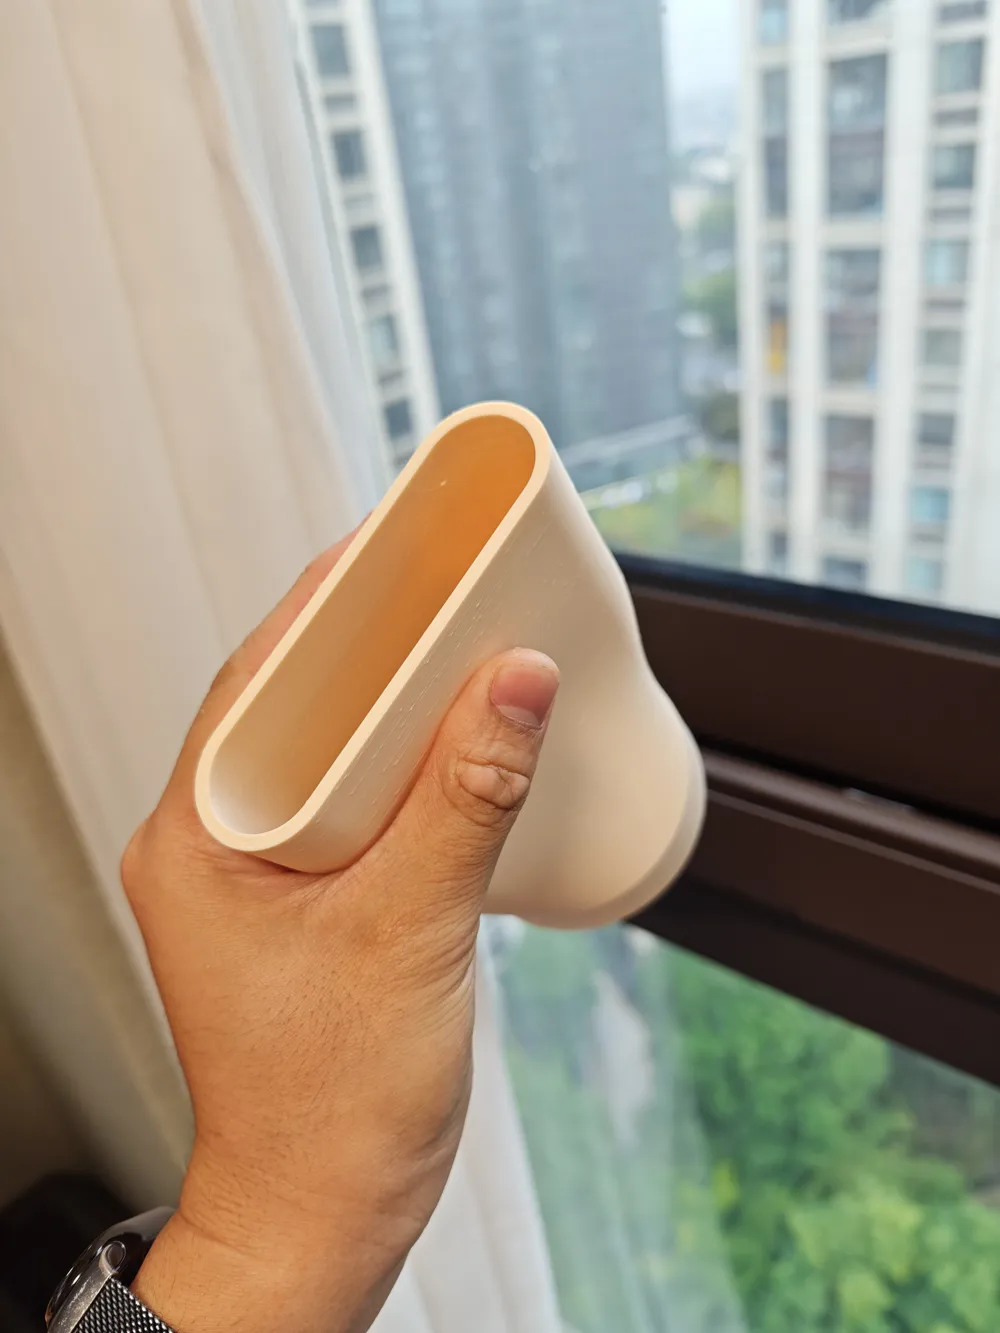
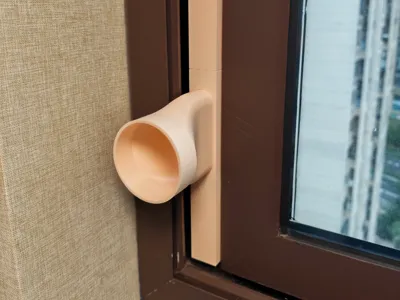
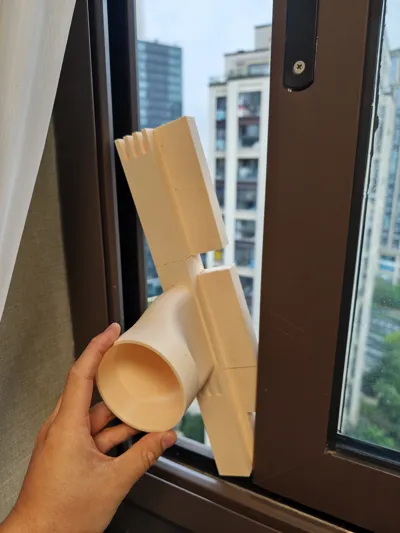
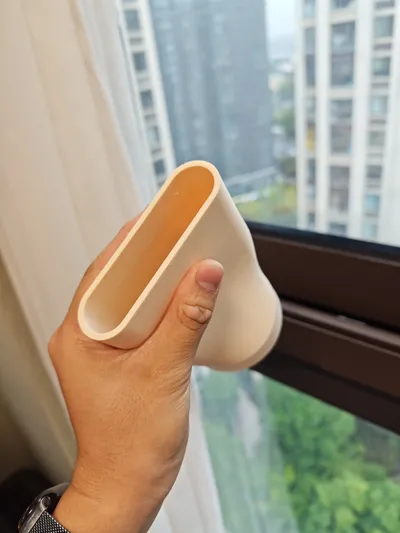
It adapts 5cm, 8cm, and 10cm exhaust pipes to a flat opening and secures them to sliding windows.
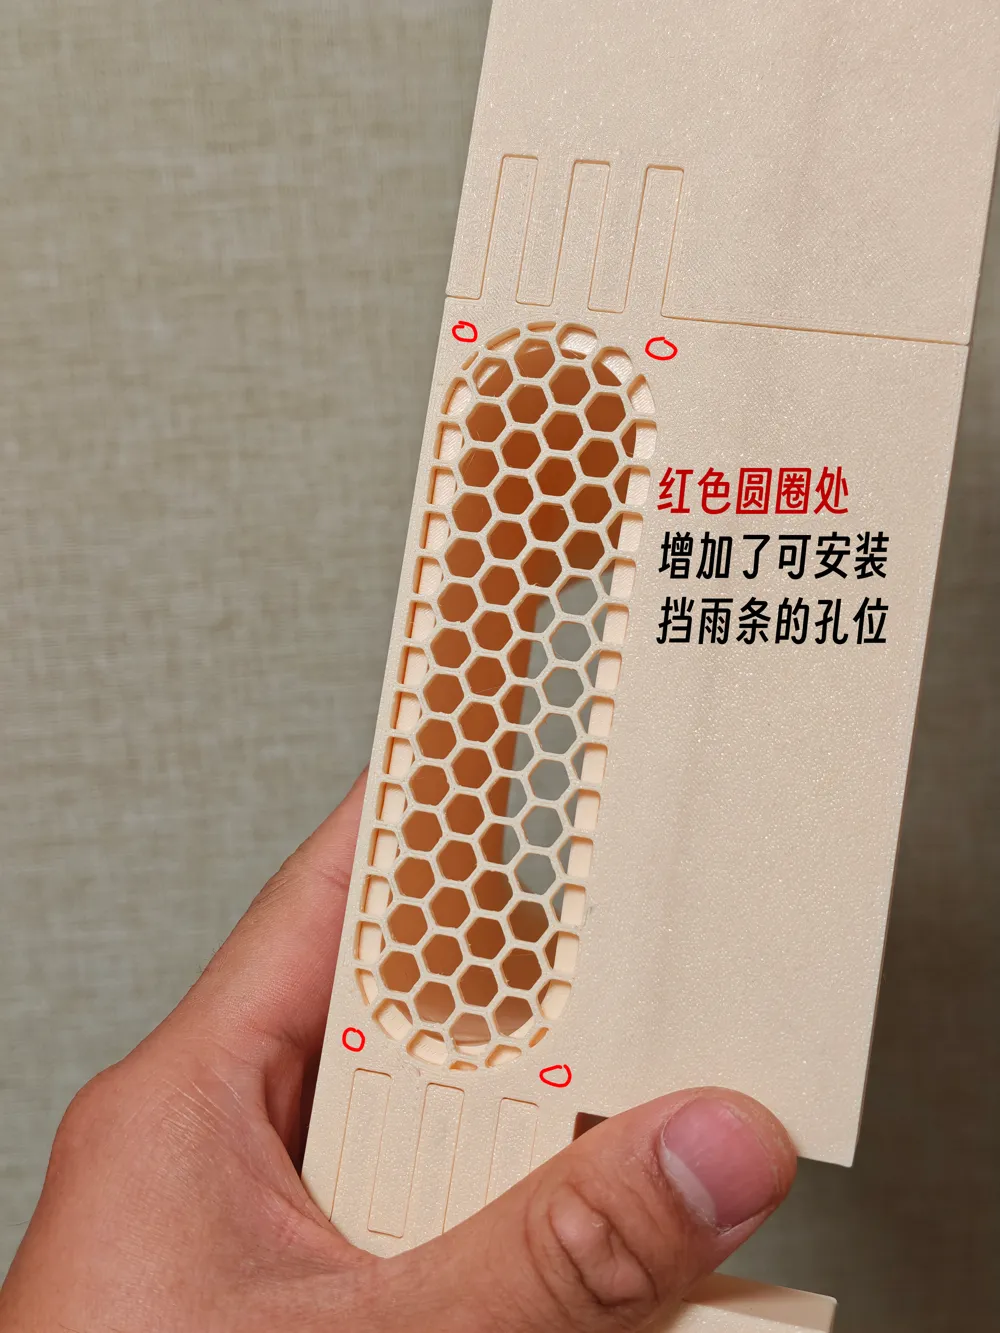
This design minimizes the window opening area as much as possible. The insect screen prevents small insects larger than 5mm from entering, and the optional rain cover extends outwards by 40mm.
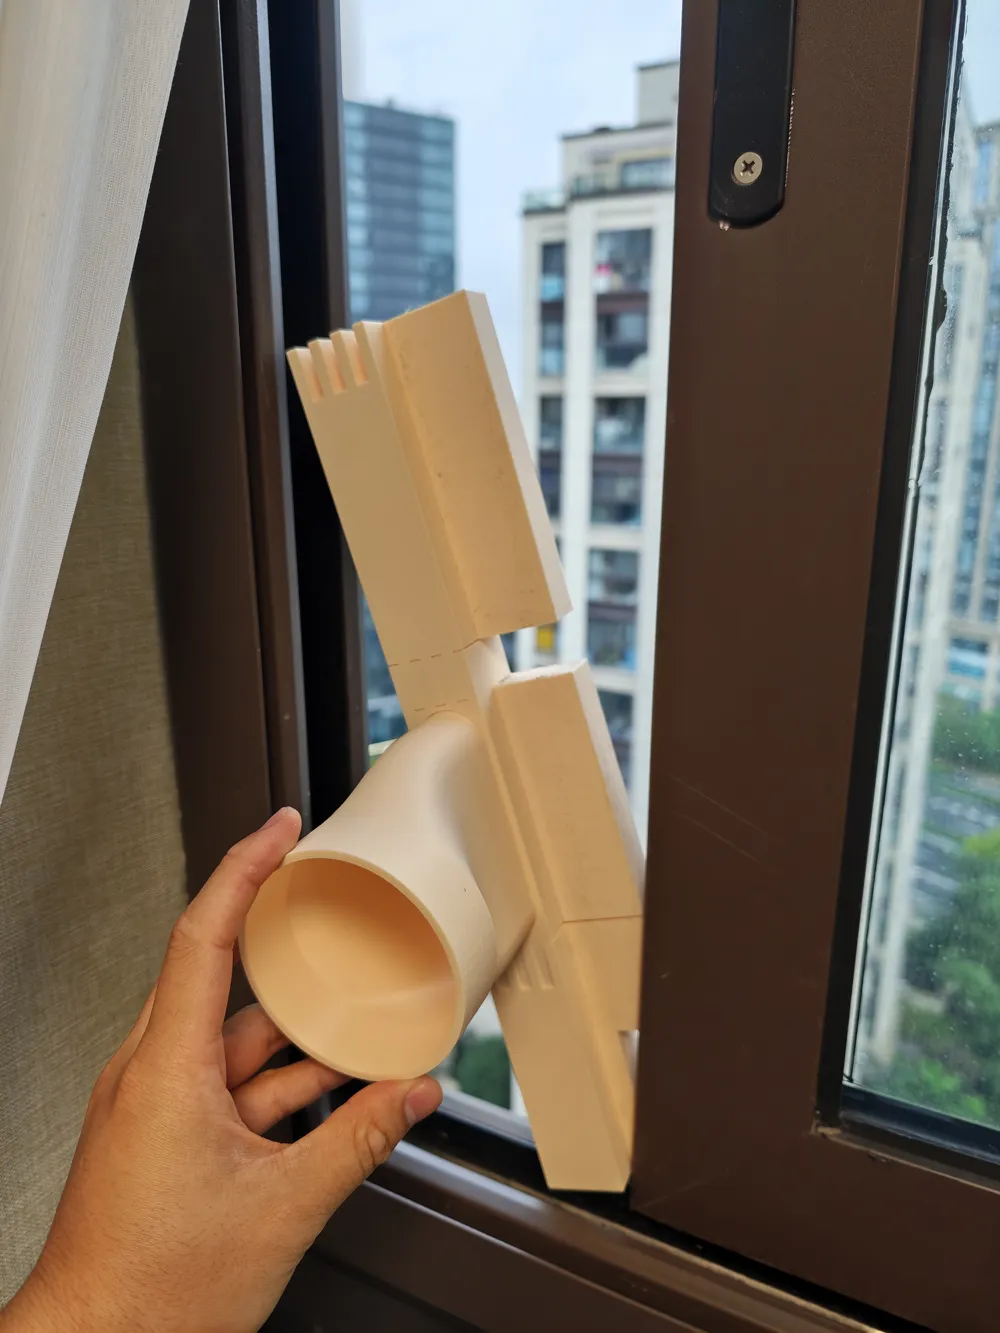
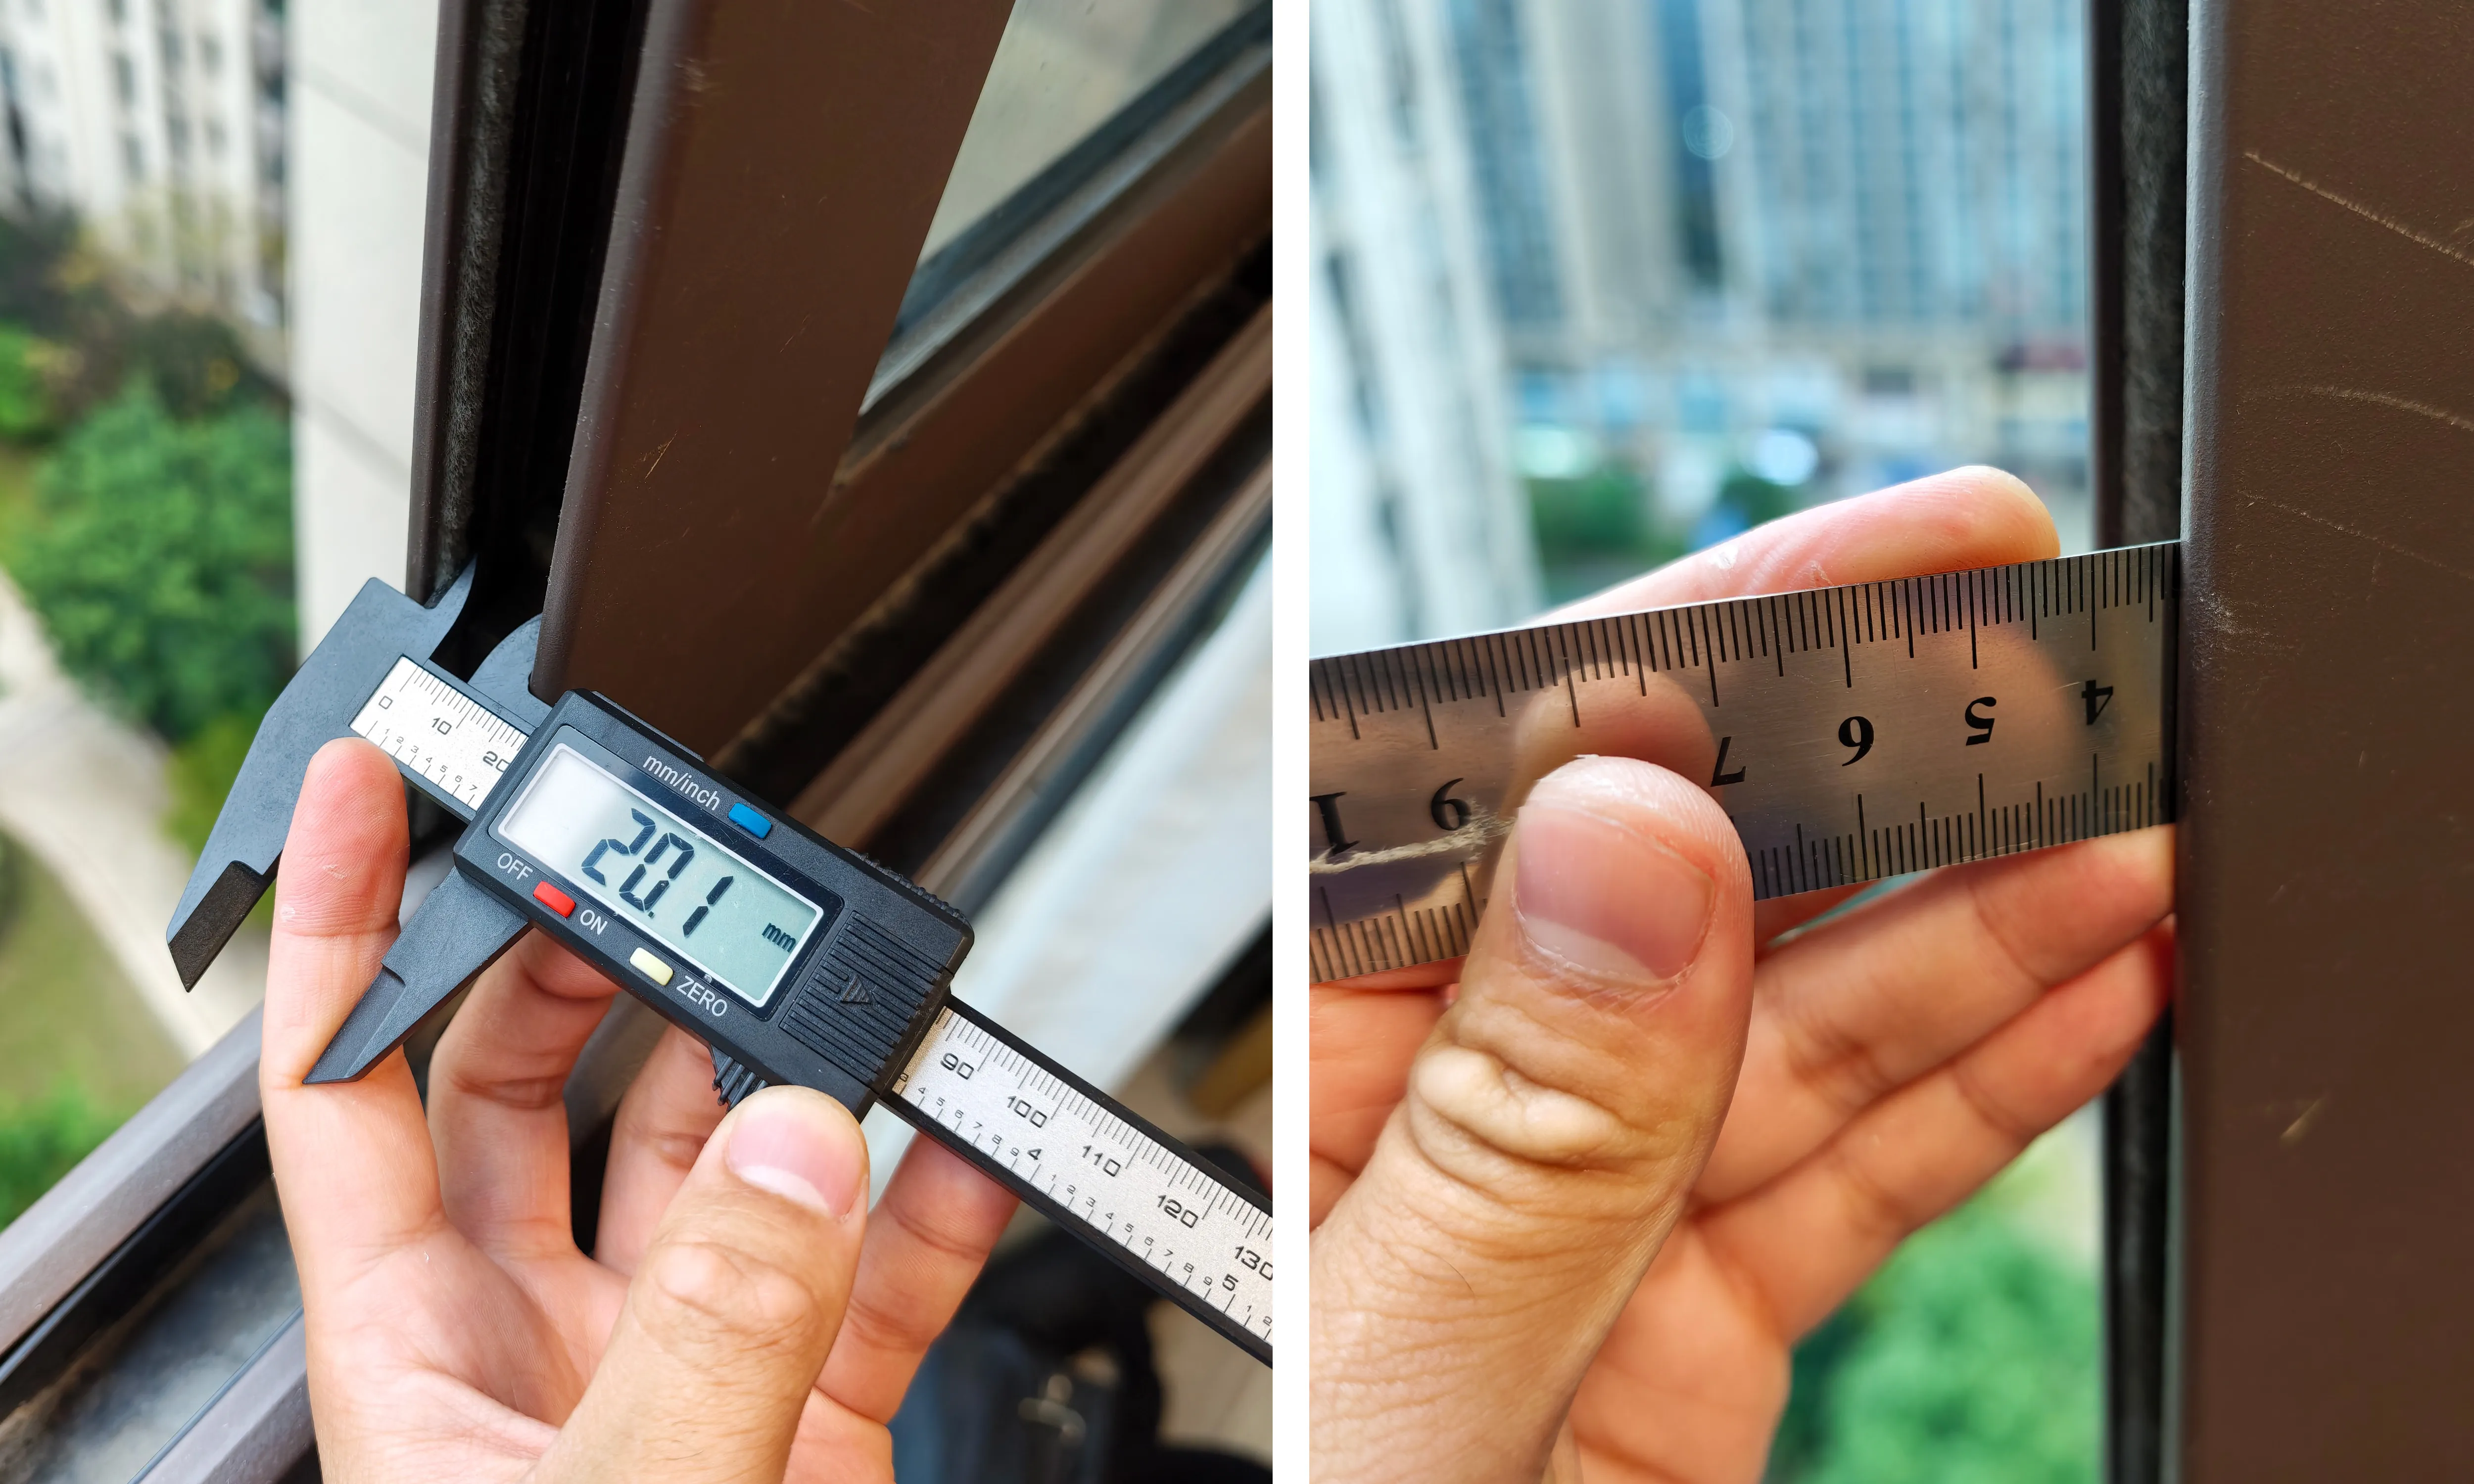
The wind baffles come in various lengths to fit windows of different heights. The wind baffles have slots to strengthen their connections and feature wings (the parts with numbers in the model) that are 20mm thick (measured by caliper in the image below) and 25mm deep (measured by steel ruler in the image below). These wings can be inserted into the window gap for fixation without affecting normal window opening and closing. Even if your window has latches and buffer blocks, the clearance design ensures a snug fit.
No supports are needed for any modules. Modules printed with Bambu Lab PLA basic and PETG HF can fit together.
Boost Me (for free)
This is my first model, thank you for your support!
If you need an exhaust vent for outward-opening windows, you can use my other model:https://makerworld.com.cn/zh/models/2371214
【2. Part and Dimension Description】
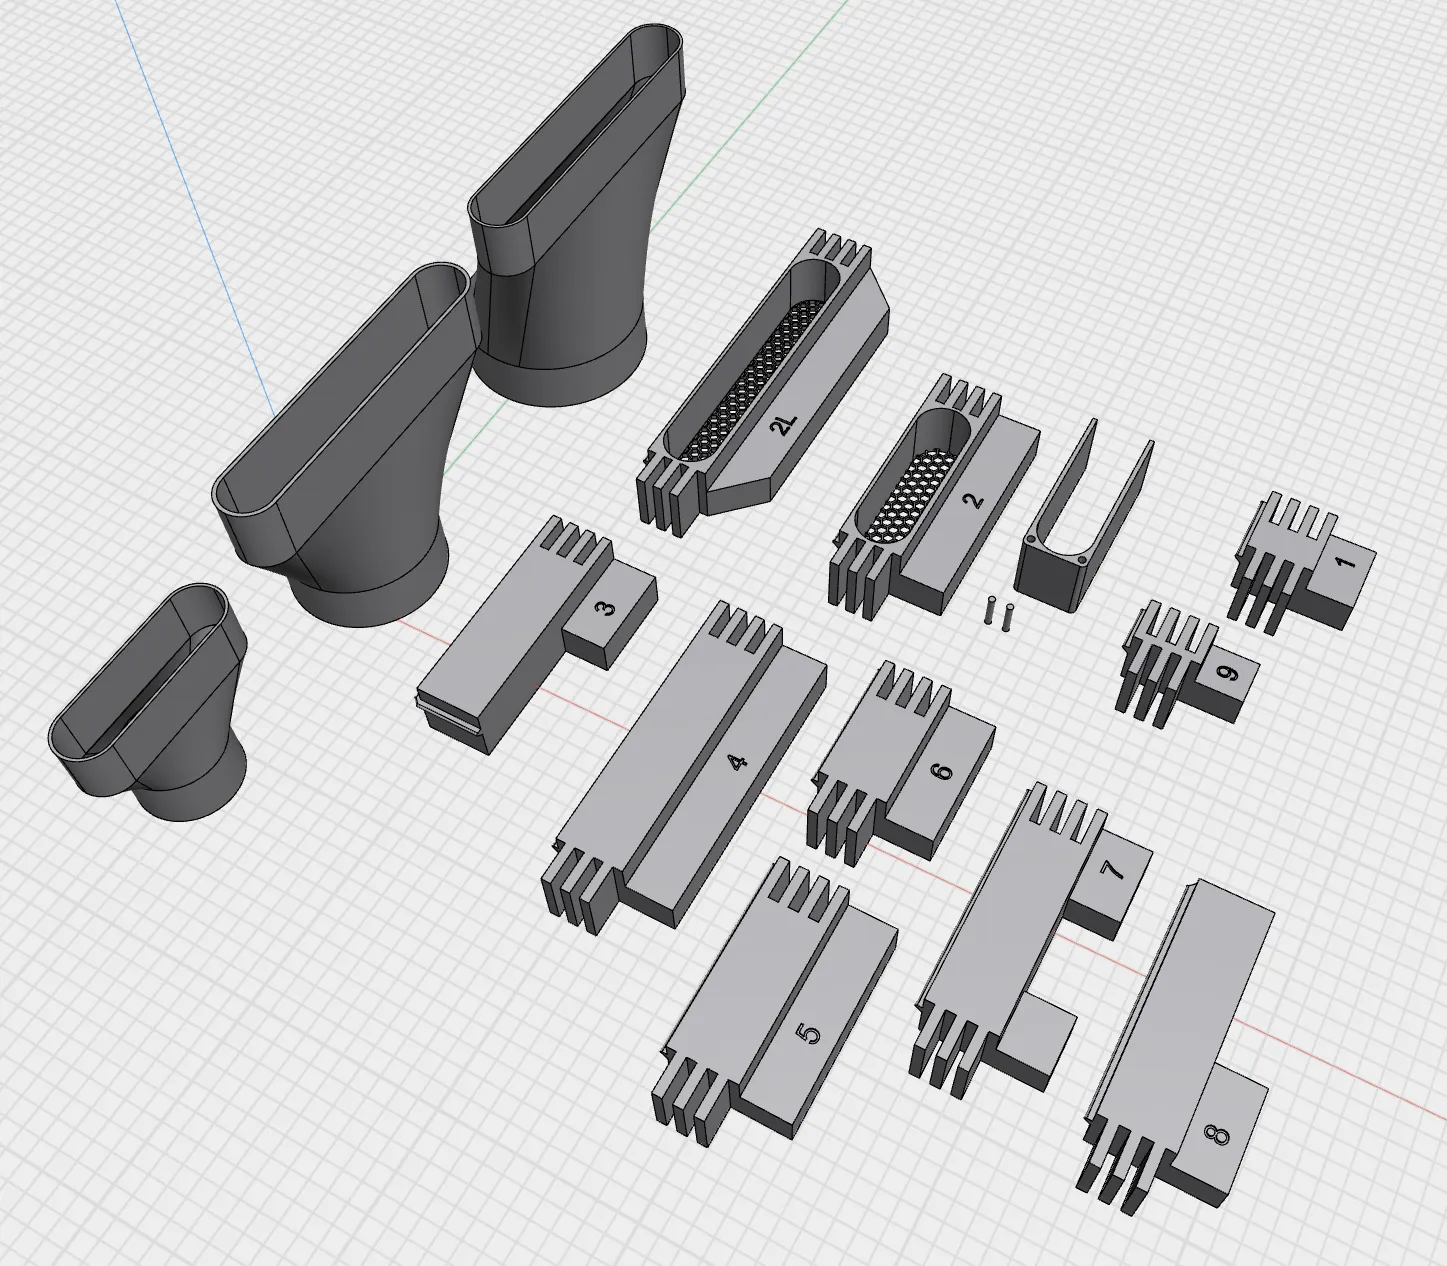
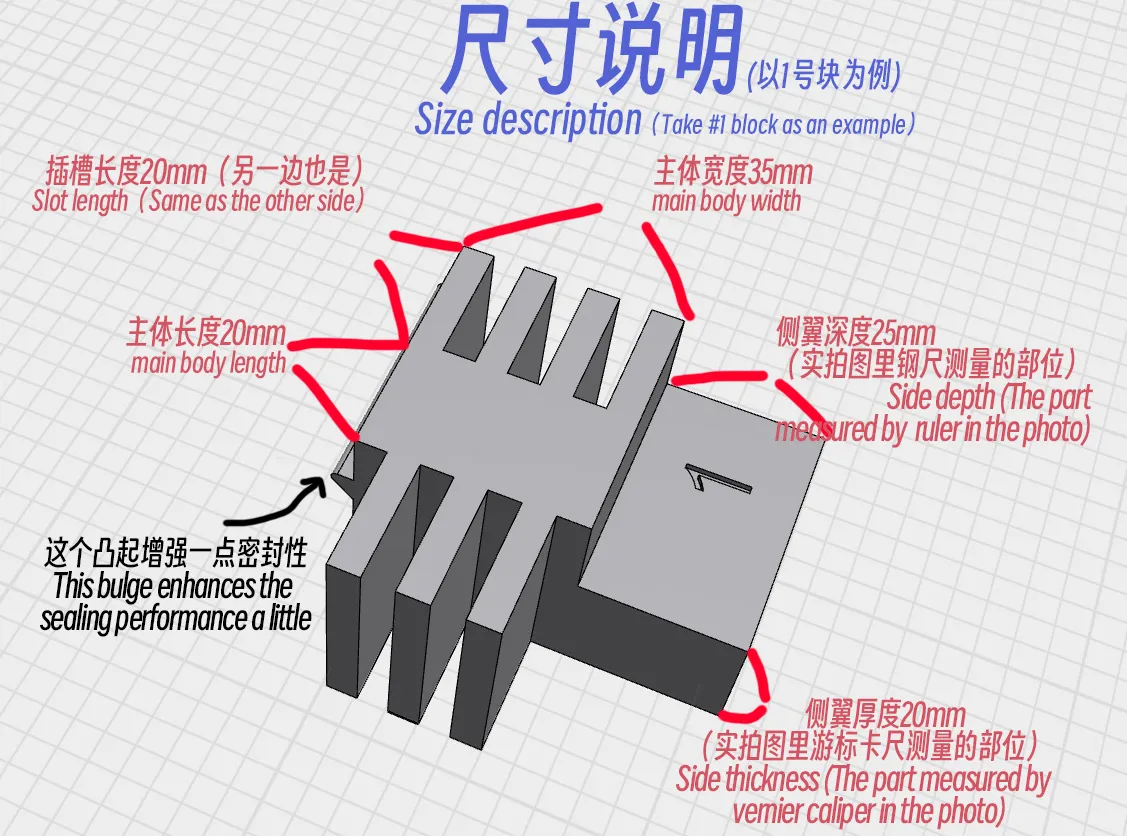
STEP files have been uploaded and can be modified using mainstream modeling software according to your window size. On the web page, click "Download STL/CAD Files" in the dropdown menu to the right of the green button to download.
If the size is unsuitable and you are unfamiliar with modeling software, you can follow the operations in Bambu Studio slicing software according to 【3. Printing and Installation Guide】.
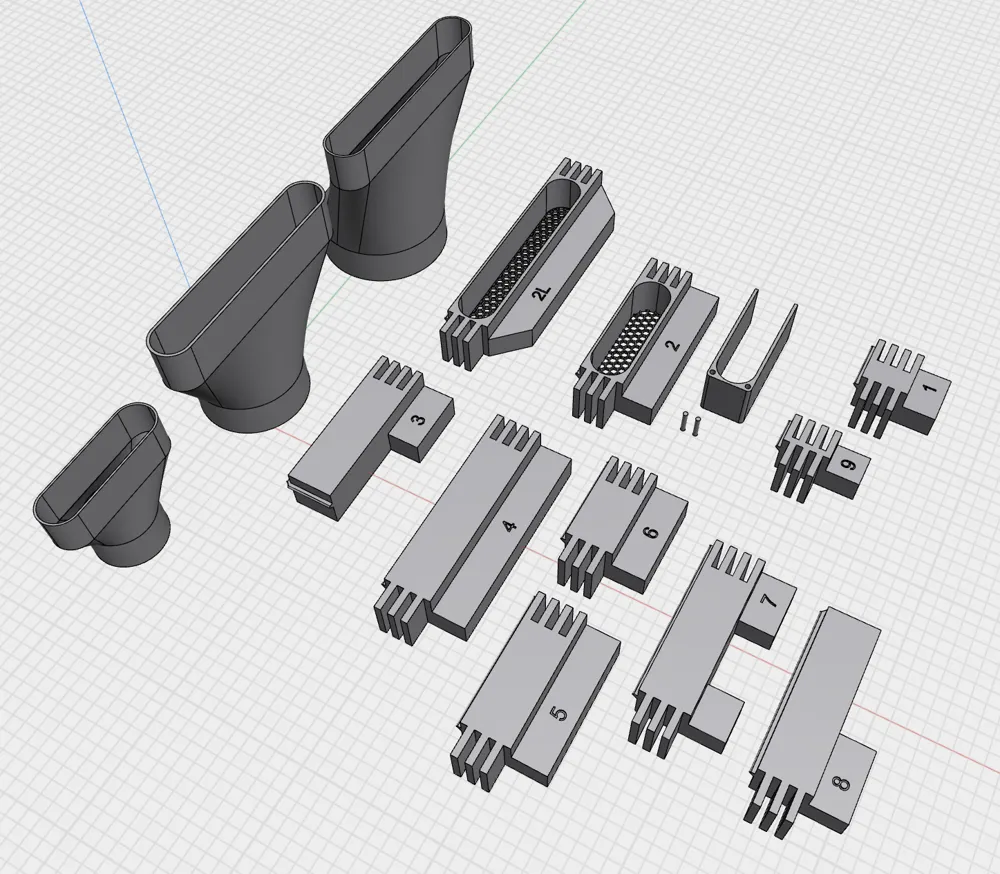
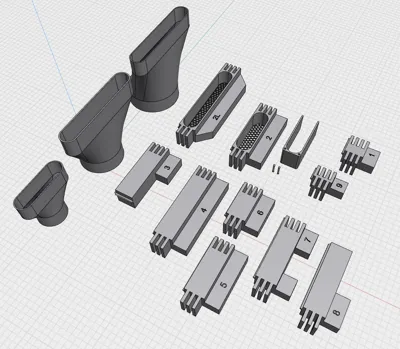
Test block 1 can be used for preliminary size testing, with a main body length of 20mm. (The main body length does not include the slots; each side of the slot is 20mm long, and the same applies below). If your window is similar to mine, it is recommended to print one block 1 for testing first. Test block 1 can also be used as a wind baffle.
Block 2 and the extended 2L block connect to the flat exhaust opening (also serving as an insect screen). Their main body lengths are 104mm and 174mm, respectively. A 5cm exhaust pipe nozzle should be paired with block 2. An 8cm or 10cm nozzle should be paired with the 2L block to reduce exhaust resistance.
You can install a rain baffle as needed (the arch-like object in the model). It is connected by two 4mm diameter, 20mm long cylindrical rods. If you have multiple devices requiring exhaust, you can print multiple block 2s or extended 2L blocks. Since the 8cm and 10cm flat exhaust openings naturally have a larger curvature, a rain baffle is less necessary, but pre-drilled holes are reserved. If needed, you can print the rain baffle from plate 2 separately.
Block 3 is used as a bottom spacer for left-opening windows (or a top spacer for right-opening windows), with a main body length of 100mm. My windows have a soft buffer block near the bottom and top (see image below), so a clearance design was implemented in the wings. The length of the clearance part is 70mm. If your window does not have a soft buffer block, block 3 can still be used as a regular wind baffle.
Blocks 4, 5, and 6 are all wind baffles, with main body lengths of 130mm, 80mm, and 50mm, respectively.
Blocks 1 and 9 are also wind baffles, with main body lengths of 20mm and 5mm, respectively.
The number of these 5 lengths of wind baffles to print depends on your window height
7号块用于避让窗户中央的锁扣(见下图),主体长度100mm。中间缺口的长度是50mm。如果你的窗户中间没有锁扣,7号块仍然可以作为普通挡风条使用。
Block 8 is used as a top spacer for left-opening windows (or a bottom spacer for right-opening windows), similar to block 3.
The main body width, slot length, wing depth, and wing thickness of each module are consistent; the main differences are in the main body length and the clearance design of the wings.
When calculating the length of the wind baffles, remember to include the slot length! Two 20mm slots, once assembled, contribute 20mm to the length!
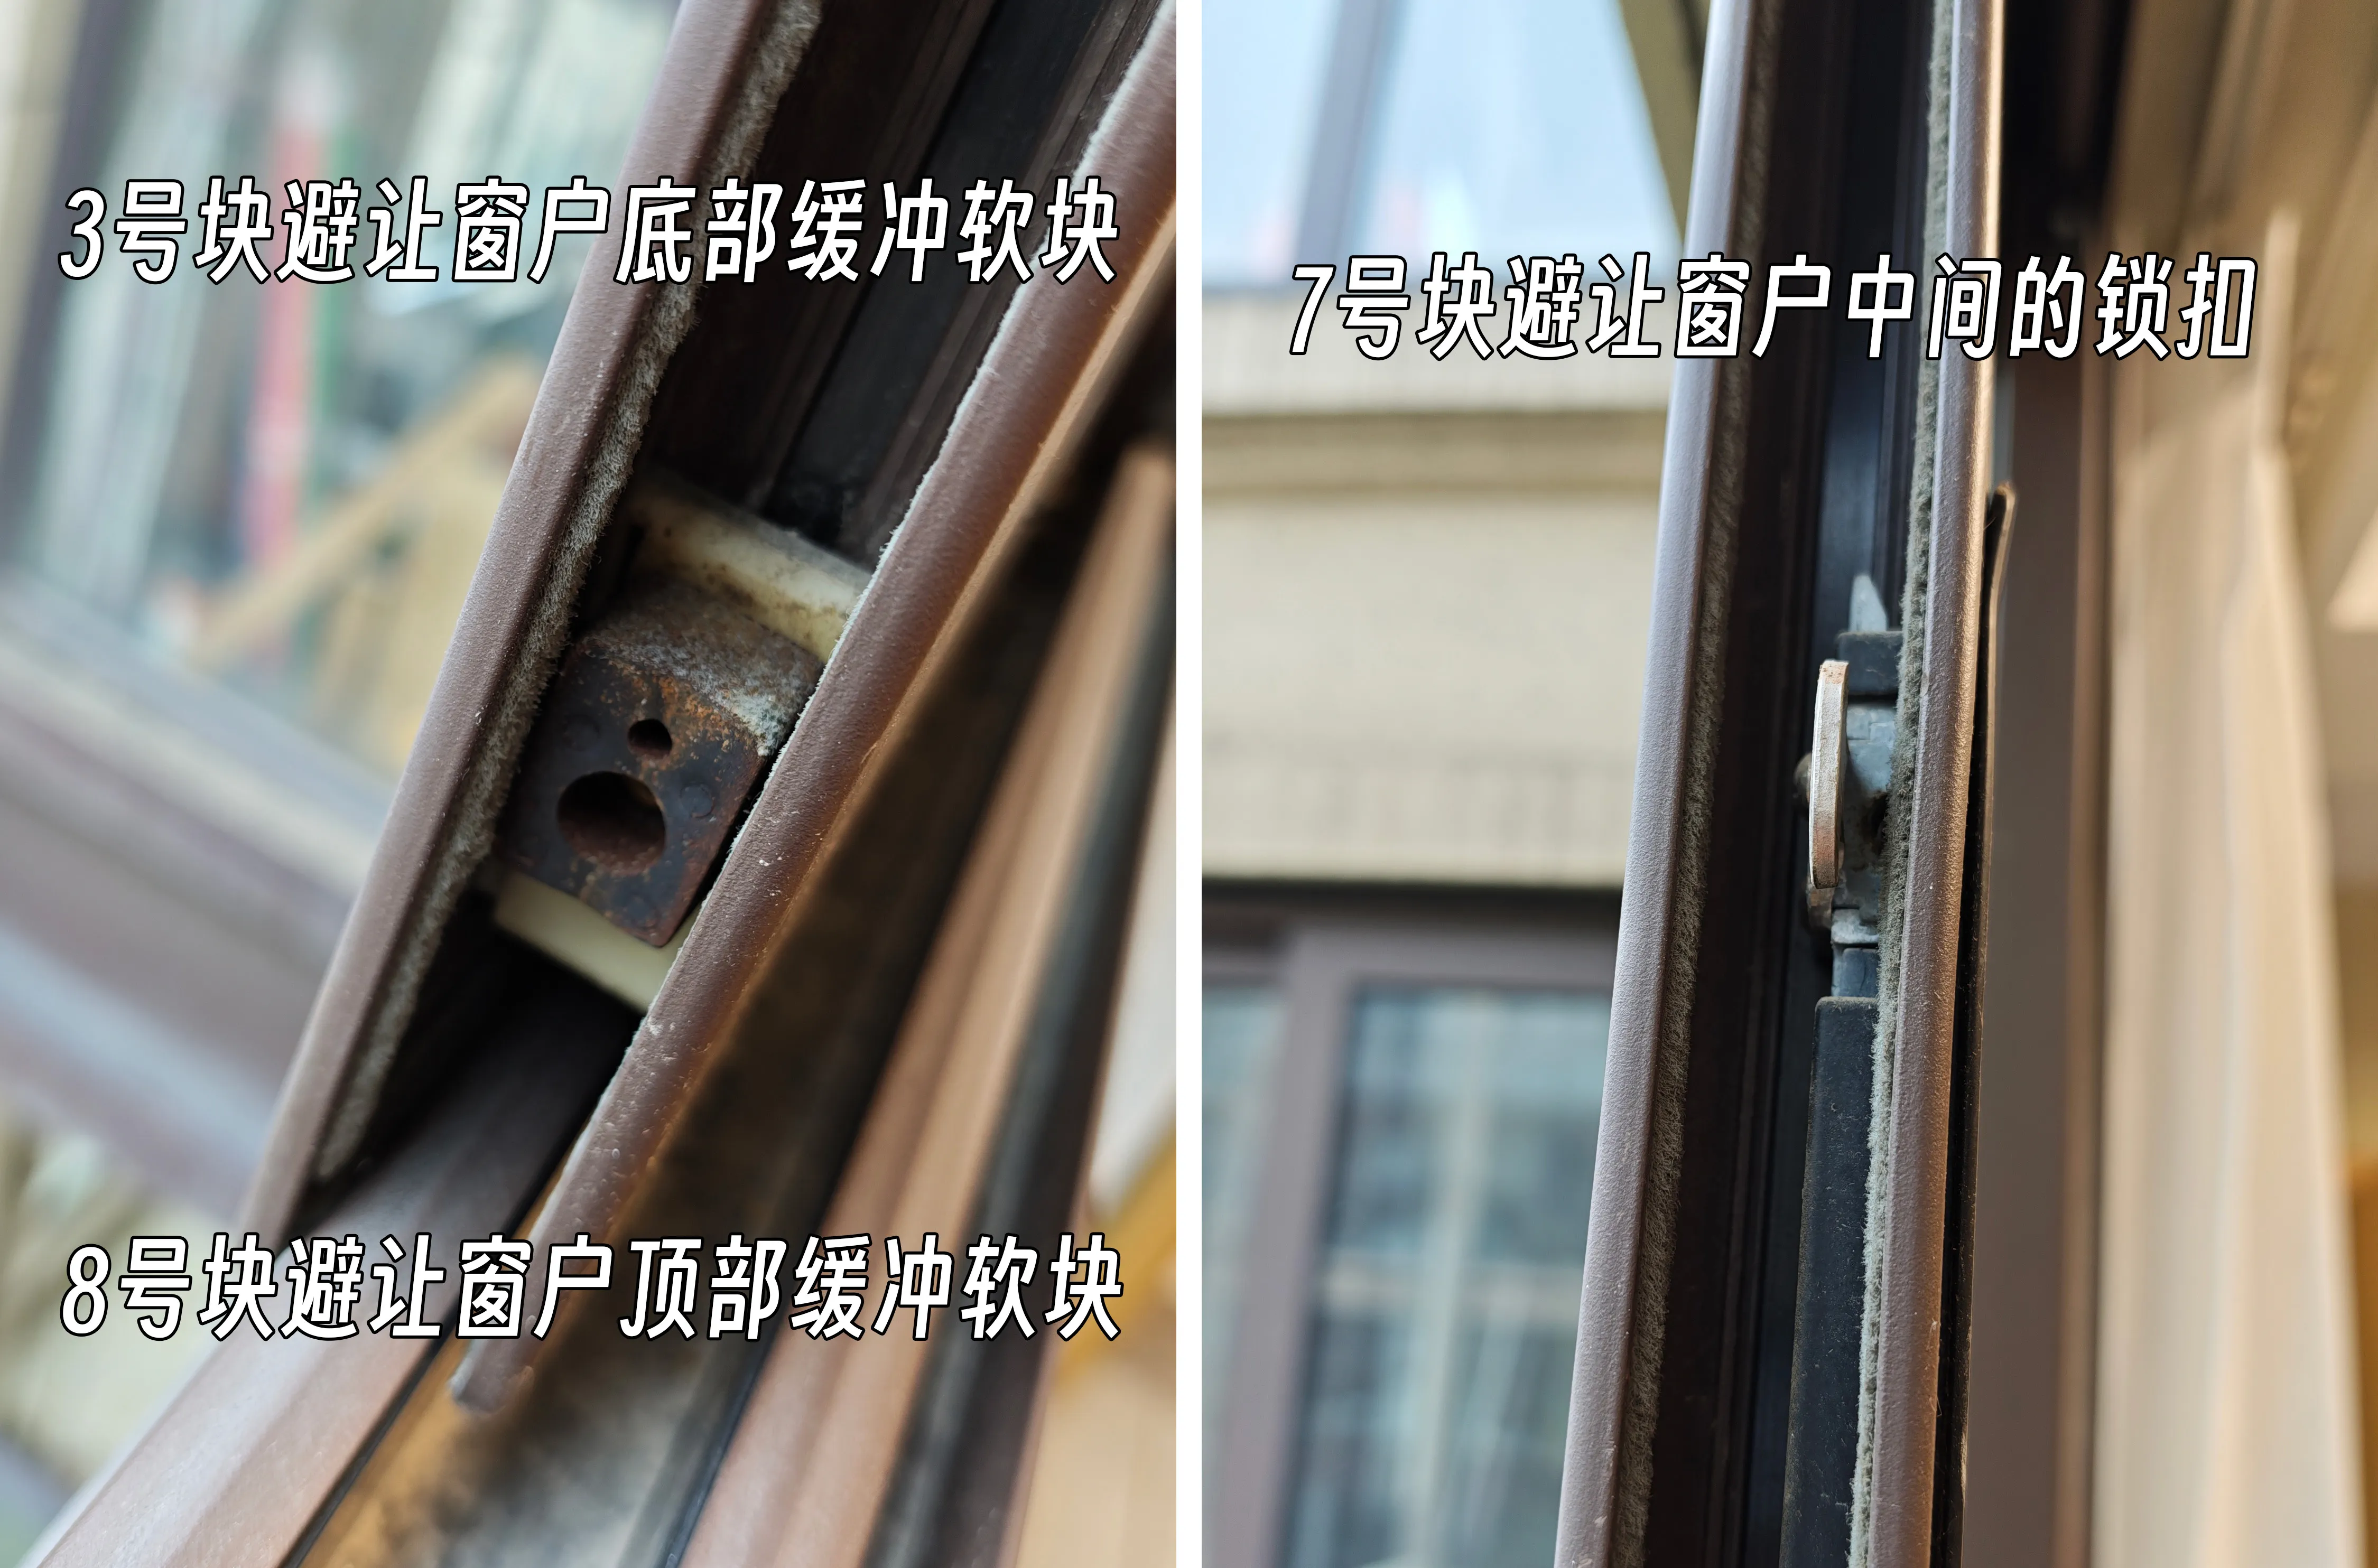
【3. Printing and Installation Guide】
- If your window is similar to mine, first print "Test Module 1" and install it on the window for testing.
If the size is unsuitable and you are not familiar with 3D modeling software and STEP files, open Bambu Studio slicing software on your computer:
(1)If the wing length of 25mm is too long and cannot be fully inserted into the window, select the wind baffle, click the cut tool, set the Y-axis to 90 degrees, then drag the yellow square to the appropriate position, and cut off and delete the excess part as needed.Note: If dimensions are modified, remember to modify every wind baffle! The exhaust pipe connector does not need modification.
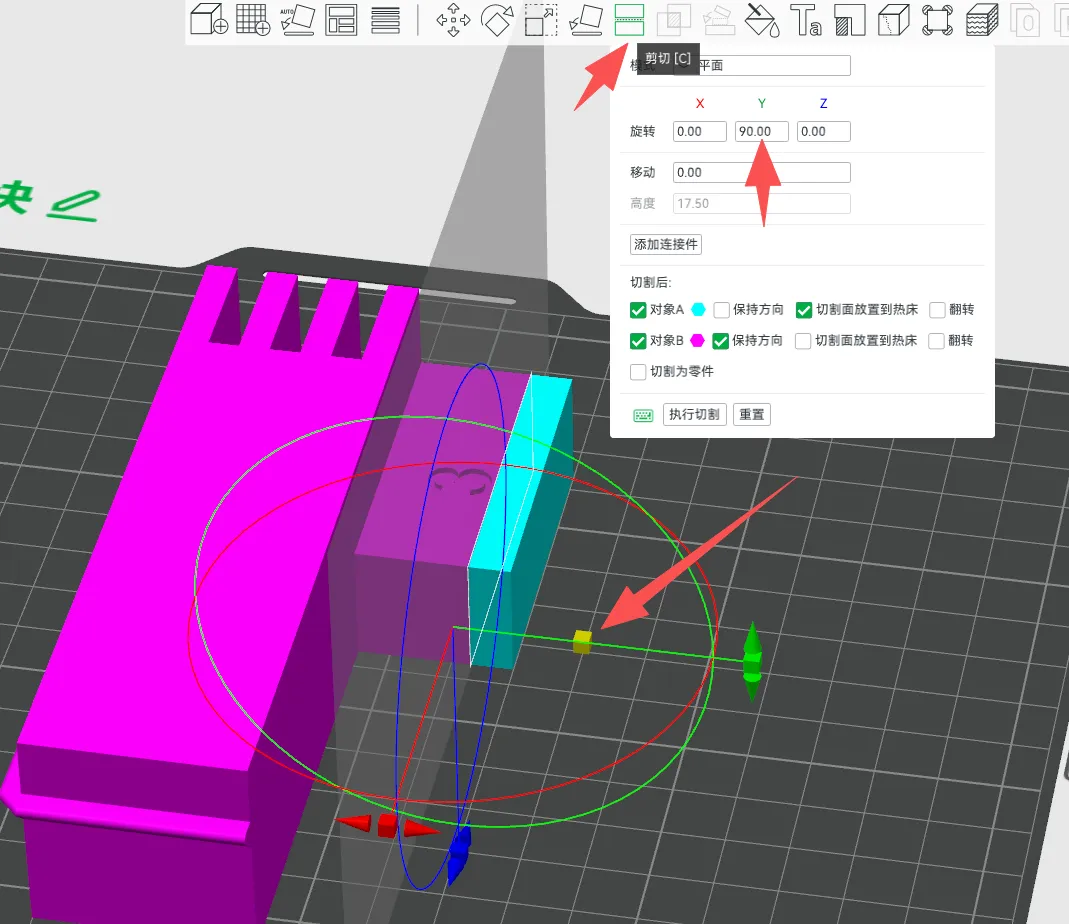
(2)If the wing thickness of 20mm is too thick and cannot be inserted into the window, select the wind baffle, use the scaling function in the slicing software, uncheck "proportional scaling", and then modify the Z-axis percentage. For example, to change the thickness to 18mm, set the percentage to 90%; to change it to 15mm, set the percentage to 75%. Note that if it is made too thin, the insect screen part of blocks 2 and 2L might become too fragile and break, which can be repaired with mesh. Note: If dimensions are modified, remember to modify every wind baffle! The exhaust pipe connector does not need modification.
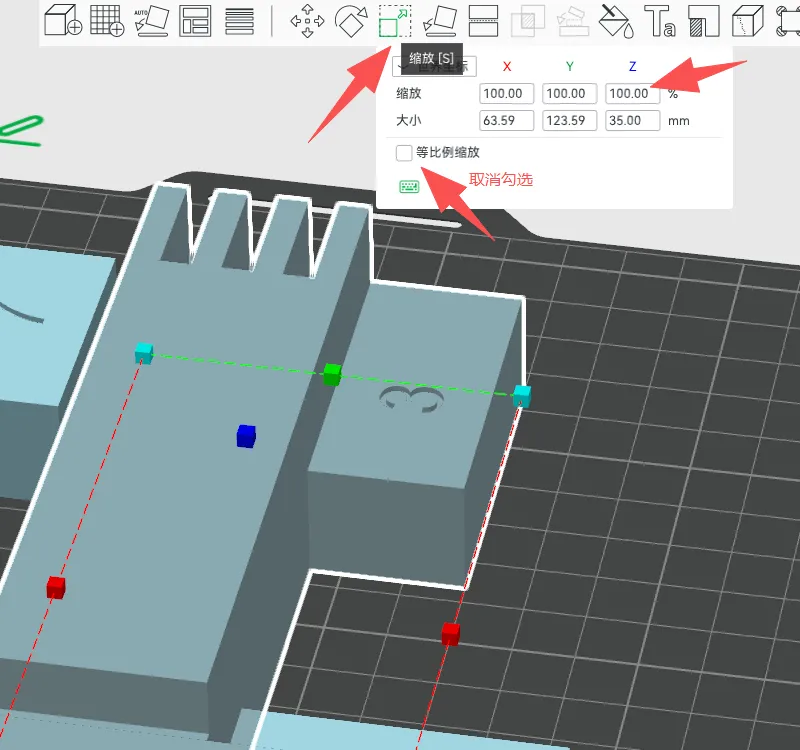
(3)If the wing thickness of 20mm is too thin and cannot be secured to the window, you can print it directly and then apply thick tape to the wings. Alternatively, you can thicken it using method (2).
- Once the size is suitable, print blocks 3, 7, and 8 from "V3.1 Version" (plate 1).
Depending on the diameter of the exhaust pipe you plan to use, for a 5cm exhaust pipe, print block 2 and the flat adapter (plate 2); for an 8cm exhaust pipe, print the extended 2L block and the flat adapter (plates 3 and 4). For a 10cm exhaust pipe, print the extended 2L block and the flat adapter (plates 3 and 5).
【If you have an 8cm or 10cm exhaust pipe but still want to use a shorter flat adapter, you can print plate 6 (8cm) or plate 7 (10cm) from "V2.4 Version" to fit block 2.】
- After printing, install it on your window, measure the required length for the wind baffle in the middle, and then decide on the specific combination and number of the 5 lengths of wind baffles (blocks 1, 4, 5, 6, 9) (plates 6 and 7) to print.
- Remark: The "plates" above are designed according to the A1 mini size; users with larger printers can arrange their own plates as needed.
Boost Me (for free)
Thank you for your support!
【4. Exhaust Pipe Specifications】
The 5cm adapter has an outer diameter of 50mm and an inner diameter of 47mm. Use an exhaust pipe with an inner diameter greater than or equal to 50mm to wrap around the outside of the 3D printed part, or an exhaust pipe with an outer diameter less than or equal to 47mm to insert inside the 3D printed part.
The 8cm adapter has an outer diameter of 80mm and an inner diameter of 77mm. Use an exhaust pipe with an inner diameter greater than or equal to 80mm to wrap around the outside of the 3D printed part, or an exhaust pipe with an outer diameter less than or equal to 77mm to insert inside the 3D printed part.
The 10cm adapter has an outer diameter of 100mm and an inner diameter of 97mm. Use an exhaust pipe with an inner diameter greater than or equal to 100mm to wrap around the outside of the 3D printed part, or an exhaust pipe with an outer diameter less than or equal to 97mm to insert inside the 3D printed part.
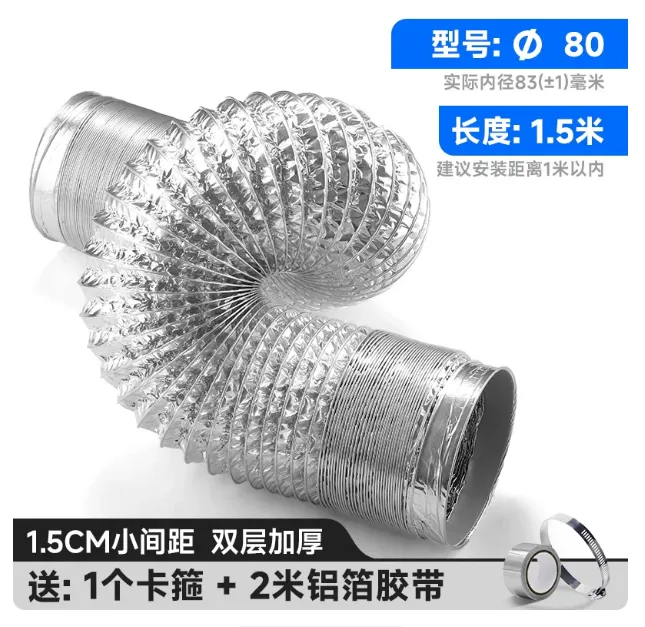
The image below shows the aluminum foil duct I use, for reference. Other ducts can be used as long as the size is appropriate. If there are tolerances, you can thicken the outer diameter of the adapter with thick tape.
License

You may create derivative works based on this object, provided that all such derivative works are published exclusively on the MakerWorld platform and include proper attribution to the original creator. You may not share, upload, host, distribute, or publish this object—or any derivative work of this object—on any other digital platform, marketplace, or distribution channel. Commercial use of this object and any derivative works is strictly prohibited. This includes, but is not limited to, selling, renting, sublicensing, or using the object in any context in which you receive monetary compensation or other financial benefits.


Comment & Rating (33)