Static RC Body Display Mount


Print Profile(1)

Description
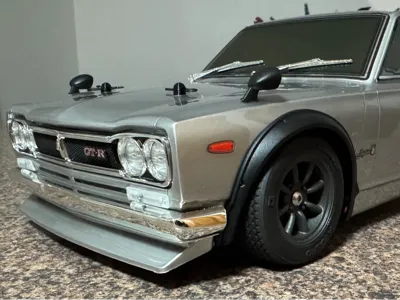
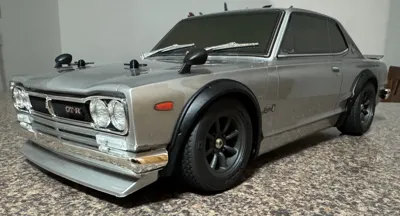
This is a display stand or mount for RC bodies that you want to display without an actual RC chassis underneath.
Particularly useful for Kyosho Phaser RC Bodies that you want to display but want to run the RC chassis with a different body.
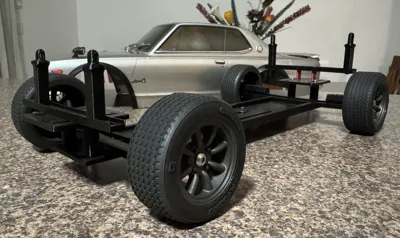
I have split the kit up into several plates so that you have options on what you need to print.
Generic plate - is required for all versions of the mount.
116mm Lateral Plate - has the parts where the body posts mount to and 116mm should be good for most 190mm RC bodies
130mm Lateral Plate - has the parts where the body posts mount to and 130mm for wider bodies that have body posts further appart.
140mm Lateral Plate - has the parts where the body posts mount to and 140mm for wider bodies that have body posts further appart again.
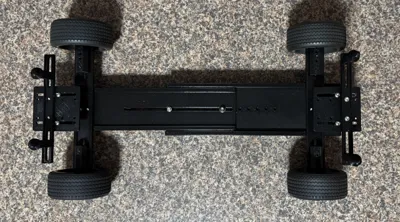
Body Posts - 4 body posts used where the body holes are on flatter part of the RC Body like Hood/Bonet or Trunk/Boot.
Body Posts (Windows) - 4 body posts used where the body holes are on more angled parts of the body like rear windows.
Spacers 20mm - some 20mm spacers to raise the ForeAft plate above the central part of the chassis, typical on the front.
Spacers 23mm - some 23mm spacers to raise the ForeAft plate above the central part of the chassis, typical on the rear.
All Options - has all the parts in all the plates except for the Generic plate, if you just want to print everything and work it out later.
If you have specific needs depending on the body you have you can always resize the 20mm spacers in the Z direction only to the height you want.
You can see in one of the images 2 red spacers between the ForeAft plate and the lateral plate on the rear, in this case they are 12mm so you can resize the spacers to what ever height you need.
The assembly guide image gives you an idea of where parts fit, you can assemble them using M3 screws usualy M3x10mm should be a good size but if you have 2 screws going into a short spacer might need M3x5mm so they don't hit each other.
The wheels will need M4x10 screws, or you can use a M4x15 set screw intot he Hex and use a wheel nut like a normal RC axel.
Documentation (1)

Comment & Rating (1)