Phone Stand + Photo Frame (interchangeable front image, no supports, adjustable angle, multiple height options)


Print Profile(1)

Description
Update Notes:
20251118:
This phone stand received my wife's approval, and she also requested a new feature: to heighten the stand so one doesn't have to look down so much when using the phone, and it can also be used with a small mirror. Additionally, the base size was increased to ensure stability for the taller stand.
Plate 3, 4, and 5 are models with heights increased by 15mm, 40mm, and 50mm respectively, plus a larger base.

Features:
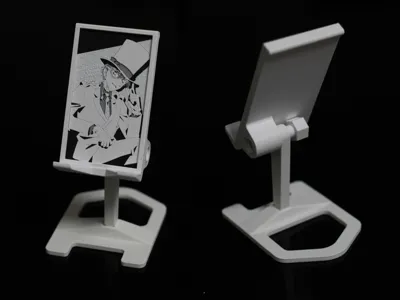
1. Phone stand + photo frame. The photo frame can accommodate photos with dimensions of 53.6mm*94.6mm and supports a maximum photo thickness of 1.8mm. Real photos, 3D printed bookmarks, or thin lithophanes can be inserted.
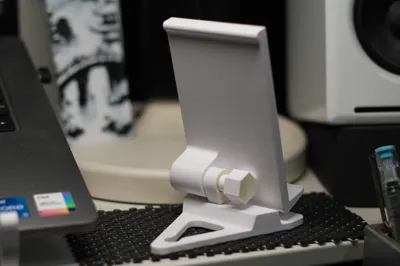
2. The phone angle can be adjusted steplessly, and the rotational damping can be adjusted via the bolt, as shown in the image below.
3. Easy to print, no supports required
4. Works with both PLA/PETG
5. No parts other than 3D filament are required
Instructions:
A: See the image below: Plate 02 is an interchangeable card, which can be replaced with real photos, 3D printed bookmarks, or thin lithophanes.

B: Assembly Steps:
① Place the photo into the tray

② Insert the tray with the photo into the main body of the stand from the side

③ Insert the connecting shaft into the main body of the stand

④ Screw the locking bolt into the connecting shaft

⑤ Connect the base and the connecting shaft, and the installation is complete.

⑥ If the connection between the base and the connecting shaft is not tight enough, a piece of filament can be inserted into this position

C: See the image below: Adjust the stand to the angle shown in the image below to easily rotate this bolt, which increases the damping of the rotating stand.

Troubleshooting:
Due to different materials and flow rate settings, the fit dimensions may vary. In step ③ mentioned above, there might be difficulty inserting or the fit might be too loose after installation.
Solution:
1. As shown in the figure below, adjust the size compensation of the base and connecting shaft according to the actual situation.

2. If you don't want to re-print,
For cases where the fit is too tight to insert, a slight sanding can be done.
For loose fits, a section of the purge line printed during preparation can be inserted inside.
Boost Me (for free)
Designing is not easy, thank you for your support!
License
You shall not share, sub-license, sell, rent, host, transfer, or distribute in any way the digital or 3D printed versions of this object, nor any other derivative work of this object in its digital or physical format (including - but not limited to - remixes of this object, and hosting on other digital platforms). The objects may not be used without permission in any way whatsoever in which you charge money, or collect fees.
Comment & Rating (0)