


Print Profile(2)


Description
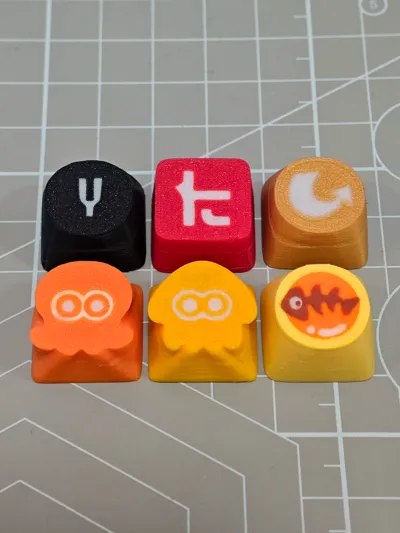
Splatter KeycapFor non-commercial use only
Requires AMS MOA height
(Currently printed upside down, the pattern printing effect will be better. If printed right side up, there are no cooling lines, but elephant foot compensation and surface ironing need to be adjusted)
Can be printed hollow
Looking forward to seeing your prints
Updated on 25.11.21
Modified G-code, improved first layer printing effect
Wall order changed to inner-outer-inner, cooling lines are less noticeable
I have received feedback from some users that the print quality is not good. For this, I have made some optimization plans. Since I use an A1 mini and everyone's filament is different, I did not modify the 3mf file. Everyone can adjust the parameters according to this plan
1. Underextrusion of matte filament (must change)
Bambu Lab matte filament default setting is flow rate 0.98, K value 0.02, change to flow rate 1.02, K value 0.027

2. If the first layer still has underextrusion leading to gaps

You can change the first layer line width to 0.3, change the wall mode to Arachne wall, this makes the first layer infill more dense. You can also modify the G-code, reduce the Z height by 0.06, so that during printing, the nozzle will squeeze the filament to eliminate gaps


3. Filament stringing (crucial)

Filament stringing can cause the keycap stem to deform, preventing it from fitting onto the switch. Assuming the filament is not damp, filament stringing is generally due to the nozzle temperature being too high. You can change the nozzle temperature from 220° to 210°

4. Bell Coin Keycap optimization

The Bell Coin can be printed separately at 0.12 layer height
5. Zhang Zhang's eyes optimization

If the white part in the middle of Zhang Zhang's eyes is printed too thinly or not at all, you can adjust the filament printing order, have the machine print white first, then other colors. The overly thin white parts will become thicker, which can also avoid color mixing.

6. Glue application

Applying glue can prevent the model from shifting due to insufficient adhesion to the build plate when printing smaller parts first. For example, in the fossil keycap above, the blue in the middle was too thin to adhere, causing displacement when printing white
7. Cooling line optimization
Cooling lines can currently only be optimized, not eliminated. The optimization plan is as follows

Hope this helps everyone
Boost Me (for free)
License
You shall not share, sub-license, sell, rent, host, transfer, or distribute in any way the digital or 3D printed versions of this object, nor any other derivative work of this object in its digital or physical format (including - but not limited to - remixes of this object, and hosting on other digital platforms). The objects may not be used without permission in any way whatsoever in which you charge money, or collect fees.
Comment & Rating (6)