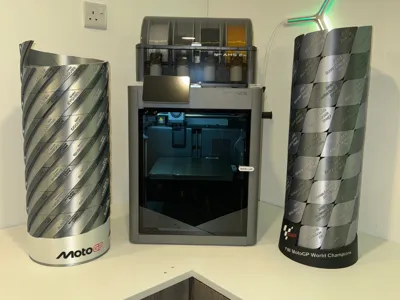
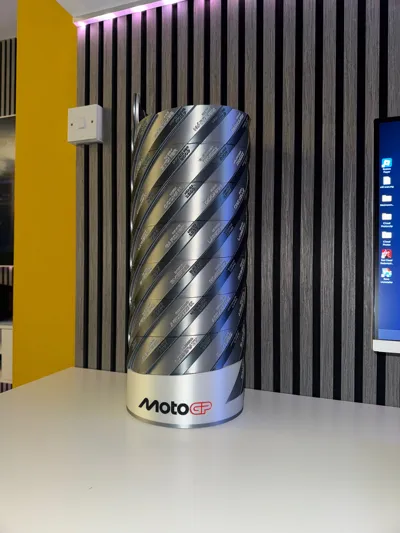
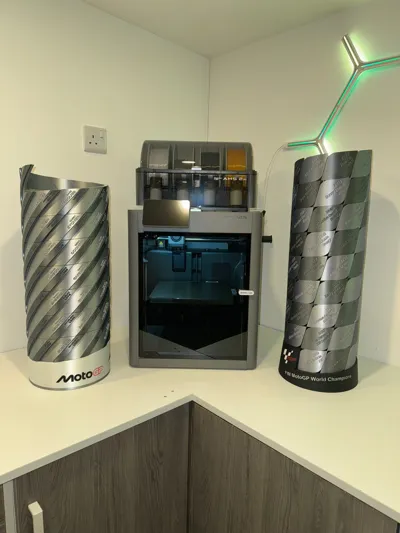
Tower of Champions – MotoGP Trophy


Print Profile(1)


Description
Membership
🏆 Tower of Champions – MotoGP Trophy
A 3D-Printed Tribute to MotoGP Legends
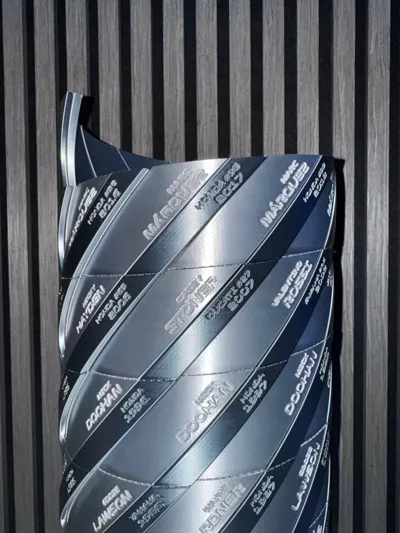
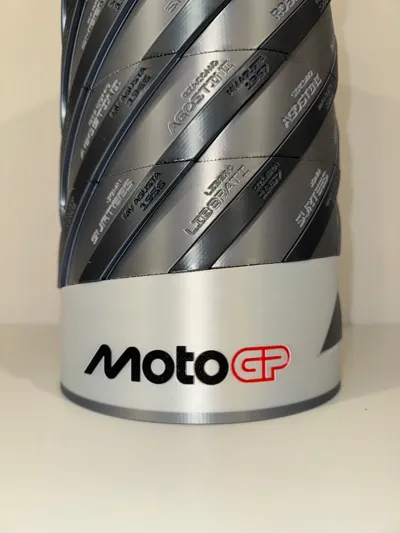
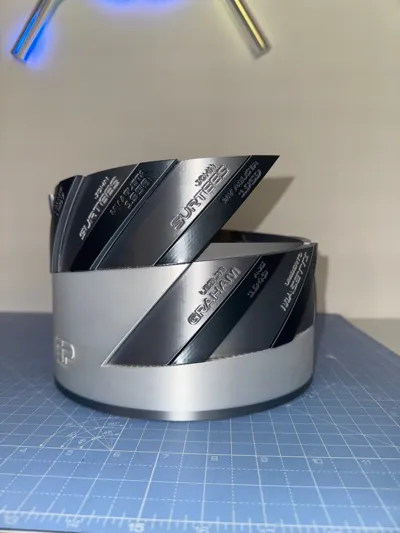
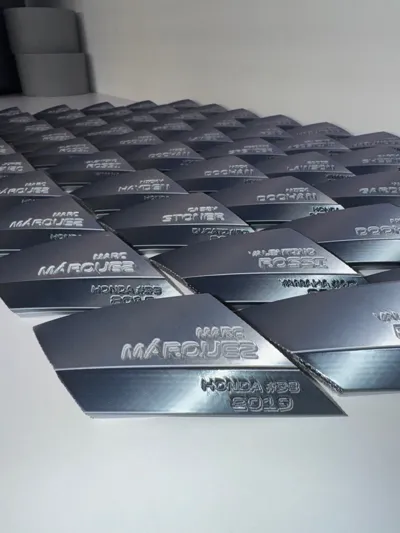
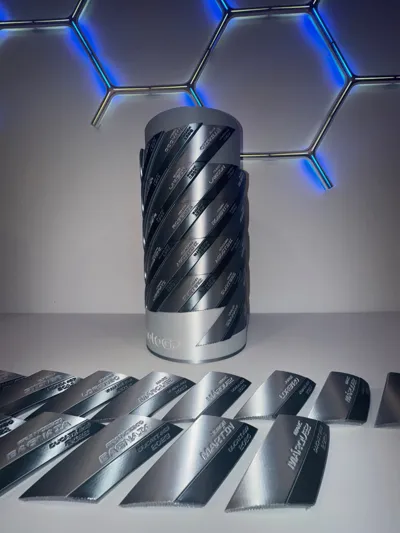
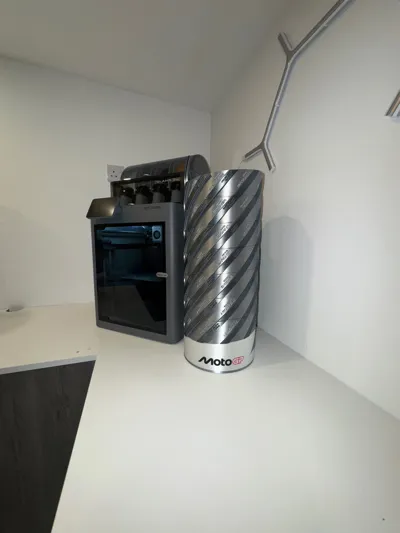
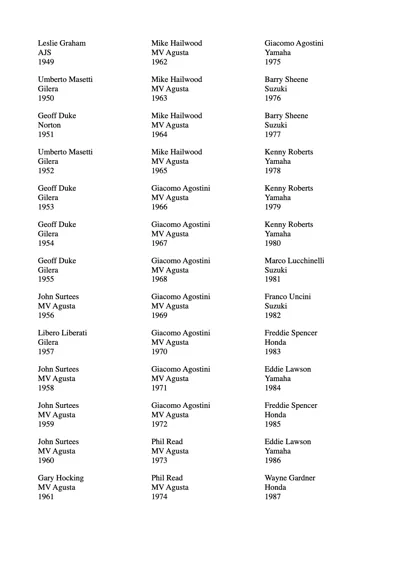
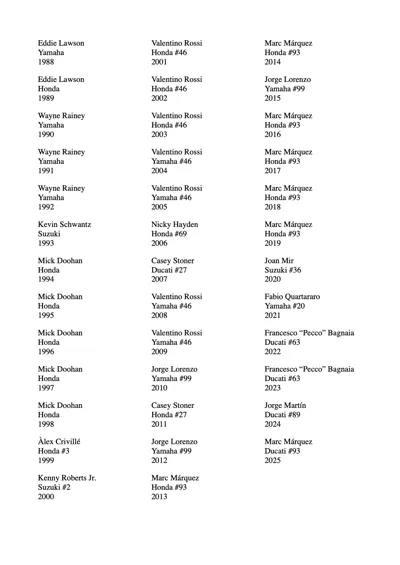
This Tower of Champions model is a highly detailed, 3D-printed replica of the official MotoGP trophy — designed from every angle for true likeness and accuracy. Each tile represents a champion and year, beautifully spiraling around the tower. The model has been cleverly split to be printable on any standard 3D printer — no AMS required.
⚙️ Specifications
- Difficulty: ★★★☆☆ (Moderate)
- Filament Required: ~1.5 kg total
- Colors: Silk Silver, Silk Titan Gray, Silk White, Red, Black
- AMS: Not Required
- Hardware: None
- Assembly Method: Slow-curing glue + Superglue
- Pieces: ~160
- Print Time: ≈ 2 days
- Finished Size: 58 cm H × 22 cm W
🧰 Tools & Materials
- Slow-setting glue (for first 11 tiles – allows 0.10 mm tolerance adjustment)
- Superglue (for final alignment and quick bonding)
- Small clamps or rubber bands (optional)
- Fine sandpaper (for cleaning any print edges)
- Clean, flat workspace
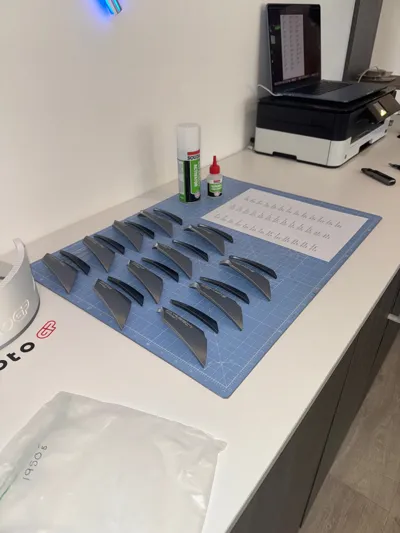
🧩 Preparation
Each tile set is split into two parts (upper and lower).
Before assembly:
- Group and label each set of tiles by decade — e.g. 1950’s, 1960’s, 1970’s, etc.
- Bag each pair of tile halves together for easier matching during gluing.
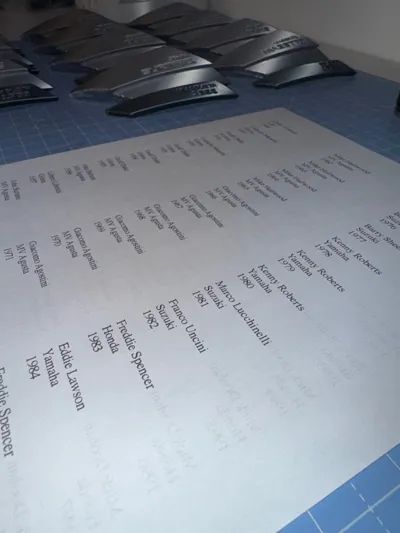
- Reference the included winners list (year + manufacturer) to ensure correct pairing.
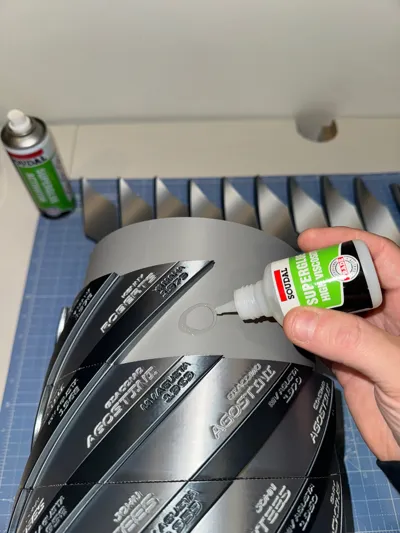
🏗️ Assembly Instructions
- Join Tile Halves:
- Glue the two parts of each tile together according to the winners list.
- Allow to dry completely before moving to tower assembly.
- Assemble the Base:
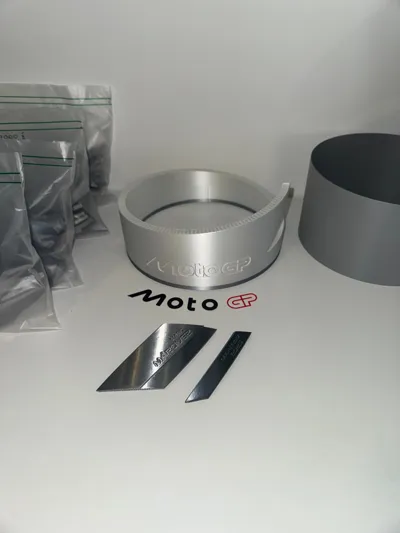
- Insert the first alignment insert into the base and glue in place.
- Stack and glue the second alignment insert on top.
- Do not glue the final smaller insert yet — it will be positioned at the end.
- First Row of Tiles (1949–1959):
- Start gluing tiles from 1949 onward using slow-setting glue to allow for tolerance adjustments.
- Tiles are designed with a 0.10 mm offset for glue thickness — slight manipulation may be needed.
- When you reach tile 1959, align its corners with tile 1949 and apply a small amount of superglue to lock the row in position.
- Once satisfied with alignment, apply a bead of superglue along the top edges of each tile to fix them securely.
- Remaining Rows:
- Continue gluing subsequent tiles around the tower until they start to overlap the alignment tool.
- Final Alignment Insert & Top Tiles:
- Place the last alignment insert, rotating it into position so that tile 2025 will finish aligned with the first tile, offset by half a tile width.
- Use the same slow-glue method as before for perfect alignment, then lock into place with superglue once satisfied.
- Final Details:
- Attach the MotoGP logo to the base with a small dab of superglue.
- Allow full curing time before handling or display.
🏁 Thanks for Building!
Licence
If you’re planning to sell prints of my models, make sure you join one of my Commercial License membership tiers here on MakerWorld. That way you’re covered, supporting my work properly, and helping me keep the new designs coming.
Appreciate every single download, print, like and Boost — you lot are legends.
If you like this model, feel free to send a Boost — every single one genuinely pushes me to spend more time designing and releasing more cool stuff like this.
Boost Me (for free)
Boost me for Free
License
You shall not share, sub-license, sell, rent, host, transfer, or distribute in any way the digital or 3D printed versions of this object, nor any other derivative work of this object in its digital or physical format (including - but not limited to - remixes of this object, and hosting on other digital platforms). The objects may not be used without permission in any way whatsoever in which you charge money, or collect fees.
Comment & Rating (36)