Search models, users, collections, and posts
PC Power Button
IP Report


Print Profile(1)

0.2mm layer, 2 walls, 15% infill
Designer
38 min
1 plate
Open in Bambu Studio
Boost
13
31
1
0
15
6
Released
Description
Content has been automatically translated.
If you 3D print your own PC case, then you also have to 3D print your own power button
The idea is to "short-circuit" the corresponding pins on the mainboard with a simple 3D printed spring and 2 screws
A common practice if no power button is available
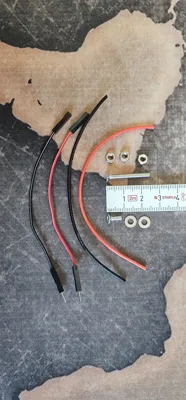
You also need (see pictures):
- 1x M3*25mm countersunk screw
- 1x M3*8mm countersunk screw
- 3x M3 nut
- 2x M3 washer
- a bit of cable
- 2 male-to-female jumper wires (optional)
- some electrical tape or a very small heat shrink tube (optional, but recommended so no small wires stick out and constantly trigger a short circuit)
Printing and assembly:
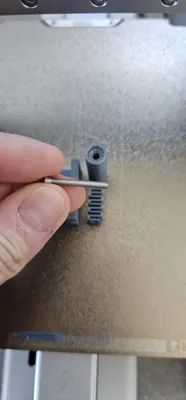
A pause is set where you need to hang the long screw into the fixture (see pictures)
You can then easily separate the two parts from each other. The lower part is no longer needed
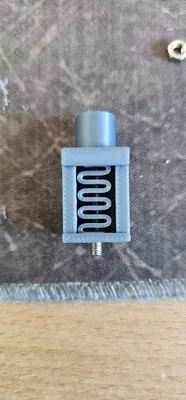
- Insert the spring into the spring holder. Push the spring together slightly
- Push the screw through the spring and fix it at the bottom with a nut
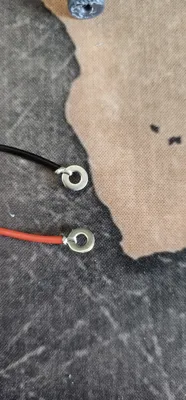
- Prepare the cables with the washer as shown in the picture
- Mount the cable to the screw with the second nut
- Do the same with the short screw and the lower part of the casing
- Push the two parts together. (The parts fit very tightly. You can get them apart again, but it's a bit fiddly
- Optionally, you can now attach a male-to-female jumper wire to the end of the cables. I simply pushed it into the insulation. This allows you to easily connect the pins on the mainboard to the button
Result:
Ideally, you now have some space between the two screws (1-2mm) and the DIY power button (shorting switch) is ready
License
This user content is licensed under a
Creative Commons Attribution-Noncommercial
Comment & Rating (1)