4x6" Postcard Dispenser & Vending Machine


Print Profile(1)

Description
Boost Me (for free)
Consider supporting me with a boost!
Description
The SKPOP 4x6" Postcard Dispenser is the largest variant of the k-pop photocard vending machine. The dispenser is best used a “lucky draw” machine for sticker sheets, postcards, or photo prints!
- Works for cards up to 159mm in length and up to 107mm in width
- Holds a card stack of up to ~1.5" / 40mm in height
- Given the dynamic surface textures of postcards, it is best to use sleeves to ensure low and consistent friction between cards, which helps with dispensing. Gloss finish postcards without sleeves were tested to be compatible as shown in the gif
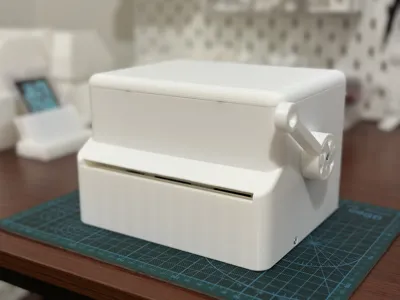
- Note: the handle one-way clutch tolerance is calibrated to X1C. A reduced tolerance version is available if your handle gets stuck. See attached step file.
Tips and commercial license: https://ko-fi.com/skpop
Measurements
📐 Overall Dimensions: 126 mm Height * 150 mm Depth * 198 mm Width
📏 Card tray internal dimensions: 160 mm Width * 108 mm Length
Components Required
You will need the following non-printed components:
- 10x M3 screws, length between 6 and 12 mm (Alternatively, use superglue)
- 2x rubber strips, length = 115 mm (for 36mm diameter roller drum), width ~ 15 mm, thickness ~ 2 mm;
Example: https://a.co/d/czWigbg (Alternatively, use rubber band) - 2x 608zz/rs bearings
- Optional: 4x 5mm x 2mm magnets, attach by press fit
Assembly Instructions
Please use the following instructions and optionally my assembly IG video!
https://www.instagram.com/reel/DQVxG0FEZPH
- Wrap rubber strip around both roller drums
- Insert bearings into left/right roller axle mounts
Install both roller drums on the roller axle. Position axle so that the left end has a screw hole. Next, install the left/right roller axle mounts onto the two ends of the roller axle. Finally, on the left end of the roller axle, install the roller gear, and secure with a M3 screw. You should have the following assembly:

Insert big gear through the gear plate, then through the dispenser case, and install the handle onto the gear axle. Secure with a M3 screw.

Loosely install the other small gear onto the gear plate

Install the roller axle assembly into the case, then secure with 2x M3 screws from the two sides of the dispenser case.

Install the two mini front rollers onto the two sides of the card tray, and secure with M3 screws. The front roller should not rotate freely. Make sure the two notches are pointing up.
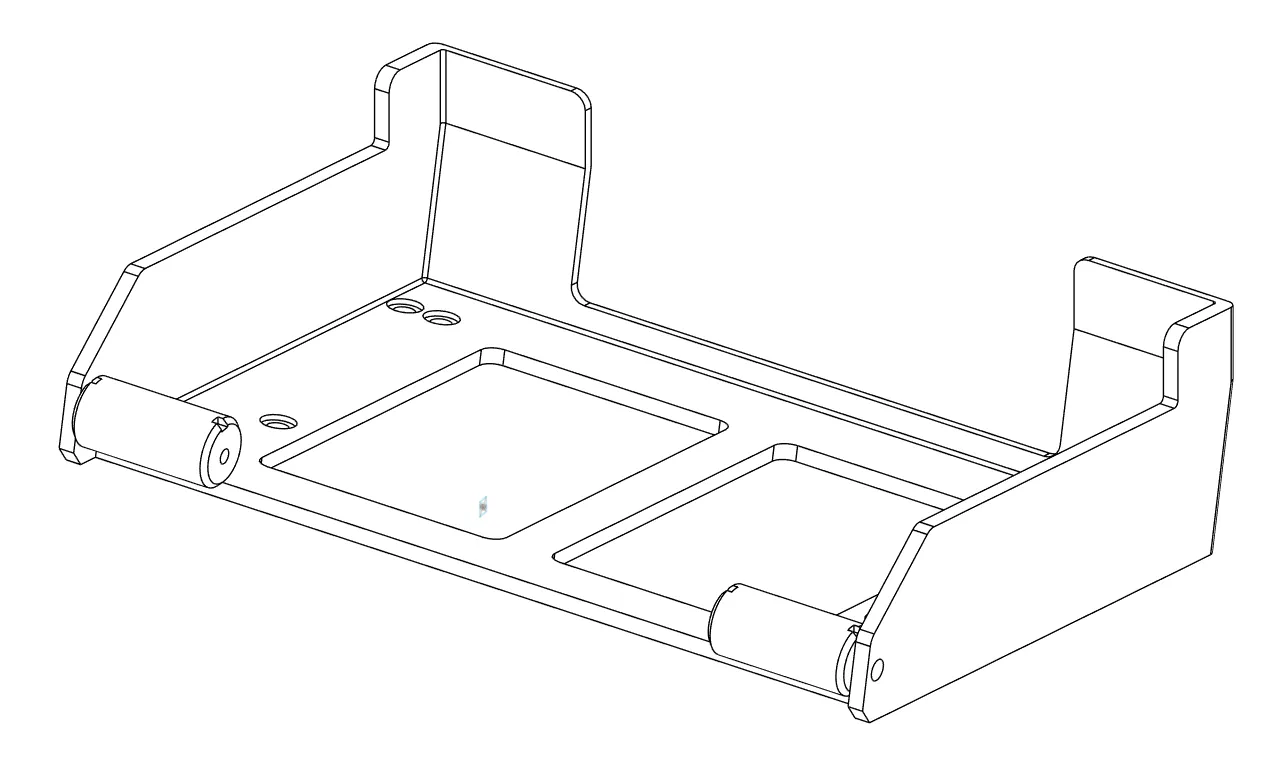
- Install the card tray, then secure with 4x M3 screws. (Note: there are extra holes in case threads are stripped)
- Install lid and dispense!
License
You shall not share, sub-license, sell, rent, host, transfer, or distribute in any way the digital or 3D printed versions of this object, nor any other derivative work of this object in its digital or physical format (including - but not limited to - remixes of this object, and hosting on other digital platforms). The objects may not be used without permission in any way whatsoever in which you charge money, or collect fees.
Comment & Rating (19)