5-Slot Build Plate Storage Box With CPU Fan Dryer


Print Profile(1)

Description
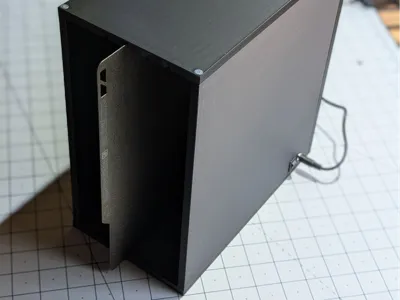
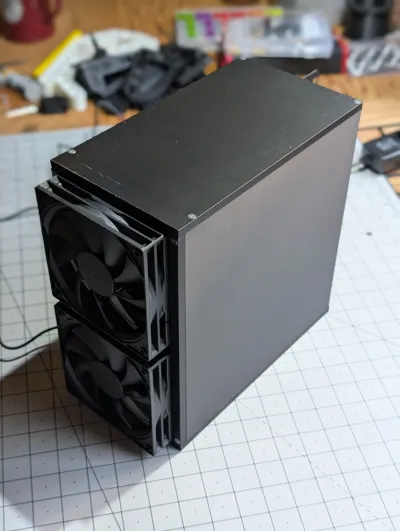
This is a 5-slot storage box designed to securely hold build plates. My main goal was to create a sturdy feeling organizer to keep my extra build plates while out of rotation. I designed it with tight fitting slots that hold the plates securely, making it easy to slide them in and out without them rattling around or touching each other.
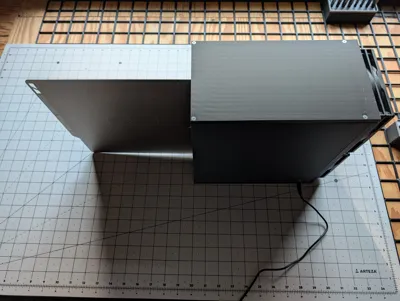
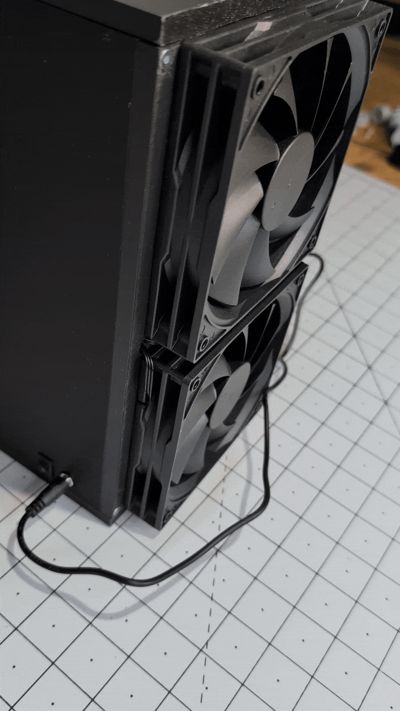
As an added feature, you can mount two 120mm computer fans, a power switch, and a barrel jack to turn the storage box into an active dryer. I try to wash my build plates regularly, and this helps keep them moisture free.
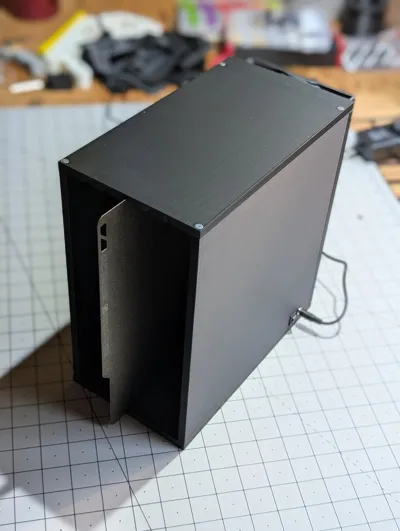
The unit is assembled from five main pieces that bolt together using M3 heat-set inserts and bolts for a solid, clean finish.
Key Features:
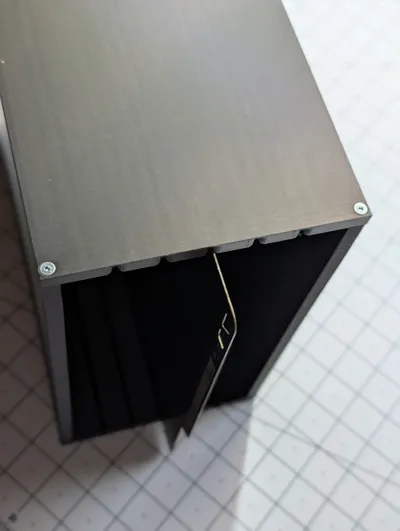
- 5-Slot Storage: Securely holds up to five standard build plates (e.g., 256mm Bambu Lab plates) vertically.
- Easy Access: The slots are spaced to allow for easy retrieval and insertion of plates.
- Optional Active Drying: Can be built as a simple storage box, or you can add two 120mm fans to actively dry plates after washing.
- Bolt-Together Design: The 5-piece body assembles for a strong and rigid final product.
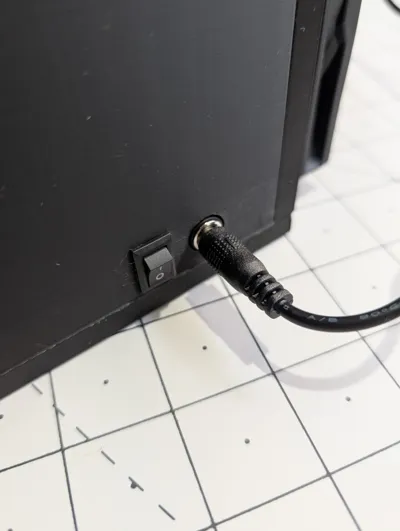
- Integrated Mounts: If you add the drying feature, there are cutouts for a barrel jack and rocker switch.
Required Hardware:
- For Assembly:
- 12x M3 Heat-set Inserts
- 12x Flat Head M3 Bolts x 16mm LG.
- For Optional Dryer Feature:
- Two (2) 120mm computer fans (e.g., 12V)
- One (1) DC Barrel Jack (e.g., 5.5mm x 2.1mm)
One (1) Rocker Switch (this is what I used)

- A power supply (e.g., 12V 1A)
- Wire for connecting components
Printing Recommendations:
- Material: PLA or PETG.
- Orientation: The 4 main body pieces are printed upright due to thei size. The rear fan mount is printed face down.
- Supports: No supports should be needed. Brims are necessary due to the vertical orientation.
- Walls/Infill: 2 walls and 15% infill. 100% is used around holes and features for more stability while bolting together.
Assembly and Wiring Instructions
Quick Safety Disclaimer
Please be careful when working with electricity, even low-voltage 12V DC.
- Double-check all connections for polarity (positive/negative) before plugging in the power. I found some YouTube tutorials for this (you will need a multi meter).
- Insulate all connections with heat shrink tubing or electrical tape to prevent short circuits.
- Soldering is ideal for secure connections. However you may use whatever connectors you prefer.
- I am providing these instructions for informational purposes. You are responsible for your own work and safety.
Required Materials
- Your 3D printed parts
- Two 120mm computer fans (12V, 2-wire is simplest)
- DC Barrel Jack (Panel mount, e.g., 5.5mm x 2.1mm)
- 2-Pin Rocker Switch
- 12V DC Power Supply (with a matching barrel plug)
- Wire (22 AWG or similar is fine)
- Soldering Iron & Solder (or alternate connectors)
- Heat Shrink Tubing
- Wire strippers/cutters
- Heat set inserts - M3
Step 1: Identify Your Component Pins
Before you cut or solder anything, know your connections.
- Fans (3-wire): You will have a positive wire, a negative wire, and 1-2 other wires (see below).
- Red is Positive (+)
- Black is Negative (-)
- (If your fans have 4 wires, you still only only need the Red (+) and Black (-). The yellow/blue wires can be taped off or cut short).
- DC Barrel Jack: These have 2 to 3 pins. Look at the bottom.
- The pin that connects to the center hole is typically Positive (+).
- The long pin that connects to the outer sleeve is typically Negative (-).
- If there are three pins, the third pin is a switched-ground. We will not use this pin.
- For a 2 pin jack, you may need to test the polarity to determine which pin is positive.
- 2-Pin Switch: For a simple on/off switch, there is no polarity. One pin is "in," and the other is “out.”
Step 2: Assembly & Wiring Instructions
We are going to wire the fans in parallel and use the switch to interrupt the positive wire.
Step-by-Step Instructions:
- Install Heat set inserts
- Before doing any wiring, install the 12 heat set inserts in the appropriate holes in the frame pieces.
- Mount Components:
- Before you solder, mount the fans, barrel jack, and switch into their slots in your 3D printed parts. This makes it much easier to measure your wire lengths.
- Prepare the Fans (Parallel Connection):
- Take the two Red (+) wires (one from each fan). Cut them to a comfortable length.
- Twist them together with a new piece of red wire (this will be your main positive wire).
- Solder these three wires together and cover the joint with heat shrink.
- Do the exact same thing for the two Black (-) wires. Twist them with a new piece of black wire, solder, and cover.
- You now have one red wire and one black wire coming from your "fan bundle." Tuck this through the provided hole in the rear fan plate.
- Wire the Positive (+) Side:
- Solder a wire from the Positive (+) pin of the DC Barrel Jack to one of the pins on your Rocker Switch.
- Solder the Red (+) wire from your "fan bundle" (from Step 2) to the other, empty pin on your Rocker Switch.
- Wire the Negative (-) Side:
- Solder the Black (-) wire from your "fan bundle" (from Step 2) directly to the Negative (-) pin of the DC Barrel Jack.
- Final Wiring Check & Tidy Up:
- That's it! The circuit is complete. The negative side is always connected, and the switch turns the positive side on and off.
- Tuck your wires neatly into the enclosure.
- Plug in your 12V power supply and test the switch. Both fans should turn on and off together. If the fans don't turn on right away after testing the switch, power off immediately and verify everything is correct.
- Final box assembly
- With all wiring complete, begin wiring all frame pieces together. I wired in the following order:
- Rear plate to side plate with electronics
- Rear plate to other side plate
- Bottom
- Top
- With all wiring complete, begin wiring all frame pieces together. I wired in the following order:
License
You shall not share, sub-license, sell, rent, host, transfer, or distribute in any way the digital or 3D printed versions of this object, nor any other derivative work of this object in its digital or physical format (including - but not limited to - remixes of this object, and hosting on other digital platforms). The objects may not be used without permission in any way whatsoever in which you charge money, or collect fees.
Comment & Rating (0)