Search models, users, collections, and posts
Ikea Kolppa - Sonoff switch Mod
IP Report


Print Profile(1)

0.2mm layer, 6 walls, 25% infill
Designer
44 min
1 plate
Open in Bambu Studio
Boost
5
8
0
0
1
0
Released
Bill of Materials
List other parts
- Ikea Koppla x 1:
- Sonoff Mini x 1:
- Cutting tools x 1: in order to cut Ikea Koppla's plastic
- Spring, 4x10mm x 2: 4x10mm springs for the button
Description
Mod to convert an Ikea Koppla power strip into an smart power strip by using a Sonoff Mini relay controller.
DISCLAIMER:
- ALL THESE STEPS SHOULD BE DONE WITH THE STRIP UNPUGGED FROM POWER!!
- THESE MOD WILL VOID YOUR WARRANTY ON BOTH, IKEA KOPPLA AND SONOFF MINI DEVICES.
Requirements:
- Ikea Koppla
- Sonoff Mini
- 2x springs, 4x10mm
- Cutting tools (in order to cut Ikea Koppla's plastic).
Steps:
- Print all pieces of the mod.
- Cut a 22x28mm rectangle, 1mm at the end of the screw holes, from side to side. Use the cover printed part to draw and check the size.
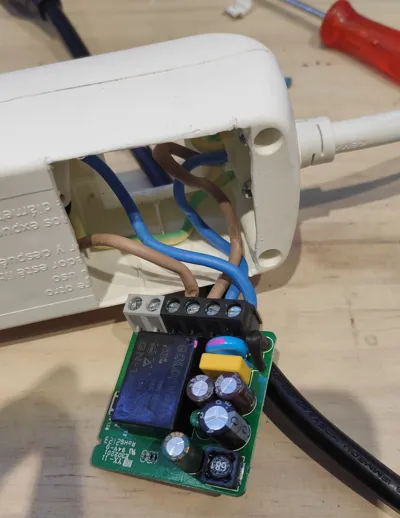
- Cut the power strip internal cables and remove the power switch
- Remove the Sonoff Mini plastic cover releasing the mainboard, and connect the cables to the Sonoff Mini using the Sonoff wiring diagrams.
- Attach the Sonoff Mini mainboard to the cover printed part and attach both into the power strip.
- Glue the two springs into the power button holes.
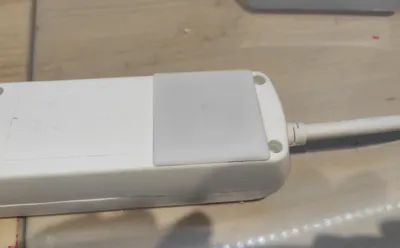
- Insert the power button into the power button frame
- Attach the power button frame into the Ikea Koppla power button hole so the button leg matches the sonoff switch button
Refer to the images in case of doubts.
License
This user content is licensed under a
Creative Commons Attribution-Noncommercial-Share Alike
Comment & Rating (0)