Illuminated Happy Halloween Sign


Print Profile(1)

Bill of Materials


Description
Boost Me (for free)
Any support is greatly appreciated! It helps keep me motivated to develop new models, and every bit helps to get free filament. Thank you so much in advance!
Allinonedesign
3d Printed Creations
Help me reach 200 followers 🙌
Follow now to unlock commercial licenses & support the journey, thank you!
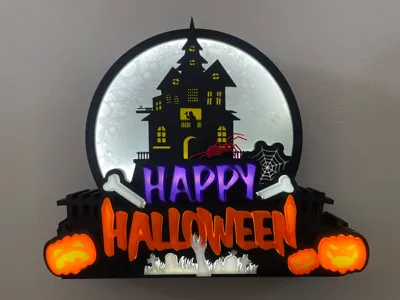
🎃 Illuminated “Happy Halloween” Sign – Wall or Shelf Display
Description:
Light up your spooky season with this glowing 3D “Happy Halloween” Sign!
Designed for versatility, this festive decoration can stand proudly on your desk, a table top, or windowsill, or be hung on the wall using the built-in screw hole cut-outs.
Featuring bold raised text, grinning pumpkins, creepy red spiders, cobwebs, and zombie hands clawing from the graveyard, this sign packs all the Halloween spirit you need! Add optional LED strip lighting for a chilling, illuminated glow that brings your haunted display to life.
Features:
• Raised “Happy Halloween” text with pumpkins, spiders, webs & zombie details 🕸️
• Built-in screw holes for easy wall mounting
• Flat, stable base for shelf, table top, or windowsill display
• LED-ready back panel for battery-powered light strips (see LED link below)
• Creepy cut-out face on the back
• Print-friendly design – minimal supports required
• Separate insert parts for single or multicolour printing, easy assembly and glue
Assembly Overview:
- Print all included parts.
- Ensure to remove all support material from the lips of the parts and inside the Halloween/graveyard hand.
- Glue the pumpkins, text, spider webs, and bones into place on the back of the faceplate, centring the parts within the whole.

- Attach the yellow insert behind the house windows, ensuring full coverage.
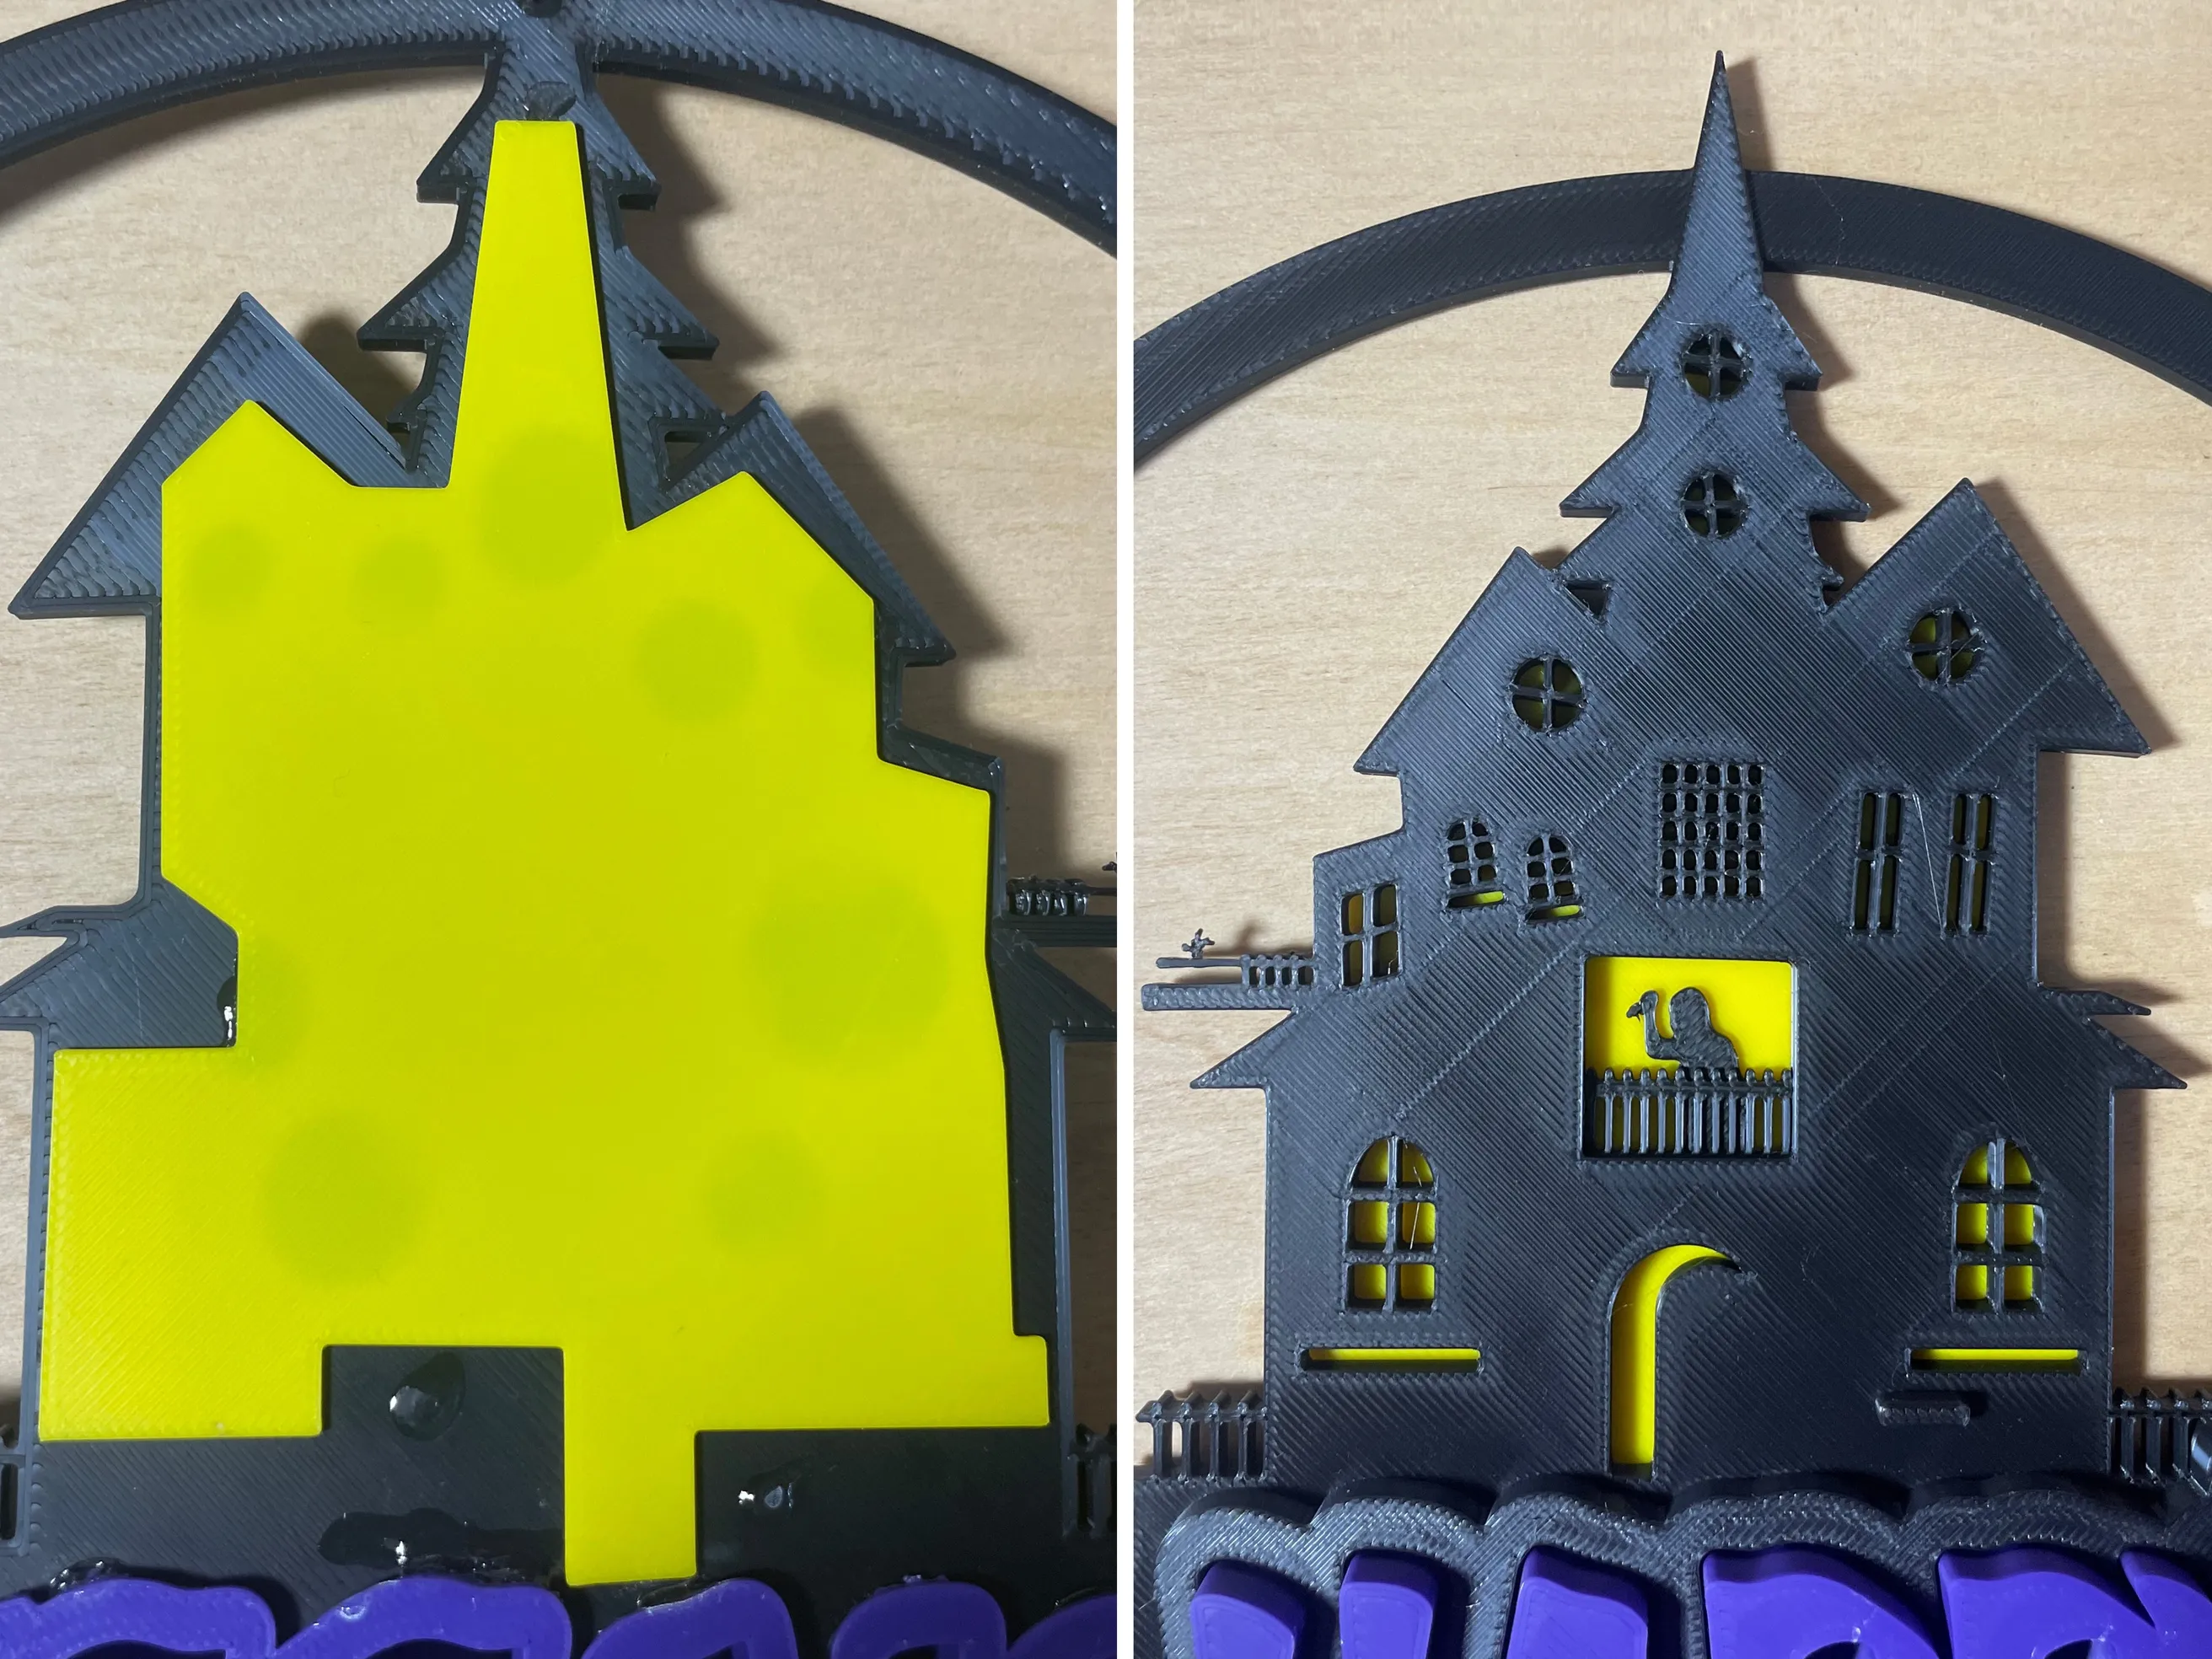
- Align and glue the lithophane moon background so it sits flush with the inner circle, web, and text. (Turn the faceplate right side up and place glue on the raised lip and align the moon to the web and bones.)


- With the faceplate right side up and glue in the small filler pieces between the letters, (easier if you use tweezers or bullnose pliers):
- A, P, P in “Happy”
- A, O, E in “Halloween”
- One piece in the gravestone - (See Photo). This can be tricky, but it will work fine without.

- Glue the spider on using the locating pin.

- Install the LED strip inside the back box, and feed the cables through the hole. Remove the backing tape and attach it around the inside edge using the strip’s built-in adhesive and press firmly to secure, as shown in the picture. Finally, glue the excess cable to the clips, ensuring to leave enough cable at the back to remove the battery box to replace batteries.


💡LED component used: “Neon 3AA Battery-Powered COB LED Strip Lights – 5V – 1m White/Cool from Temu"
• Temu Link - White - Item below
• Amazon.co.uk Link - Cold White
• Amazon.com - Natural White
- Join and glue the faceplate and back box using the 3-pin-and-slot alignment points.

- Power on your LED strip and enjoy the eerie glow of your Halloween masterpiece!
Perfect for:
🎃 Halloween decor, spooky displays, or lighting up your desk, wall, or windowsill.
Check out the rest of my haunted 3D arsenal on MakerWorld; new creepy creations lurk in all the time.
👻 Hit BOOST, drop a spell (or a comment), and rate it if you’re feelin’ ghostly good.
♥ All prints are FREE – but your support keeps the cauldron bubbling. Stay spooky. ♥
Bring the spooky vibes home today - Happy Halloween!
Documentation (1)
License
You shall not share, sub-license, sell, rent, host, transfer, or distribute in any way the digital or 3D printed versions of this object, nor any other derivative work of this object in its digital or physical format (including - but not limited to - remixes of this object, and hosting on other digital platforms). The objects may not be used without permission in any way whatsoever in which you charge money, or collect fees.
Comment & Rating (0)