Skull Mask for Day of the Dead


Print Profile(1)

Description
3D model description
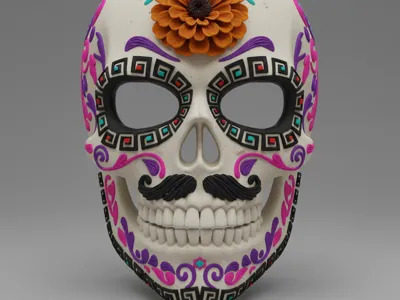
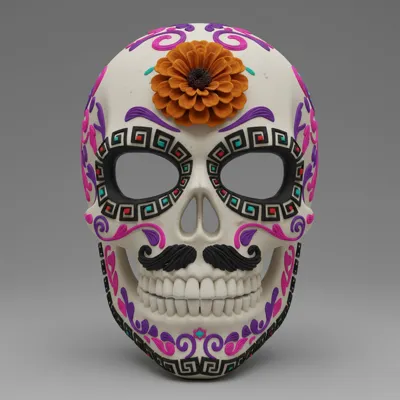
Celebrate one of Mexico's most beautiful traditions with this skull mask inspired by the Day of the Dead!
I have designed this model to capture the vibrant and colorful essence of sugar skulls. With intricate filigree details, a classic mustache, and a marigold flower on the forehead, this piece is perfect for wearing as a mask during your celebrations or for decorating your offering or altar.
The design is optimized for 3D printing and is a perfect canvas for you to unleash your creativity by painting it. Print it in a base color like white or bone and customize it with the colors you like best.
I hope you enjoy printing and customizing this piece as much as I enjoyed designing it. I would love to see photos of your creations!
3D printing settings
General Recommendations
Material: PLA is ideal for its ease of printing and excellent details. A white, bone, or light gray color is perfect to use as a base for painting.
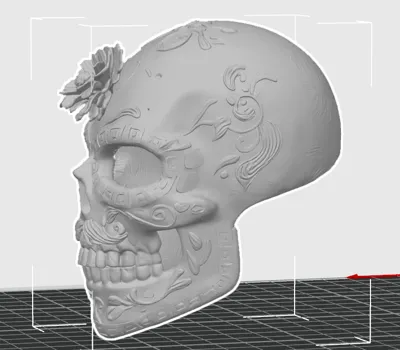
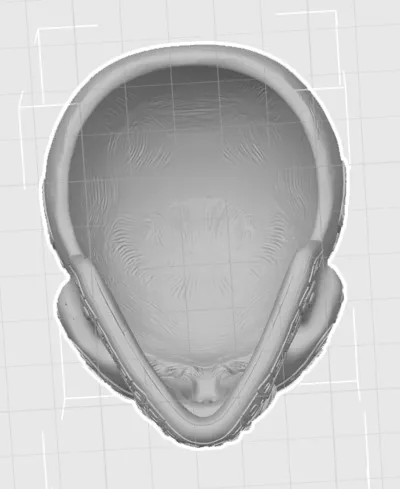
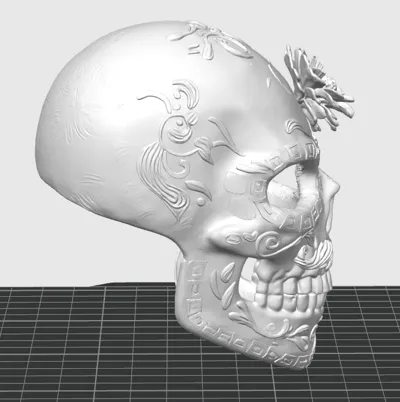
Orientation: It is recommended to print the mask lying on its back to minimize the need for supports on the front face and preserve details.
Scaling: If you plan to use it as a mask, measure the width of your face (temple to temple) and scale the model in your Slicer software to fit comfortably.
Suggested Printing Configuration
Layer Height: 0.12mm or 0.16mm. A thin layer height is crucial to capture all the ornamental details of the design.
Infill: 15% to 20% is more than enough. The infill pattern can be Grid or Cubic.
nozzle: 0.4mm (standard).
Supports: Yes, you will need supports.
Placement: "Touching build plate".
Support Type: If your Slicer allows it, "Tree Supports" are excellent for this model, as they are easier to remove and leave fewer marks. Otherwise, normal supports will work fine.
Key Support Areas: Mainly under the eye arches, nasal cavity, and chin.
Printing Speed: 40-50 mm/s. A moderate speed will help fine details print with greater precision.
Post-Processing and Finishing Instructions
Removing Supports: Carefully use tweezers or small pliers to remove all support structures. Be patient so as not to damage the details.
Sanding (Optional): If you are looking for a super smooth finish for painting, you can gently sand the surface with fine-grit sandpaper (220 and then 400).
Primer: Apply a thin and even coat of spray primer for plastic. This helps the paint adhere much better and reveals any imperfections that need to be sanded.
Painting: The most fun part! Use acrylic paints and brushes of various sizes. Use fine brushes for the small details of the filigrees and eyes. Use my render as inspiration or create your own color combination!
Varnishing: Once the paint is completely dry, apply a coat of clear spray varnish (it can be matte, satin, or glossy) to protect your work and give it a professional finish.
Final Adjustment (for mask): If you are going to wear it, you can glue an elastic band to the inner sides of the mask to secure it.
Comment & Rating (4)