RC shock absorber 8C


Print Profile(1)

Bill of Materials


Description
Hey everyone, I've build this RC shock absorber type for one of my future projects. I needed 2 specific sizes for it, so I decided to build them myself.
Please read the complete description.
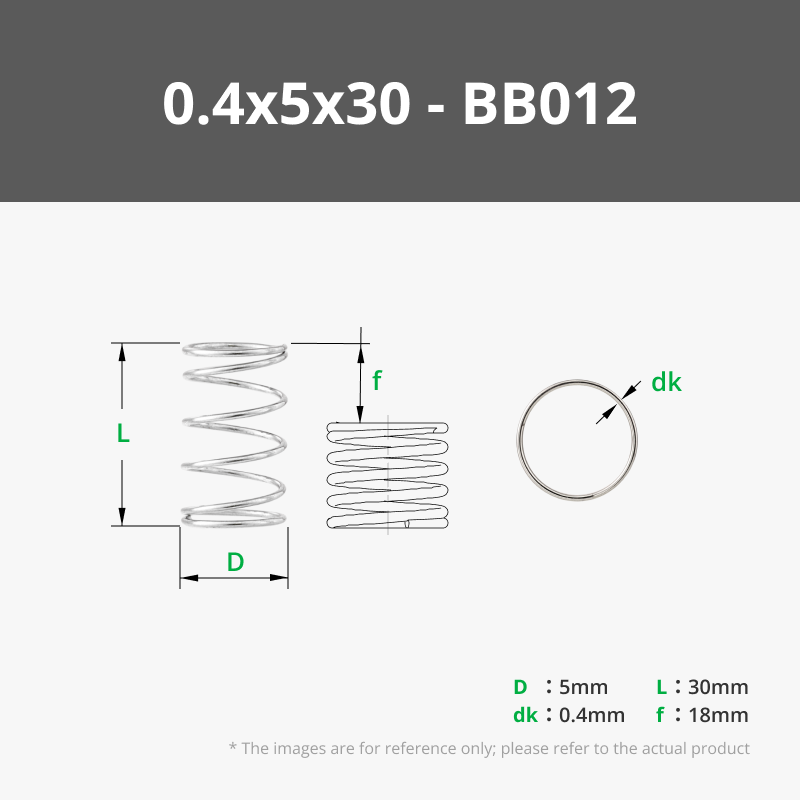
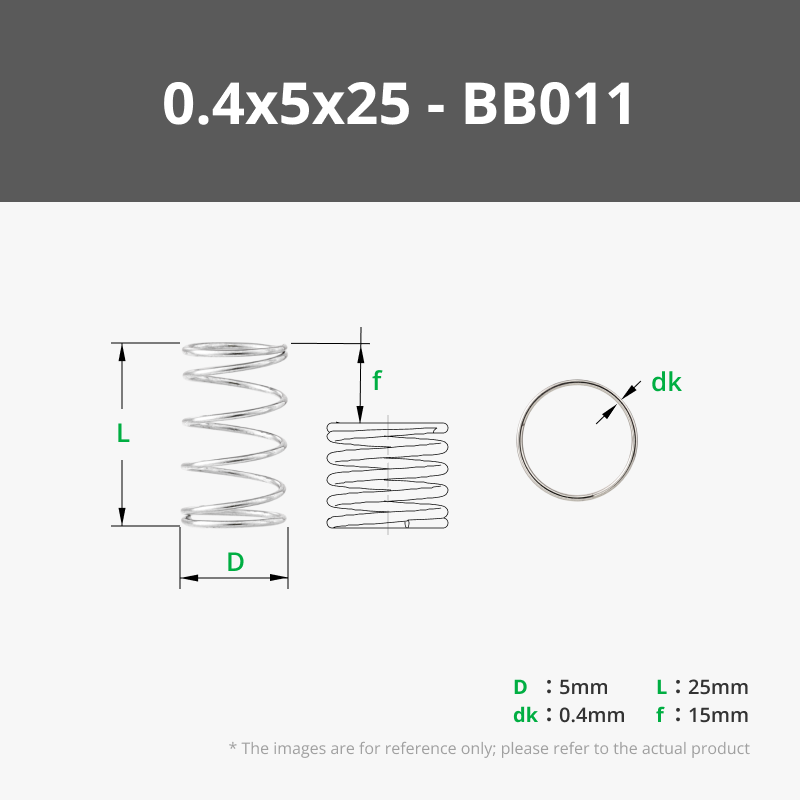
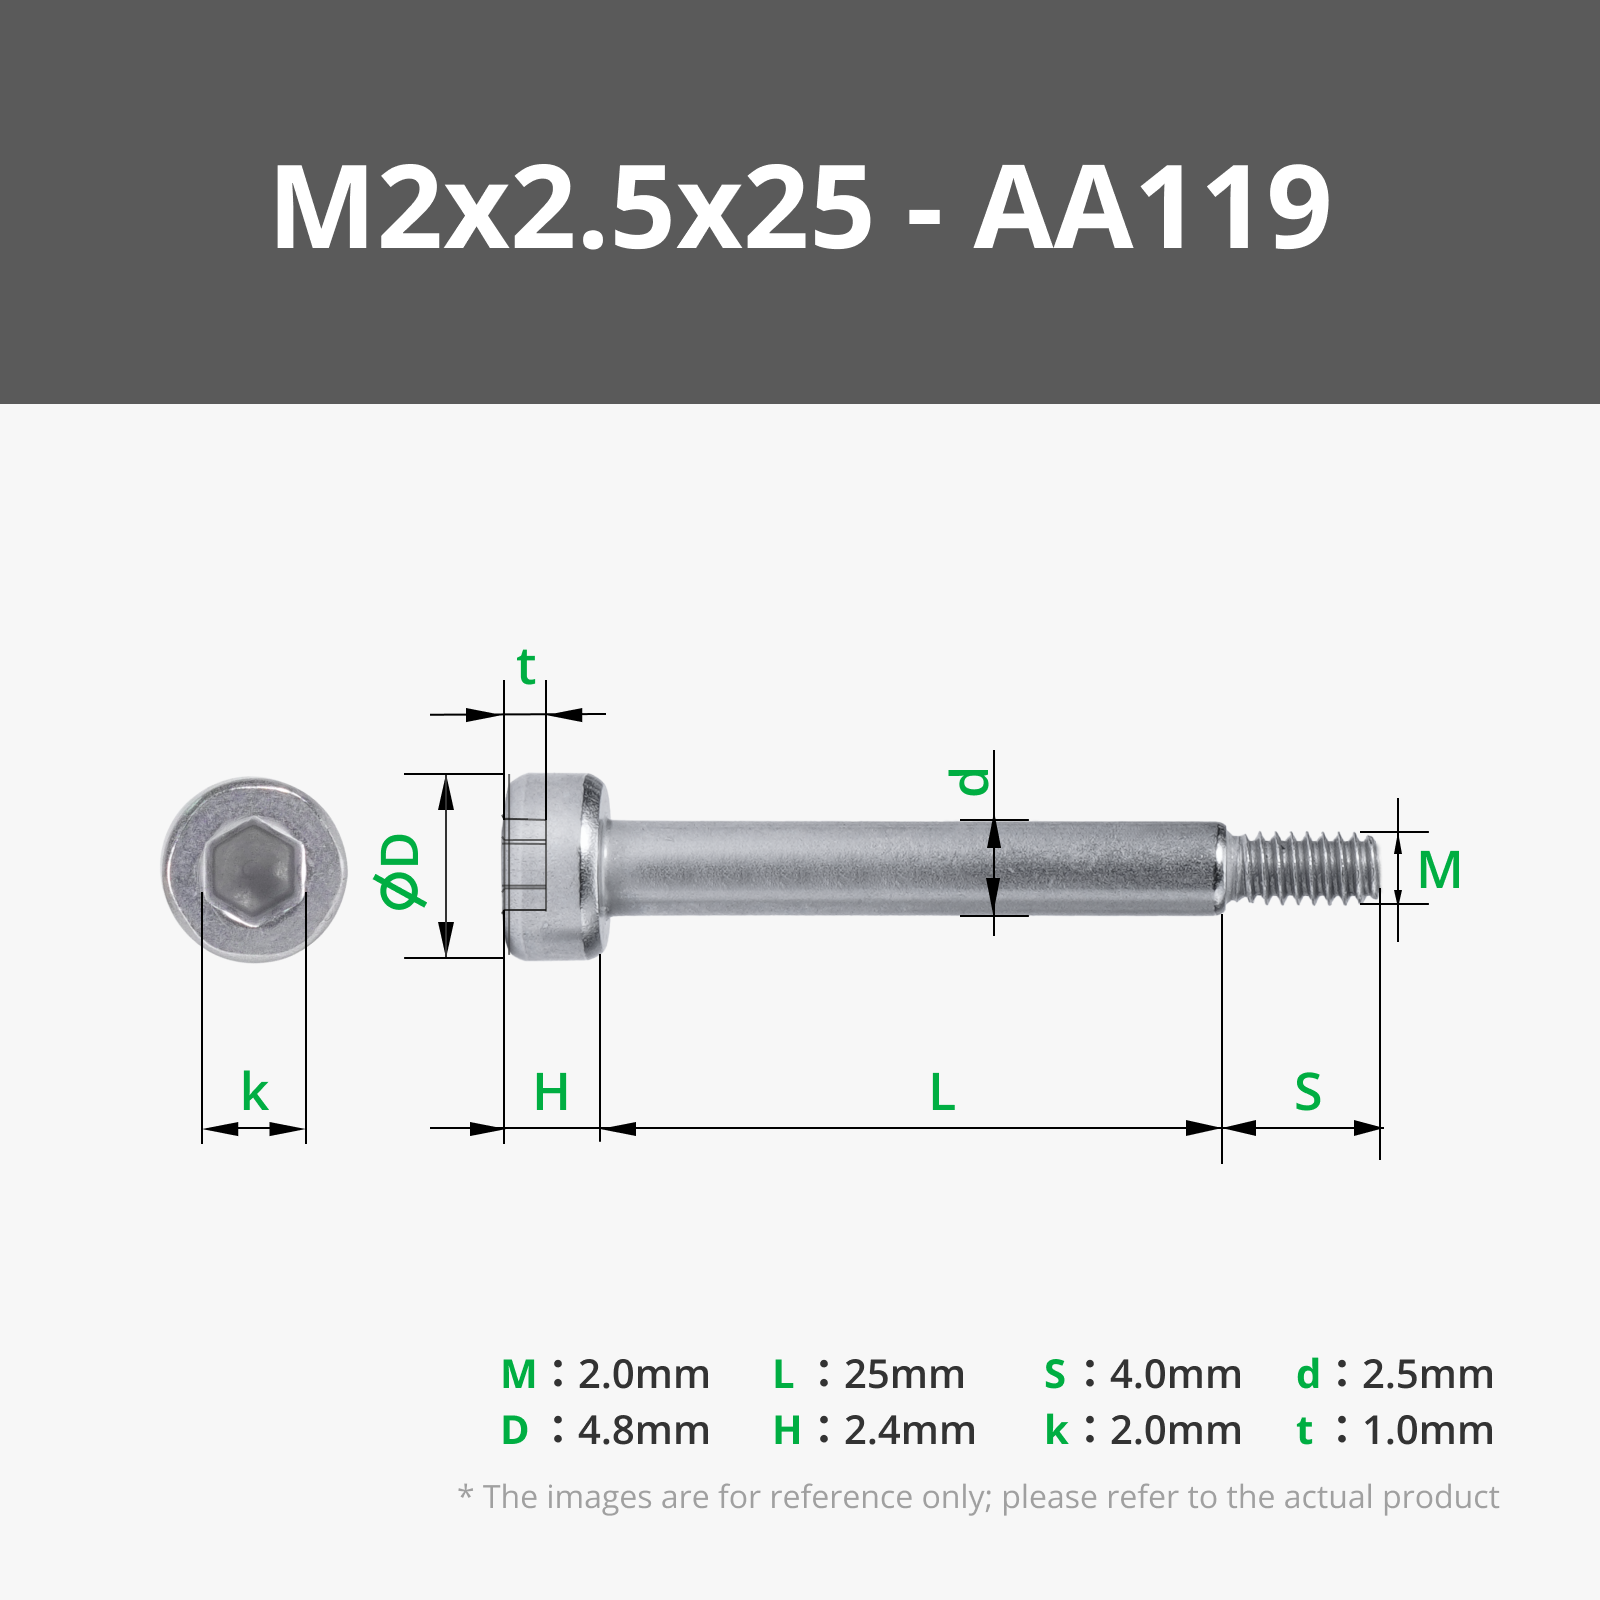
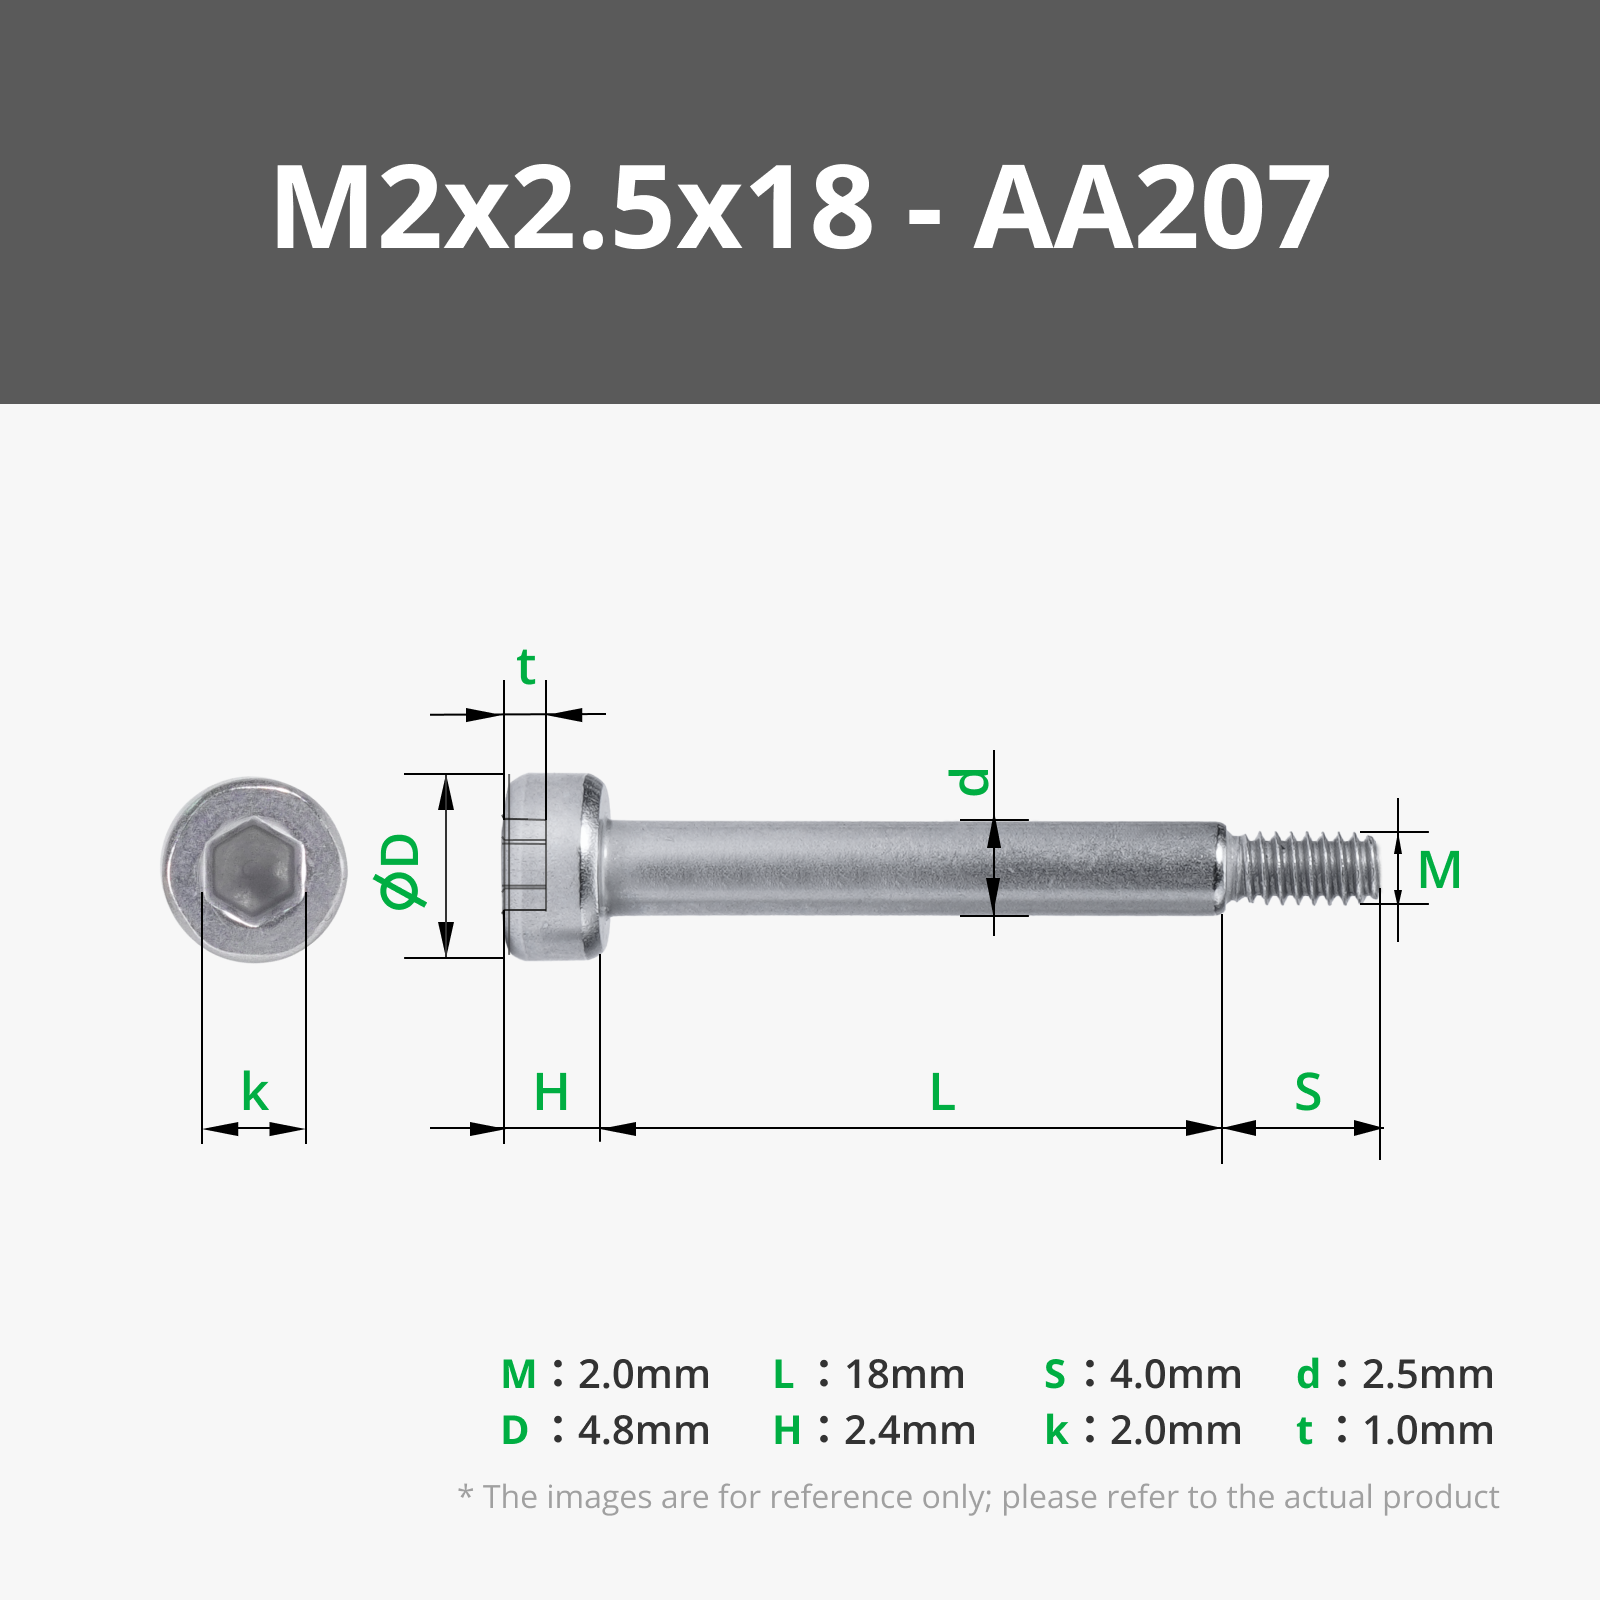
There a 4 sizes available (see the images) for more details:
- 80 mm long with 76mm between the mounting holes
- 71mm long with 67mm between the mounting holes
- 60 mm long with 56mm between the mounting holes
- 51 mm long with 47mm between the mounting holes
The full diameter of the shock absorber is only 8mm, if your printer setup is good, everything should be a tight fit at first. PLA will give way a bit after a few compression cycles.
Hope it fits one of your projects too :)
I would recommend printing the cylinder cap and the endcap from a more durable material such as ASA or ABS for more strength.
This model uses hardware parts from Bambu Lab.
My recommendations are:
-For the 30mm cylinder use a 30mm screw and 30mm spring
-For the 25mm cylinder use a 25mm screw and 25mm spring
-For the 20mm cylinder use a 18mm screw and 20mm spring
-For the 15mm cylinder use a 14mm screw and 15mm spring
The thickness of the spring wire is up to you.
Assembly is pretty straight forward:
Step 1: Press the M2 threaded brass heat-insert nut into the endcap

Step 2: put the screw in the cylinder

Step 3: Slide the spring onto the screw

Step 4: Screw the endcap

Step 5: Screw in the threaded cylinder cap

DONE
If you like my 3D models, think about following me, I always have something cooking :)) in the mean time enjoy this model. Thanks!!
"Fuel for the Factory" – Keeping the printer (and the person) running at 100% https://ko-fi.com/abe3d
Boost Me (for free)
....or not.... It's up to you! Have fun!
License
You shall not share, sub-license, sell, rent, host, transfer, or distribute in any way the digital or 3D printed versions of this object, nor any other derivative work of this object in its digital or physical format (including - but not limited to - remixes of this object, and hosting on other digital platforms). The objects may not be used without permission in any way whatsoever in which you charge money, or collect fees.
Comment & Rating (6)