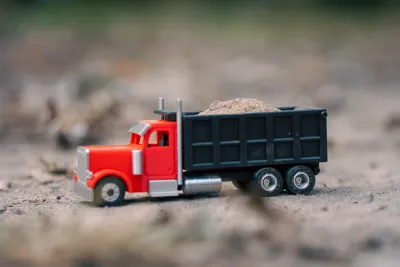
Peterbilt 379 1/64 Scale Dump Truck (No AMS)


Print Profile(1)

Bill of Materials


Description
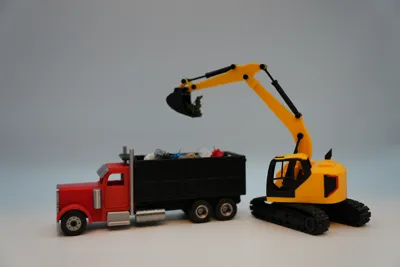
Get ready to put your excavator to work paired with this 1/64 Scale dump truck.
Modeled after a 379 Peterbilt.
This Model is the easiest build so far of my 1/64 scale series.
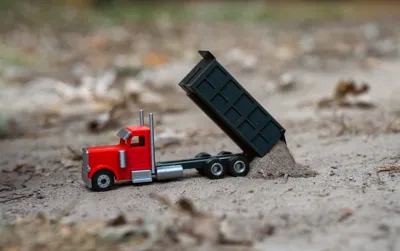
Featuring moving wheels, Detailed interior, Full range dump, Openable dump gate that locks closed.
Boost Me (for free)
Support me for Free, I love building these models for y'all to enjoy and boosts help a ton.
Parts and Supplies needed.
x2 16mm M2 bolts
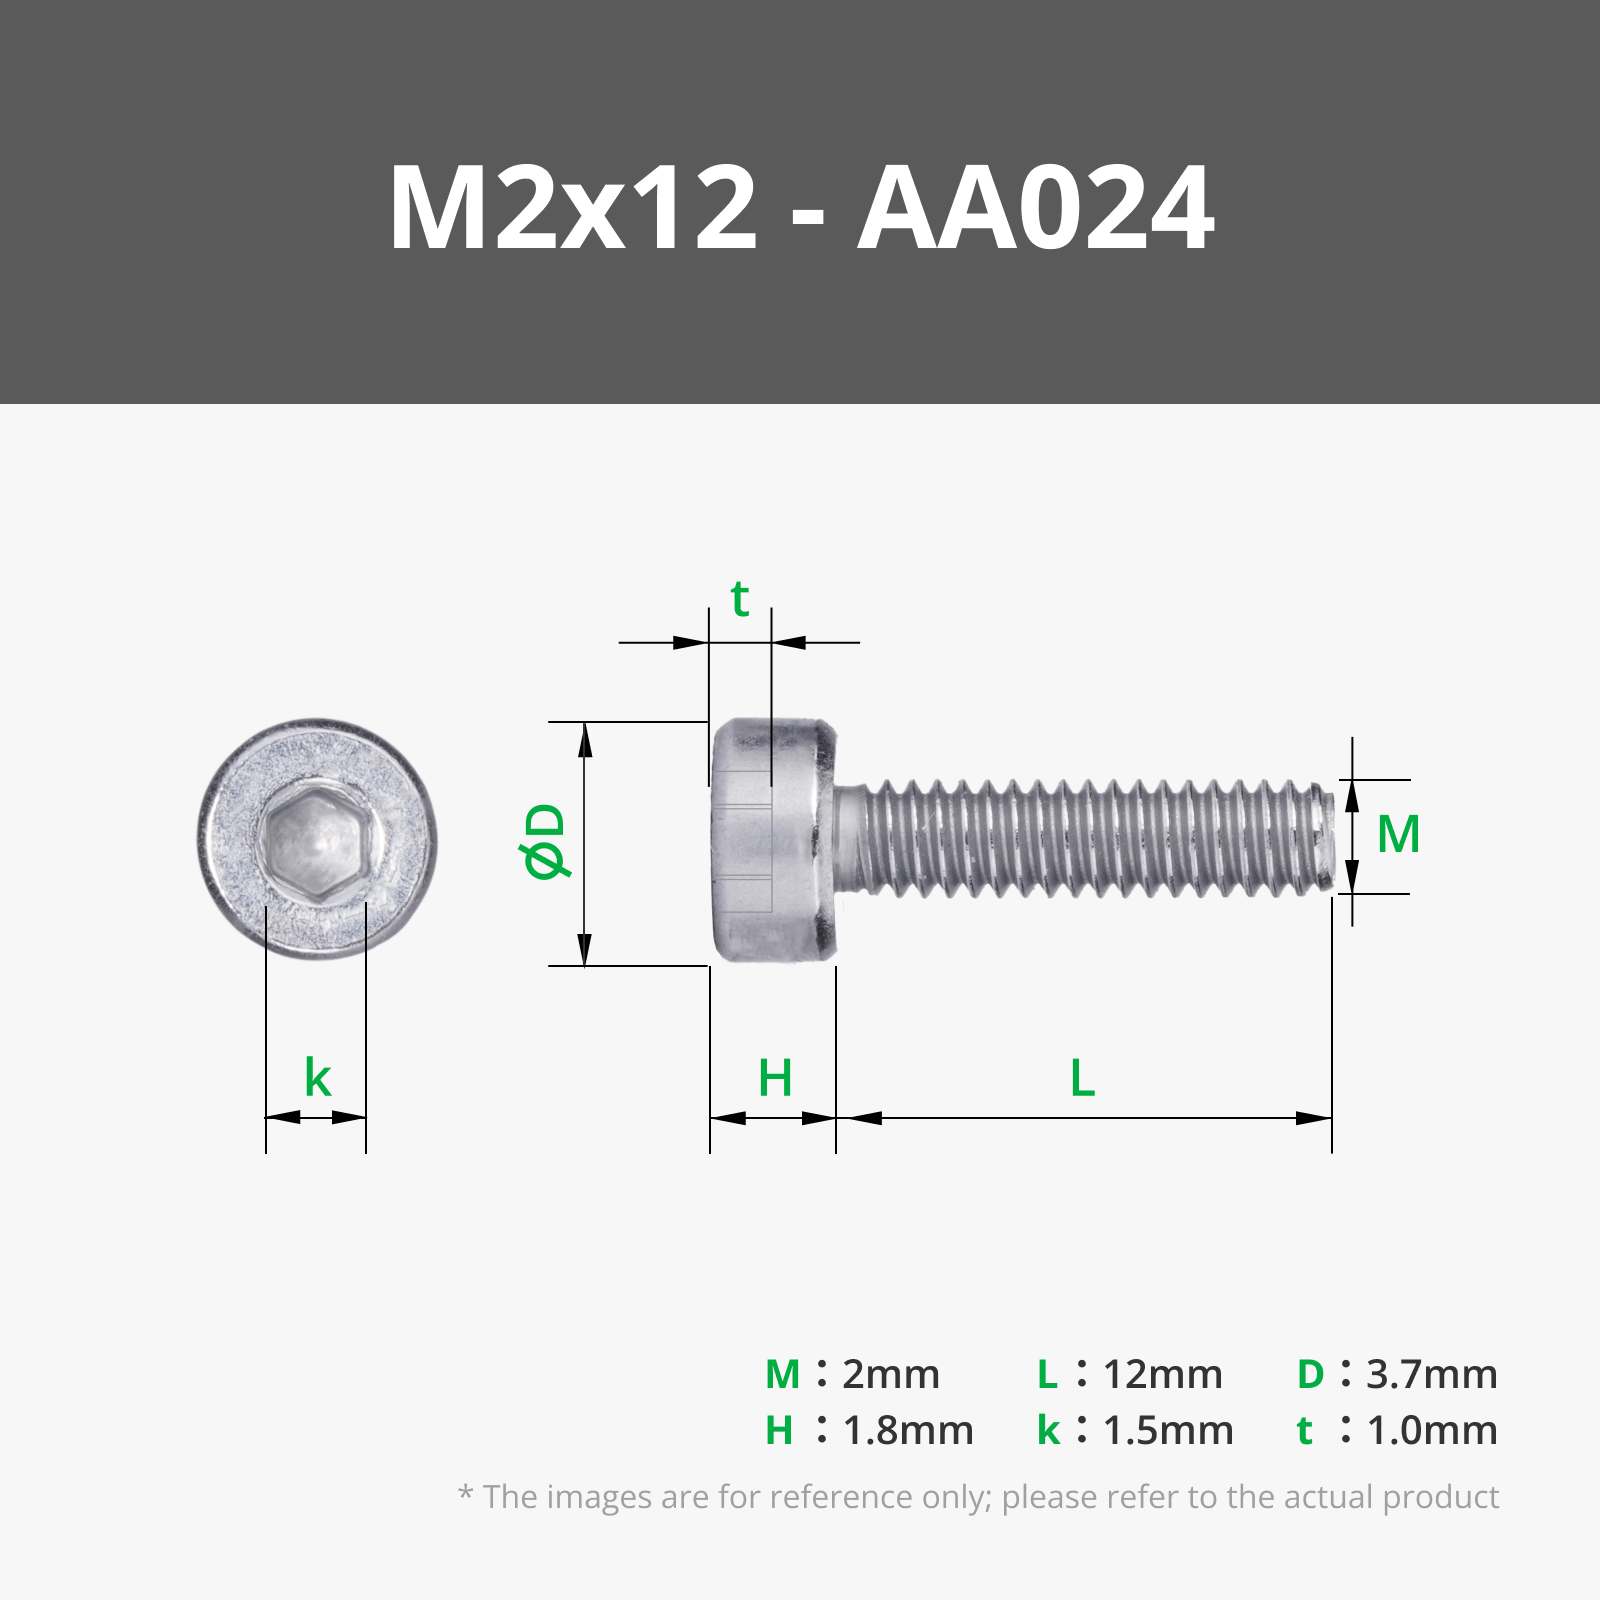
x6 12mm M2 bolts
x2 10mm M2 bolts
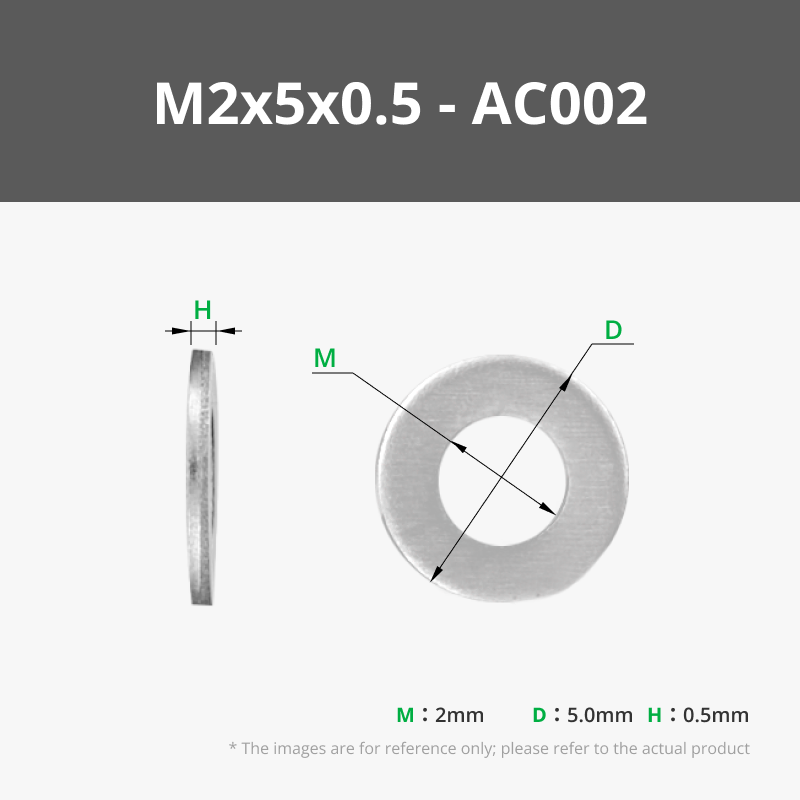
x6 M2 Washers
x8 M2 Nuts
Super Glue
I bought this kit off amazon that has the hardware you need.
Stay tuned for more.
Check out my excavator https://makerworld.com/en/models/1727059-fully-functional-1-64-scale-excavator-no-ams#profileId-1833904
Truck Assembly:
Glue your lights into the holes in the grill then glue the grill to the hood of the truck, Then glue the wheel fenders to the hood (bed side should be facing out (there is a little cut to go against the grill). Then glue the hood to the cab and line it up with the bottom and sides, next glue the steering wheel into the interior, apply some glue and insert it up in the cab make sure its not sticking out the bottom. Next there is a little cylinder that fits down in the frame glue that in place. Next put glue on the front of the frame and on that cylinder and on the hood and cab or the frame where that touches to glue it down. Next glue the steps on there is a bar that goes across the bottom to connect them to give it strength and to help line it up glue that bar to the frame with the steps being glued at the same time this part can be a bit tricky, next repeat that process with the fuel tanks, The air filters can be glued on straight and lined up or you can insert the smaller cylinders to help with placement, be mindful of the angle because they are different. Next put some glue on the exhaust and slide them into the frame, I applied a little glue to the exhaust where it meets the top of the cab. For the visor apply some glue to the visor or the edge of the cab and stick it on there is a hole in the middle of the top of the cab line that up and press the visor pin in it, you can adjust the angle you want it at then hold it till the glue dries enough.
Dump Assembly:
Glue the front of the dump to the top of the dump bed, line it up with the edges, Next glue the Dump cylinder cover into the space inside the dump bed to cover the cut out. Next insert 12 mm m2 bolts into the dump bed into the dump gate and tighten it to the stiffness you want. Next you are ready to connect your dump bed to the frame, doing one side at a time put a m2 nut in the cut out and insert a 10mm m2 bolt into the hole and tighten repeat process on the other side. Once done tighten them to be able to hold the amount of weight you want which could be more or less. This will make it harder to tip back but allow it to hold a load of sand or dirt up in the air. Once you figure out the tightness you want apply some glue to the nuts so they don't come off.
Wheels Assembly:
Take the tires and put them on the rims. Next take a front wheel and stick a 16mm m2 through it and stick it through the hole in the frame. then stick a washer over it and a nut on. Repeat this on the other side. Next do the same thing for the dual wheels on the back but use a 12mm m2 bolt and repeat that for each wheel. Next go back and tighten/loosen until they roll freely and apply glue to the nut so it doesn't come off.
Your build should be completed.
Post a picture of your builds I would love to see them.

Join the Webb Designs Patreon
Get closer to the design process and be the first to experience every new release!
Member Benefits
Early Access
Patreon-Exclusive Models
Behind-the-Scenes CAD Previews
Vote on Future Projects
Supporter Recognition
Have your name featured as an official Webb Designs Supporter
Supporters
- DPM Customs
- Katelyn Meyer
Boost Me (for free)
Your Support is Appreciated
License
You shall not share, sub-license, sell, rent, host, transfer, or distribute in any way the digital or 3D printed versions of this object, nor any other derivative work of this object in its digital or physical format (including - but not limited to - remixes of this object, and hosting on other digital platforms). The objects may not be used without permission in any way whatsoever in which you charge money, or collect fees.
Comment & Rating (49)