MX MASTER 3-3S External Shell

Print Profile(1)

Description
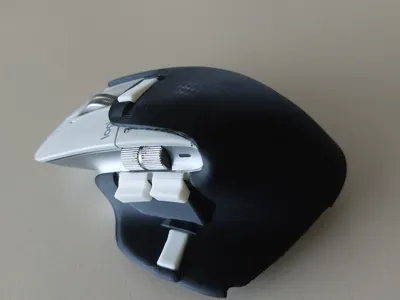
Some images of the project: at the address:
youtube.com/shorts/5bZDuyiMf3k
The video referenced above is not working, I don't know why. I'm providing another one here that I had made before, I will update it in the coming days, but this way you can get an idea of the project. I'm not at all used to making videos so please be indulgent…..
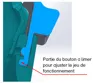
If you want to try this shell, you have the corresponding files. This is probably not the final version I will make, I still plan to improve it. However, after many trials, this model works well. Depending on your mouse, you will probably need to adjust the 2 side buttons a bit where I've provided supports, with a small file like a nail file you can create the operating clearance that suits you. see attached photo.
Even if it may require a little filing, this model is great, it's the one I've been using for a few days. It is obviously completely free. If you build this model, I'm open to your suggestions for modifying it.
The MX MASTER 3 may still have a bright future. The aging of the rubber surface is a problem that led to seeking its replacement with a very nice 3D Printed shell, but which requires disassembling and re-installing all components on the new part. The modifications I propose here are not at all motivated by the replacement of the original mouse surface, but by an improvement in its functionality. However, ultimately installing this new casing, directly on the original mouse, serves to hide any potentially damaged surface.
My problem with the original MX MASTER 3 or 3s mice
First, a remark: the gesture buttons, meaning the fact that with one button you can get a main action when released and 4 other actions with press-and-move north/south/east/west-release, is great. I immediately wanted to take advantage of it. But too often when manipulating the mouse, I had flaws in the execution of gestures; unwanted movements when pressing a button would trigger the associated gesture instead of the main function.
Indeed:
To reach the 2 buttons under the side scroll wheel, I have to lift my thumb from the side surface, bending it more or less to place it on one of these buttons. Often (if not always) while the thumb is lifted, there is an unwanted cursor movement. Thus, the cursor is no longer on the object one wants to select when the action defined for the button is triggered.
To activate the top button, the problem is even more obvious because you have to completely bend your index finger so that it can be above this button
For the button on the right under the thumb, the problem is that the effort required for activation and the not-accessible-enough position also often generate an inadvertent cursor movement.
The search for a solution.
From these tests with added wire shapes on the buttons, felt or foam pads, etc.... I arrived at a vision of the modifications I wanted where:
1: The thumb does not need to leave the support of the shell to activate the 3 buttons on the right side.
2: The top button is activated simply by extending the index finger (not a left click) that is lowered.
TOWARDS THE 3D PRINTER SOLUTION.
First of all, a big thank you to @Ziemniaczenka who produced a great model of the MX MASTER 3-3S
The transition to 3D printing was quite laborious.......Here is the latest current version.
For the side buttons (the 2 at the top under the scroll wheel and the one at the bottom under the thumb), they are all simultaneously in contact with the surface of my thumb. Thus, one only needs to force finger pressure on an area to trigger the button. The finger always remains supported on the mouse shell, on the vertical part under the 2 buttons.
For the top button, as previously mentioned, it is activated simply by extending the index finger. The button acts as a lever; the finger's effort, almost in line with the left-click button, activates the mouse button which itself is in line with the scroll wheel.
For the finger rest on the right side of the shell, I placed it just for comfort and also to give more rigidity to the part so that its engagement with the original mouse is well secured, it does the job well. There is something I had not anticipated and which suits me well, it is that once the mouse is held, the pressure on this finger rest and the other button-side supports mean that the hand hardly moves relative to the mouse anymore. I think this situation can suit many users. As soon as I have time, I also plan to try to complete this effect by using the CARPIO wrist rest proposed by: @MedoG in the modified configuration by @uodama which further ensures aligned wrist support.
Documentation (2)
Comment & Rating (2)