Search models, users, collections, and posts
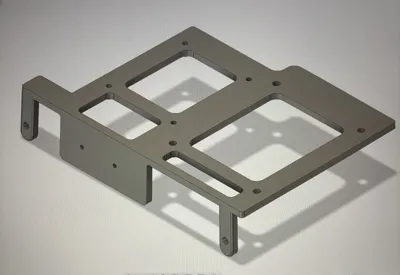
Baldrick8 Mount
IP Report


Print Profile(1)

0.2mm layer, 2 walls, 15% infill
Designer
1.4 h
1 plate
Open in Bambu Studio
Boost
2
10
1
0
14
4
Released
Description
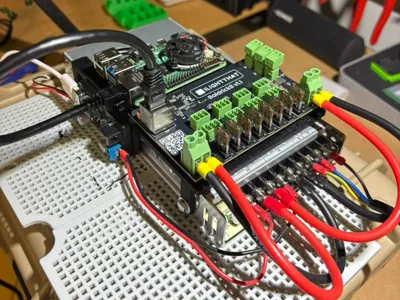
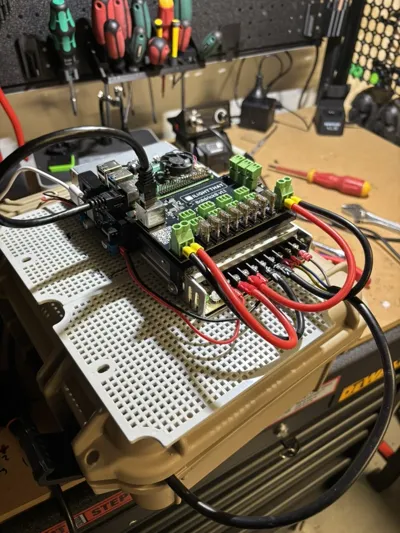
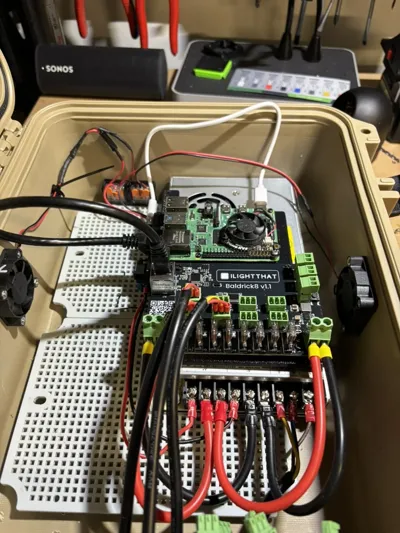
🔧 Baldrick 8 + Raspberry Pi 4 + Buck Converter + Meanwell PSU Mount
After spending way too long perfecting this instead of working on my light sequences 😅, I finally have a clean and functional mount that ties it all together!
🧩 What It Fits
- Baldrick 8
- Raspberry Pi 4
- 5V Buck Converter
- Meanwell PSU
🧰 Additional Supplies
- 2 × M4 x 8mm bolts – to mount the print to the PSU
- 4 × M3 heat inserts
- 4 × M2.5 heat inserts
- 4 × M3 standoffs (6×6 mm)
- 4 × M2.5 standoffs (6×6 mm)
- 4 × M3 x 6mm screws – to mount the Baldrick 8
- 4 × M2.5 x 6mm screws – to mount the Raspberry Pi
- Space provided for a 5V buck converter https://www.amazon.com.au/dp/B0D5V5YDC3?ref=ppx_yo2ov_dt_b_fed_asin_title
💡 Design Highlights
- Mounts to one side only to reduce the overall width
- Moves the Raspberry Pi away from the edge, allowing easy SD card removal even if the PSU is close
- Vent holes and raised standoffs to improve airflow and cooling
- Clean cable routing and solid mounting points for all components
🧱 Recommended Material
Printed in PETG – my Christmas is in summer, so it can get warm!
I recommend sticking with PETG (or other heat-resistant filament) due to the potential heat from the PSU and Pi.
License
This user content is licensed under a
Creative Commons Attribution-Noncommercial-Share Alike
Comment & Rating (1)