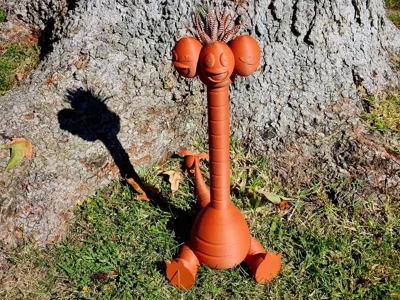
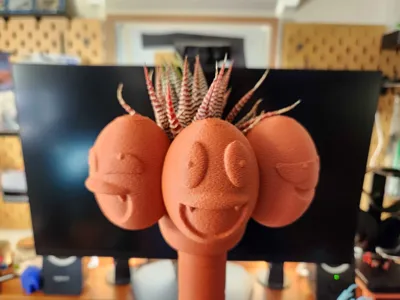
Alolan Exeggutor Planter


Print Profile(1)

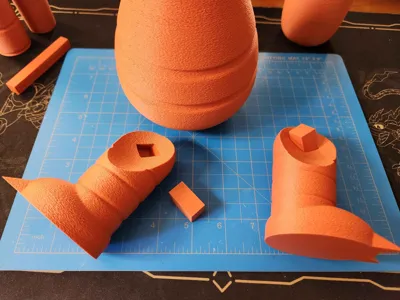
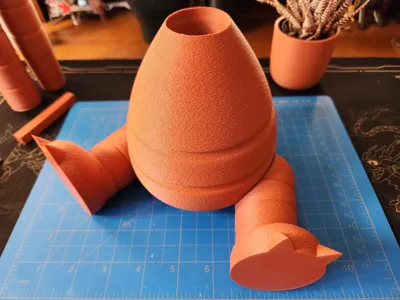
Bill of Materials
- Super Glue x 1: Use as needed
Description
A large planter for a small plant! This funny planter fits small 2inch potted plants. Behold my (winning!!!!) entry to the 2nd ever Pumpkin Jam based on the theme "length". I am a new modeler who's only had a 3d printer since July. This is my 1st self sculpted and printed model made with Nomad. This modeling jam really challenged me on learning how to create shapes like the faces and the tail. I am especially proud of the cute fruit on the tail and the nice shape of the legs. I also learned how to create a large multi-piece project and how to create the connector pieces to put it all together.
11/14/2025 Update: Implemented fuzzy skin painting per feedback from the competition as well as labeled the pegs for ease of assembly
Boost Me (for free)
If you like this print, please consider boosting it! It would mean a lot to a new designer.
This project was printed in bambu PLA in Matte terracotta with a fuzzy skin texture on a coolplate supertack with supports.
To Assemble:
- Starting with the plate 1 objects, Insert the 26mm long pegs labeled legs into the matching holes in the legs. These are the 2 pegs on the front left of the built plate.
Connect the legs to the matching holes on the body ensuring they point outward so the eggy boy is sitting

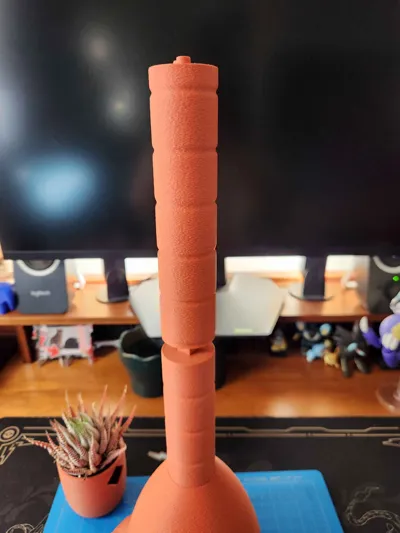
Connect the neck pieces using the 80mm long peg, make sure they line up nicely

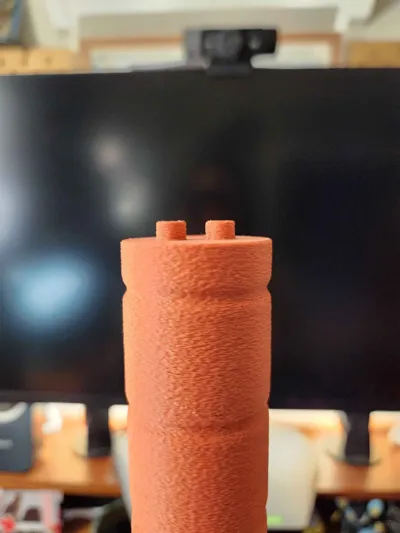
Insert the neck assembly into the body, be sure the top pegs look like this from the front.

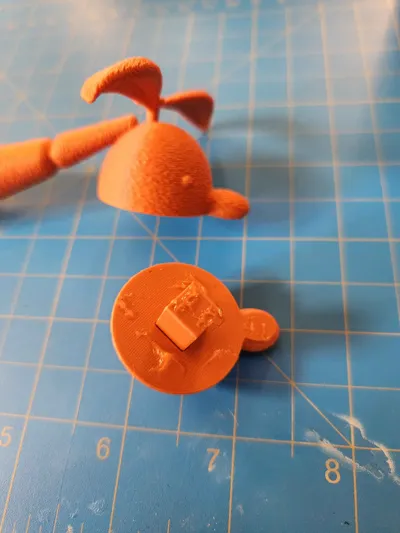
Moving on to plate 2, connect the halves of the tail fruit with the 20mm long peg labeled fruit found at the front left of the build platel. You may need a little super glue here, ensure it doesn't spill out the edges. Insert the leaves into the center top hole. It is a tight press fit but please be careful as this piece is a little fragile due to its shape. I recommend using a thin object like a pen to push on the stem.

- Connect the fruit assembly to the tail via the peg at the end of the tail. A little super glue helps it bond.
- Connect the completed tail assembly to the body with the 40 mm peg labeled tail found at the back right of the plate.
- Connect the planter to the pegs at the top of the neck.
- Insert tiny plant into planter
Connect the heads to the planter, I don't recommend gluing these so you can remove them to take out your tiny plant if needed.

Enjoy your silly plant!
License
You shall not share, sub-license, sell, rent, host, transfer, or distribute in any way the digital or 3D printed versions of this object, nor any other derivative work of this object in its digital or physical format (including - but not limited to - remixes of this object, and hosting on other digital platforms). The objects may not be used without permission in any way whatsoever in which you charge money, or collect fees.
Comment & Rating (1)