Hyla IKEA Raskog Insert


Print Profile(4)


Description
Important note:
Please pay attention to the flushing volume!
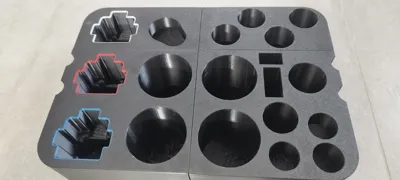
The insert is scaled to 50% to fit on the build plate and must be scaled to 100% and then cut.
The external dimensions are:
X: 390 mm
Y: 278 mm
Z: 85 mm
A print profile with 100% scaling and cut with connectors is also available.
A print profile is also available that omits the bottoms of the bottles and the connectors on the hoses to save material and time.
A print profile for the A1 Mini is now also available. Feedback would be appreciated :)
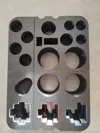
So, I tried to construct something for my wife ;o)
The insert is for the larger of the two scales.
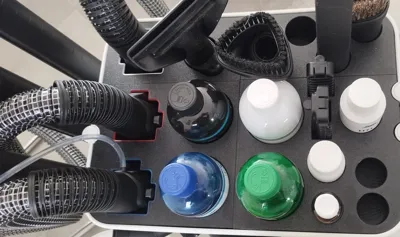
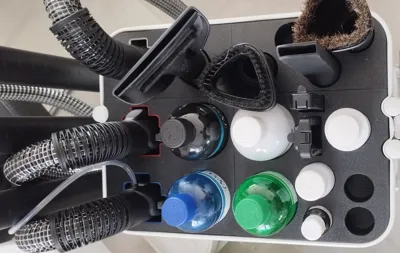
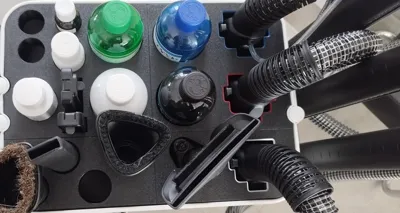
After my wife bought a Hyla and had to add a Raskog cart from Ikea, she wanted to organize the upper compartment so that everything wouldn't be flying around in the compartment.
The colors on the edges of the cutouts are based on the colors of the Hyla system. The white and blue ones are compatible and also fit into the red cutout. Due to the connection of the red hose, which still has a "nose" at the front for the plug, the plug only fits in the middle.
Since the model is a bit oversized, it has to be cut. I used the dowel option as a connector to put it together, which worked great. I'll leave the position of the cut up to you so it's not predetermined and everyone can cut it individually. The dowels I used for connecting the boards are 8 mm in diameter and have a depth of 18 mm. Please pay close attention to where they are placed, so the holes don't end up in the cutouts for the bottles or similar items.
I printed it in PETG, but it should work with any other material as well. I placed the top surface on the print bed so it would have the texture of the PEI plate. Additionally, after printing for my wife, I removed the 2mm base from the large bottles and brushes in the print profile because the supports were wasting unnecessary material. These changes aren't visible in my pictures yet ;)
I would appreciate any positive feedback or suggestions for improvements, and of course, a boost too :D
License
You shall not share, sub-license, sell, rent, host, transfer, or distribute in any way the digital or 3D printed versions of this object, nor any other derivative work of this object in its digital or physical format (including - but not limited to - remixes of this object, and hosting on other digital platforms). The objects may not be used without permission in any way whatsoever in which you charge money, or collect fees.
Comment & Rating (44)