Customisable Conveyor Belt System


Print Profile(1)

Bill of Materials


Description
Boost Me (for free)
I put a lot of hours into this design and wasted a hell lot of filament, so you don't have to.....No sponsors [sadly), no shortcuts, just a maker trying to help the community. A boost = a big smile. Tysm :)
Index
- Introduction
- What’s in the box
- Scaling & customization guide (Bambu Studio)
- Assembly guide
- Tips, tolerances & troubleshooting
- Custom Print in Place Belts
- Help, mine isn't working
- Model Defects
Coming Soon……
- Better Automation Modules
- Tiny Diorama Belts for even tinier builds
- Many Addons and modules to upgrade your old or new conveyor belt
- Many More!
What's New with Update 1.1 ?
- Added motor addons to make it automatic! ( This is just a prototype there might be a few issues, but it will be fixed in the next update. It works just fine. If you find anything, please let me know)
- Minor tolerance adjustments
Stay tuned for more updates coming soon……And don't worry, most of the things will support your already printed conveyor belts!
Note that I am no professional in creating such build guides or a mechanical engineer. If you find anything wrong with the build guide or model, please refer to section 8.
I hope you find this useful, and I am excited to have all of your feedback! Thank You!
1. Introduction
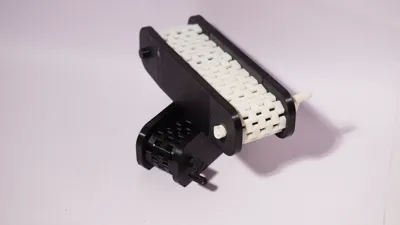
Meet the Modular Conveyor Belt System — your pocket-sized production line for models, dioramas, and desktop factory fantasies. It’s a modular, this is a belt system that you can lengthen, widen, and configure to taste. Designed to be friendly for 3D printing and highly configurable in Bambu Studio, it gives you the freedom to build anything from a tiny parts-sorting line to a multi-lane assembly track for your mini robots.
This project mixes practical design with a little maker mischief! Stackable gear discs let you match any belt width, filament pieces insert through pegs to lock parts together, and a print-in-place preview belt helps you check fit and look — note that the preview belts are fixed-size and can’t be resized. Most components interlock with filament-cutouts so you can assemble without complicated hardware (but glue is recommended).
A few promises:
- Modular: extend the length as far as your printer (and patience) will let you.
- Scalable: change width and length in Bambu Studio — carefully (see scaling guide).
2. What’s in the box (quick parts list)
- Modular belt system
- Print-in-place preview belt (fixed sizes)
- Stackable gear discs and spacers (Added as per belt width, attached via rods)
- Stoppers and Handle
- Rods
- Scalable Body
3. Scaling & customization guide (Bambu Studio)
You can scale the modular pieces in Bambu Studio to change overall length and width — but a few important rules will keep your conveyor functioning.
A. What you can safely scale
- Rod
- Body Mid
- Hub (Uniform Scaling)


B. What to avoid or treat with caution
- Uniform Scaling - Turn this off
- Small features: Rod bores, collar walls, and filament-cutouts are sensitive to scaling; always test a single hub + collar after changes.
- Print-in-place preview belts: These are intentionally fixed-size; don’t resize them unless you plan to redesign and test.
- Supports not reccomended
D. Sanity checks after scaling
- Verify press-fits: tight collars should press in and should hold together, or else you will have to scale accordingly (turn on uniform scaling)
- Confirm glue bonding surfaces on the loose collars — sometimes you need rougher surfaces for glue to grab.
4. Assembly guide
Tools you might need
- Glue
- Some sort of cutters for cutting filament
How the connection works (quick note)
Modules connect by inserting a piece of filament through matching hubs. Each module's outer hub accepts two types of outer mating collars:
- Tight press-fit collar (no glue): designed to hold the rod mechanically. This provides a glue-free, semi-permanent joint but can be tight to assemble.
- Loose outer collar (glue intended): slightly larger internal clearance so you can easily assemble; secure permanently with a drop of adhesive.
Step 1 — Layout your modules
Place the belt segments on a flat surface, hubs aligned. Decide belt length and lane count. The Hubs and Collars should sum up to an odd number from top to bottom for this to work.
Step 2 — Prepare Filament
Cut the filament to your desired width of belt minus 2-3mm, you can also trim the filament at the end so its fine if its toobig, but make sure its not too small.
Step 3 — Insert Filament
Align the outer hubs of your choice and slide the filament through as far as possible by hand.

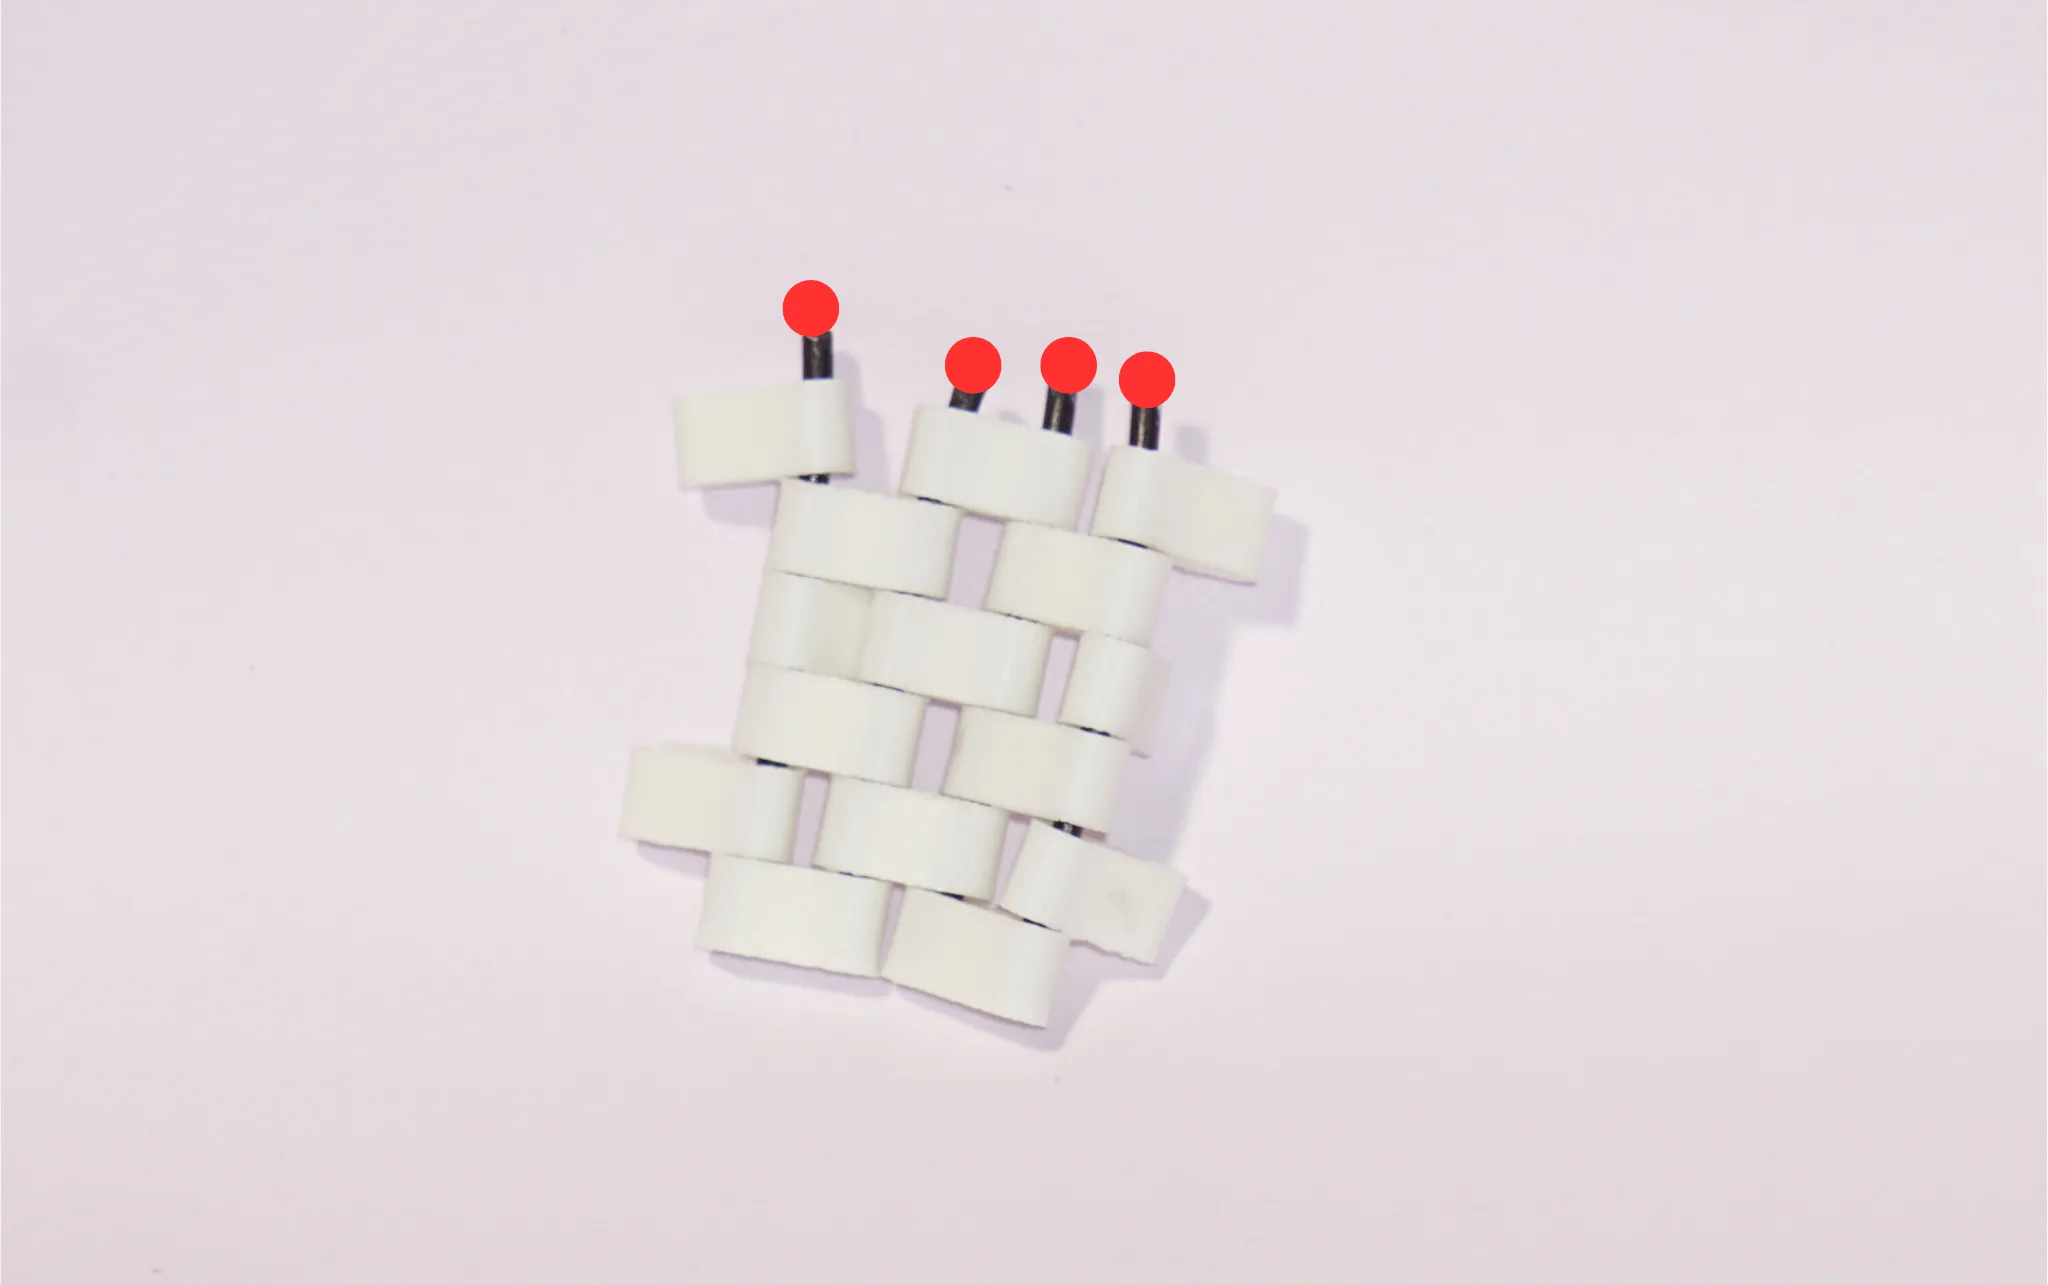
Step 4 — Make the pattern
Now insert the inner hubs in the pattern shown in the image.


Step 5 — Repeat and Seal
Repeat the pattern for your desired width, but make sure to leave space for one outer hub. Then check if the outer hub fits perfectly. If not, trim it, else you can add a drop of glue on top of the filament and then insert the outer hub.

You can repeat the above steps as much as you like to obtain the perfect length. And after joining the two ends, you have now successfully created the belt!

Step 6 — Join the Sides
Each side comes in 3 pieces. Insert the filament into the outer parts and then join it with the middle part (use glue if needed). You will need two of these sides.

Step 7 — Add the Rod
Insert one stopper each for the two rods required and insert both of them into one of the sides.

Step 8 —Add the Gears
Now add the gears and spacer as shown in the image to both of the rods. You can interchange the spacers for gears but make sure that the gears are aligned.

Step 7 — Add the other Side and Complete
Add the other side and complete your build by adding one stopper to one of the rods and a handle to another.

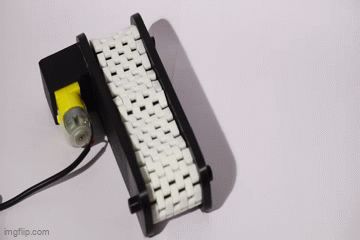
Step 7 — Final Test
Twist the handle and see the magic. If it doesnt work, and you are sure that it is not the problem with your printer or the assembly, feel free to message me or comment on this model!


Bonus Automation
- Instead of one stopper, use a Motor Connection Stopper. This will allow you to connect a DC motor into the stopper.
- Then, glue the Motor Housing around the Motor (New Updates are coming to make the housing better, don't worry lol this one is just a prototype)

5. Tips, tolerances & troubleshooting
- Gluing: CA (superglue) is fast for small collars, but feel free to use whatever you feel should do! Don’t glob glue — a little goes a long way.
- Rod alignment: If rods don’t slide freely, check for burrs or small stringing from printing — a quick deburr fixes many issues.
- Belt friction: Too-tight tension → slow or stop. Loosen it by adding some oil and then washing it with soap and water or by reassembling it.
- Gear noise: Slight clicking is normal, but persistent grinding means misaligned teeth or debris — disassemble, clean, and realign.
- Print orientation: Print hubs and other parts so the bore prints along layer lines that give strength (typically across the bed).
- Material: PLA works fine as long as it's indoors PETG or ABS for more durable builds. Consider tougher filaments for parts that will undergo frequent assembly/disassembly.
6. Custom Print in Place Belts
I know that creating the belts manually is really boring; I've been there too. But it's the best option for an unrestricted build size.
But if you really want to have a custom print in place belt or a whole conveyor belt system tailored for your needs, you can message me or comment on this model, and I'll be happy to help for a tiny donation. Anything helps, and Thank You for approaching me!
7. Help, mine isn't working
If you are sure that it is not any filament issue or nozzle issue, you can message me or comment on this model, and ill be happy to help you out for free!
8. Model Defects
I am not a full-time creator, but a teenager who loves to create models and help other people. There might be many defects, it sure wont be perfect, but if you notice anything, feel free to comment or message me, I'll look into the issue as soon as I can! Thank you for your concerns! It really helps me improve this model, as the users and are the best people for feedback!
License
You shall not share, sub-license, sell, rent, host, transfer, or distribute in any way the digital or 3D printed versions of this object, nor any other derivative work of this object in its digital or physical format (including - but not limited to - remixes of this object, and hosting on other digital platforms). The objects may not be used without permission in any way whatsoever in which you charge money, or collect fees.
Comment & Rating (10)