TEMPUS Cameo Clock Kit - Easy to Print & Assemble!


Print Profile(4)


Bill of Materials


Description
If you enjoy this design, 👍 Like, 💝 Follow, and 🚀Boost! |
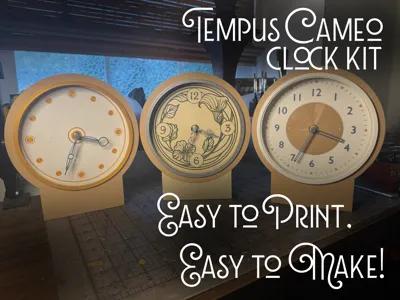
TEMPUS Cameo - the newest member of the TEMPUS family of 150mm clocks - is the easiest to print and make yet! This new clock kit does not require either screws or an acrylic disk as a lens. It is also the first TEMPUS clock that can be printed on the Bambu Lab A1 Mini.
Details:
- 2 Body Styles - A composite version with a separate body and stand suitable for A1 Mini, and a unibody design compatible with larger printers.
- 3 Select Clock Faces & Hand Sets.
- Enjoy even more face and hand options included with the TEMPUS Clock Parts Bonus Kit, TEMPUS Halloween Bonus Parts Kit, TEMPUS Arch, and TEMPUS Cathedral.
- Only ~319g of filament for a customizable, large-faced clock compatible with practically any decor.
- Simple design lends itself to serial production.
- An AMS is recommended for clock faces, but not required. Perform a filament change at the appropriate layer if you do not have an AMS.
The TEMPUS Cameo Clock Kit is compatible with the Bambu Lab Kit MH011 and similar quartz clock mechanisms from third parties. The included components support a range of shaft lengths and widths, which can vary among mechanisms from different manufacturers.
Important: Be sure to download both the print profile for the body style of your choice and the print profile for the faces and hands.
Assembly Diagrams:


Assembly Instructions
This clock kit has been designed for quartz clock mechanisms, such as the Bambu Kit MH 011.
An acrylic disk (150mm or 6 in. diameter x 1mm) is used in the lens version. These disks can be sourced from third parties, including your local hobby or craft shop.
Tools & Supplies:
- A thin blade for removing a flat support, such as the Bambu scraper blade or a hobby knife.
- Hobby clippers.
- Glue or cement, such as CA glue, Barge cement, or a similar product.
Note on Optional Printable Parts:
Two optional parts are included. If your clock mechanism has a longer shaft than desired, the spacer can be placed between the mechanism and the back of the clock face frame. The optional lens retainer ring has a tighter fit than the standard version.
Step 1
Print parts. Allow the heatbed to cool completely before removing parts.
Step 2
Carefully remove the support from the circular depression around the front opening on the body.
Step 2.5 (composite body version only; skip for unibody)
Attach the body to the stand with glue or cement. Match up the parts carefully so the fronts of both the body and the stand align. Allow glue to set.
Step 3
Apply a small amount of glue to the “ears” on the mechanism frame. Place the mechanism frame into the depression on the back of the clock face frame. Allow glue to set.
Step 4
Apply a small amount of glue around the circular depression on the front of the body. Press the decorative ring (no lens) or lens ring (metric or US) into the depression. Allow glue to set.
Step 5
Insert the clock mechanism post through the hole on the back of the clock face frame. Place your chosen clock face into the front of the clock face frame, aligning the face with the two posts. Screw the retainer washer and nut onto the mechanism shaft.
Step 6
Choose the best-fitting hands from your chosen set onto the posts. Affix the endcap onto the end of the mechanism shaft last. (The most likely sizes to fit have been set as printable.)
Step 7
Apply a small amount of glue to the post holes in the clock body. Align the posts on the clock face frame with the receiving holes in the body, then insert the frame into the body. Allow glue to set.
Step 8
Insert a AA battery into the mechanism and set the time.
Step 9
Insert the backplane. It is friction fit. Do not glue the backplane in place! (This is the last step for the lensless model.)
Step 10 (lens option)
Place the lens disc into the depression in the lens ring. Place the lens retainer ring over the lens and lens ring. The fit should be tight, but removeable.
Boost Me (for free)
🚀 Your boost is appreciated! Boosts contribute to the filament used to bring new models to you. Thank you! 🫶
Membership
Would you like to sell prints of my work? 💵 Enjoy generous rights and no competition from the author with my low-cost license! 😄
License
You shall not share, sub-license, sell, rent, host, transfer, or distribute in any way the digital or 3D printed versions of this object, nor any other derivative work of this object in its digital or physical format (including - but not limited to - remixes of this object, and hosting on other digital platforms). The objects may not be used without permission in any way whatsoever in which you charge money, or collect fees.
Comment & Rating (0)