


Print Profile(1)

Description
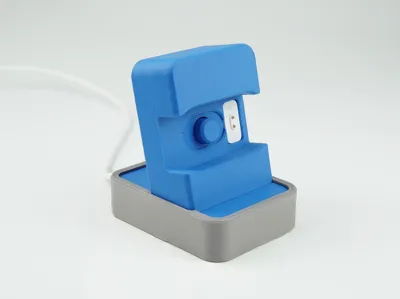
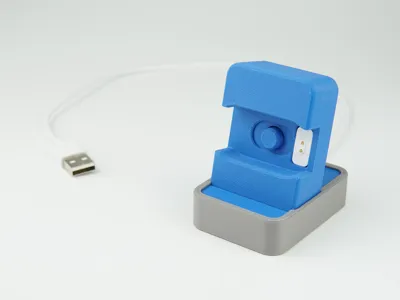
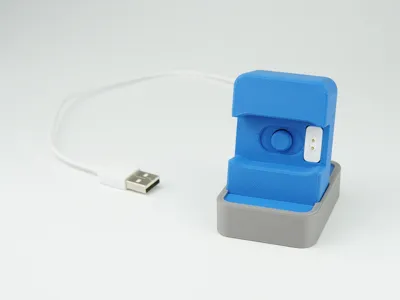
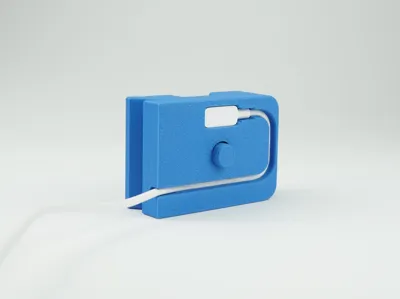
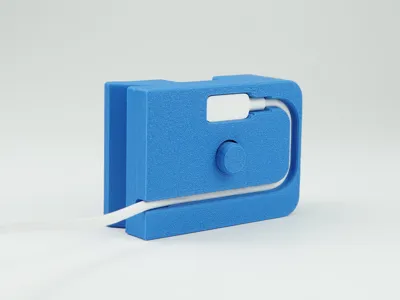
🔋 Xiaomi Mi Band 10 Charging Dock
Just a clean and reliable way to charge your Mi Band 10 👌⌚
I designed this dock to keep things tidy on the desk and make everyday charging feel effortless. No dangling cables, no weird angles — just drop the band in and you're good.
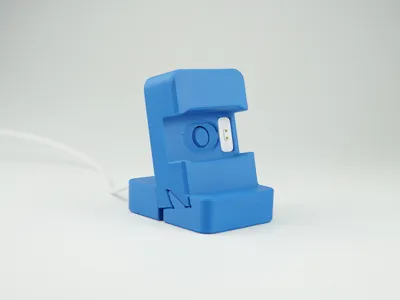
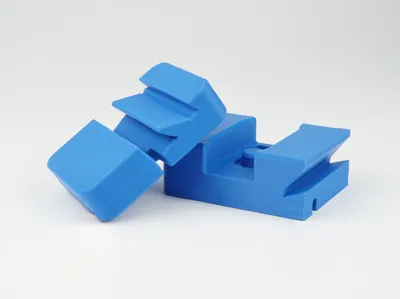
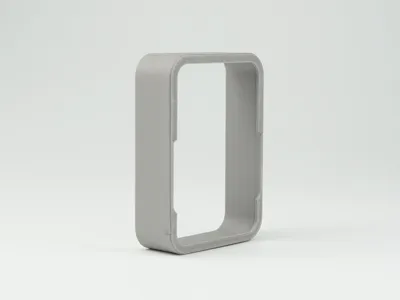
The dock is made of three interlocking parts: a watch wall, base, and frame. The charger routes through a dedicated channel, so the little square plug fits perfectly and stays in place. There's also a small pin that helps push the band out smoothly after charging — no need to tug on the strap.
Thanks to the cutout design, the screen stays visible while charging, which makes the Mi Band double as a desk clock 🕒
🧾 Printing and assembly
The dock prints easily without supports. Parts are designed to snap together and hold firmly — no glue or screws needed.
Assembly is very straightforward, but I’ve included a step-by-step guide below just in case.
Printed in PLA, but PETG should work fine too.
🧰 Assembly guide
This dock is super quick to put together — below you’ll find a short step-by-step with GIFs to guide you through it 👇
1. Place the charger cable into the groove in the watch wall.
Gently press it in using a blunt tool — there’s a small ridge inside the groove that holds the cable in place.

2. Slide the wall into the base from the side with the cable cutout.
Then push the cable into the second groove in the base and press it in the same way.

3. Slide the front frame down from the top.
You’ll need a bit of force to snap it fully into place.
Make sure the small cutouts in the frame are facing the front — this part keeps everything locked together and gives the dock a clean finish.

That’s it — your Mi Band 10 dock is ready to use ⚡⌚

⚠️ Heads up:
Make sure the band straps are attached on the correct sides. They can be flipped, and this dock is designed for the original factory strap orientation.

---------------------------------------------------------------------------------------------------
I put a lot of personal time into each project I share here 🕒❤️. I do it knowing there's no real profit—apart from sharpening my skills 🛠️ and the joy of contributing something useful or fun to others 😊.
The points I earn on this platform help cover only a small part of the filament I use to create these models 🎯.
If you ever run into printing issues, please take a moment to check if the cause might be on your end 🔍🖨️.
Even with all the advancements in 3D printing, proper calibration, bed adhesion, filament choice, and profile settings still play a big role in the final result ⚙️🎛️.
Negative ratings affect a project’s visibility 📉 and reduce the number of downloads, even if the issue wasn't with the model itself.
If something's not working, please don’t hesitate to message me 💬—I'll do my best to help or clarify things 🙌.
This is just a small part of my life, but it’s a big part of my passion 💡. I’m constantly learning and improving 📚, and your thoughtful feedback makes a huge difference 💬🌱.
Boost Me (for free)
If you'd like to support me, consider clicking the free “Boost” button 🚀—it really helps. Thank you for being here! 🙏

License
You shall not share, sub-license, sell, rent, host, transfer, or distribute in any way the digital or 3D printed versions of this object, nor any other derivative work of this object in its digital or physical format (including - but not limited to - remixes of this object, and hosting on other digital platforms). The objects may not be used without permission in any way whatsoever in which you charge money, or collect fees.
Comment & Rating (0)