Sydney Trains K set (HO Scale)


Print Profile(2)

Description
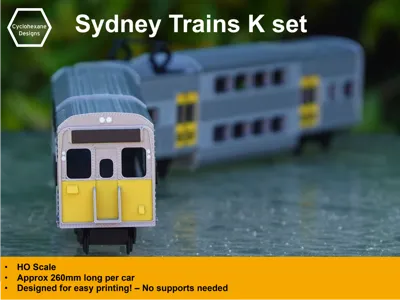
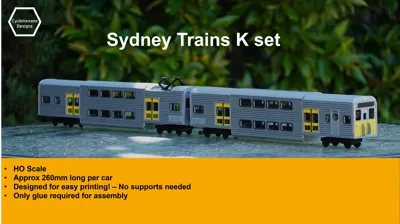
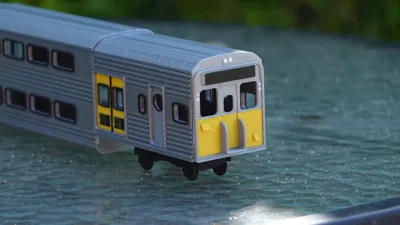
Do you like trains, but the scale models ones cost too much? Have no fear. You can now 3D print your very own Sydney Trains K set in HO scale!
11th March 2026 update: A1 Mini Profile now available!
IMPORTANT NOTE: I designed this as a display model with a decreased part count, as a result, the wheels don't turn. There is also no interior. This model is also designed for easy printing, and therefore is not a 100% accurate model.
PS. Remixes are allowed on this model. Feel free to design an S set or C set front
How to print:
- I am assuming that you want to print the full 4 car set.
- Print each plate twice
A1 mini users, there is a special print profile with some parts cut down to fit on the A1 mini bed. (The model is the same size).
Boost Me (for free)
Like this model? Please boost it so I can continue to create more just like it!
Assembly:
Step 0 **Only for A1 mini users**:
Glue the side pieces together using the black tabs. Make sure to leave a small gap at the top and bottom so you can attach the roof/floor later.


**All print profiles**
- Glue the “tub” to the 2 sides with superglue as shown (example with cab car)
Remember to not mix up the car types

2. Glue the rest of the bottom of the car
- For the “long” end, make sure the socket is offset to the left.
Length A should be slightly shorter than length B.
3. Glue the front and back ends of the car. (example with cab car)
Remember that only the front of the cab cars have the destination board!
4. Glue the roof segments together as shown.
- A1 mini users, the “long” segment is split in half.
- Cab car has the universal “long” segment, plus the 3 curved ones

Non driving car has the universal “long” segment, plus 4 curved ones, plus the pantograph
The roof profile should look like this now

5. Attach the roof to the car. (glue is optional here)
- The side of the roof with the aircon goes on the “long” end of the car
- The roof with the pantograph goes on the non driving car

6. Glue the bogie to the pin as shown, then attach the bogies to the car WITHOUT GLUE. The bogies should pop in with a bit of effort, and be able to rotate freely.


7. Glue the couplers onto the end of the cars as shown.

Comment & Rating (41)