Gridfinity Modular Drawer Generator


Print Profile(9)


Description
Boost Me (for free)
If this model helped you, please support my work by giving me a boost. Thank you!
UPDATE: V2 Gridfinity Drawer Generator
- Housing: Increased clearance from 0.2mm to 0.4mm
Hello everyone,
Like many of you, my workbench is in a constant battle against chaos. To help win that fight, I'm excited to introduce my gridfinity drawer generator.
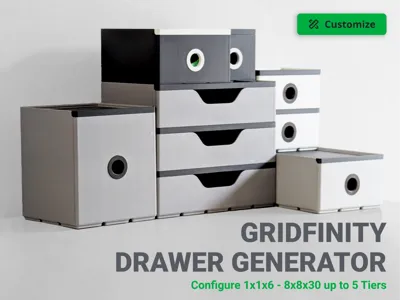
Ultimate Gridfinity Drawer Generator.
While standard Gridfinity bins are fantastic, I often found myself needing compact, enclosed drawer units. The problem is, a pre-made size is never quite right. My original generator was a good start, but I've now rebuilt the system to be more versatile and powerful by offering two distinct generator files to give you the ultimate choice.
How the Two-Generator System Works
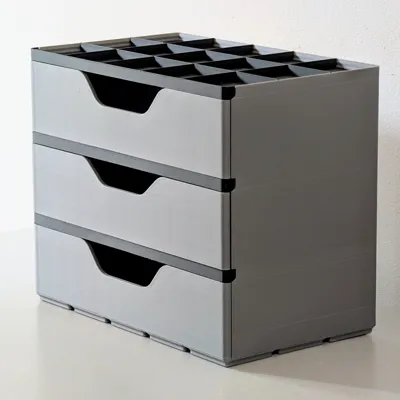
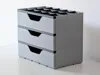
1. The "All-in-One" Housing & Drawer Generator
This is your main, go-to tool. It's a complete, all-in-one system that generates:
- The main Housing
- The Drawers
- The basic Drawer Inserts (lids)
- The Ring Pull handles
It's highly versatile, allowing you to configure the Width, Depth, and Height in Gridfinity units. It supports sizes from a tiny 1x1x6 all the way up to a massive 6x6x30, with up to 5 drawers (tiers).
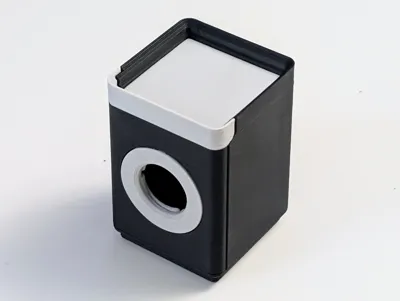
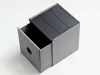
2. The "Advanced Drawer" Generator
This is a separate, additional generator for users who want more features. This file only creates the drawer itself (with its lid), not the housing.
Why is it separate? Because it's packed with new customisation options that have different size requirements:
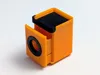
- Drawer Style: Choose between a standard drawer with a Gridfinity Base inside (perfect for dropping in bins) or a Flip-Down Front (which automatically adds Gridfinity-spaced rails to slide bins in and out).
- Handle Style: Choose between the classic Ring Pull or a new, sleek Cut-out Handle.
Sizing Note: Because these advanced features (like the built-in Gridfinity base) require more internal space, this generator is limited to drawer sizes from 3x3x7 to 6x6x30.

Key Features
- Two Generator Files: A simple "All-in-One" generator for most needs, and an "Advanced Drawer" generator for more specific features.
- Fully Parametric Housing: Generate the perfect drawer unit for your space (Width, Depth, Height, Drawer Count).
- Advanced Drawer Styles: Choose between a Gridfinity Base or a Flip-Down Front with slide-out rails.
- Handle Options: Select either the classic Ring Pull or a modern Cut-out Handle.
- Seamless Gridfinity Integration: Each unit is designed to stack and align perfectly with the standard Gridfinity ecosystem.
- Engineered for Performance: I've ensured the design has clean tolerances for smooth-sliding drawers and a sturdy, workshop-ready construction.
Printing & Assembly
Printing:
- The models are designed to print cleanly. The main housing and drawers print upright.
- The Cut-out Handle option is fully support-free.
- If you select the Ring Pull handle (from either generator), the ring part itself should be printed flat on its face for the best results.
Assembly:
- Drawer Lid: Align the lid's grooves with the channels on the drawer and carefully slide it into place.
- Ring pull: Remove any printing defects from the hole and apply even pressure to snap it in place. You may need to sand the hole slightly if it printed a bit rough.
- Drawer: Ensure the rails/groves on the housing are free from loose filament. Align the drawer with the rails and slide it in. Be careful, as a misalignment might damage the box.
- The drawers should slide in and out easily after a few uses.

Important Note: Splitting the Model in Bambu Studio
The generators will create one large file. You must split it into separate parts before slicing. To do this: Right-click the model, then select Split -> To objects from the context menu. You'll then be able to select and print each part individually.

Conclusion
I designed this system to bring a new level of personalised order to my own workspace, and I'm incredibly excited to share this much-improved version with the community. I can't wait to see the unique configurations you all come up with.
Follow for Updates!
You May also Like


I'm continuously creating new products so please follow @moss3d to be notified when new models are uploaded


License
You shall not share, sub-license, sell, rent, host, transfer, or distribute in any way the digital or 3D printed versions of this object, nor any other derivative work of this object in its digital or physical format (including - but not limited to - remixes of this object, and hosting on other digital platforms). The objects may not be used without permission in any way whatsoever in which you charge money, or collect fees.
Comment & Rating (105)