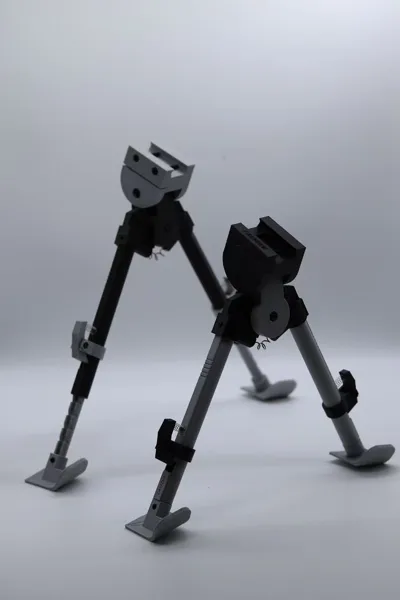
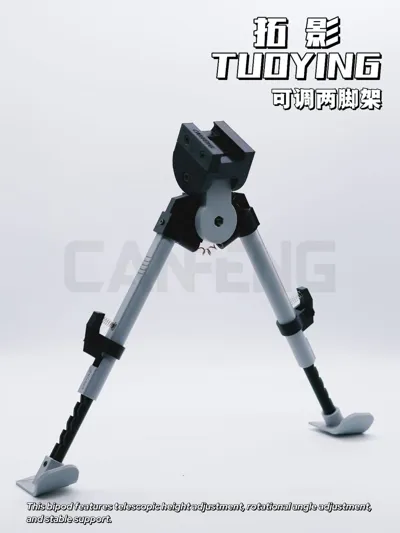
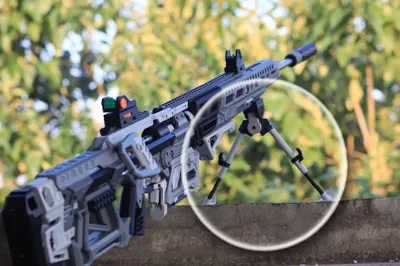
【TuoYing】Adjustable Bipod


Print Profile(1)
Description
Tuoying Adjustable Bipod Assembly Instructions
For assembly tutorial videos, please see:
1. Tuoying Adjustable Bipod - https://b23.tv/1VBLbzx
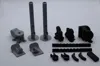
Parts list:

Assembly steps:
Step one: Insert the support inner tube from one end of the support outer tube, paying attention to aligning the grooves

Step two:
Use M2*5 self-tapping screws to install the foot pad

Step three:
Use M2*5 self-tapping screws to fix the button retaining ring onto the support outer tube

Step four:
Embed the M2 nut into the reserved slot of the retaining ring

Step five:
Embed the spring with a wire diameter of 0.3mm, outer diameter of 5mm, and length of 20mm into the reserved slot of the button

Step six:
Use an M2*12 half-threaded sleeve screw to fix the button, being careful not to overtighten the screw

Step seven:
Use M2*5 self-tapping screws to fix the support legs and the connecting plug

Step eight:
Embed the M4 nut into the reserved slot on one side of the pivot clip, and use an M4*25 half-threaded sleeve screw to fix the pivot clip and the two support legs


Step nine:
Embed the M4 nut into the reserved slot of the handguard fixing part, and use an M4*30 half-threaded sleeve screw to connect the handguard fixing part and the pivot clip, ensuring the letters on the handguard fixing part align with the orientation of the foot pads


Step ten:
Embed the M3 nut into the reserved slot of the handguard fixing part, and use an M3*30 full-threaded screw to connect the side plate of the handguard fixing part to the handguard fixing part


Step eleven:
Embed the spring with a wire diameter of 0.5mm, outer diameter of 5mm, and length of 50mm into the connecting plug
Installation complete
License
You shall not share, sub-license, sell, rent, host, transfer, or distribute in any way the digital or 3D printed versions of this object, nor any other derivative work of this object in its digital or physical format (including - but not limited to - remixes of this object, and hosting on other digital platforms). The objects may not be used without permission in any way whatsoever in which you charge money, or collect fees.
Comment & Rating (3)