Pop Fidget


Print Profile(1)

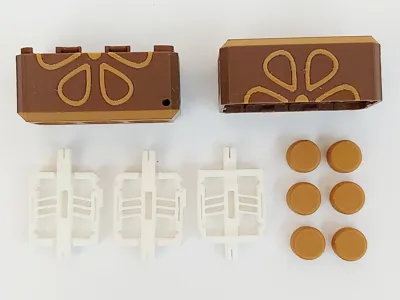
Bill of Materials

Description
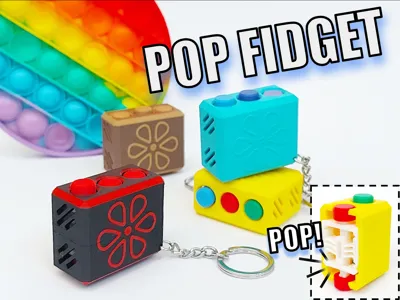
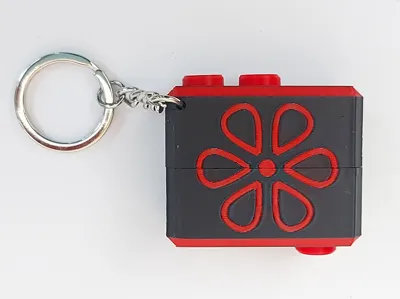
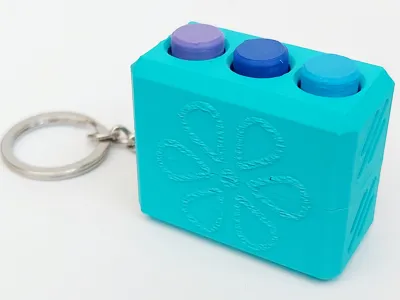
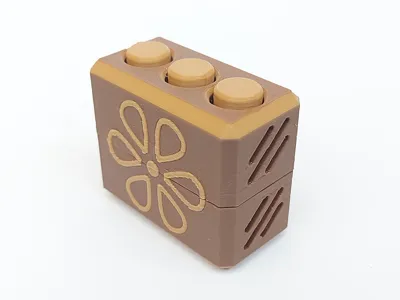
I am happy to present the Pop Fidget, a fun toy inspired by the double sided silicone pop toy.
While fun and satisfying to play with, this model is clearly overengineered, as I mainly wanted to play around with a bistable compliant mechanism. It requires printing 11 parts to assemble, but everything clicks into place, and is overall a quick print if printed on a single plate in a single colour.
To fully enjoy this toy, you need to read the printing and assembly instructions below.
Boost Me (for free)
If you enjoy this model, please give it a like and consider giving it a boost! Many thanks!
Membership
If you want to sell prints of my models, please join the membership for a commercial license.

Printing
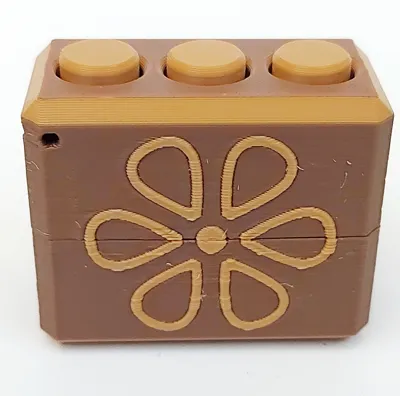
I recommend using the provided print profile for best results. A number of plates are available for printing the Bistable switch, buttons, multicolour box, box with fuzzy flower and all 11 pieces on one plate.
If you are using the provided STL files, you need to print 6 buttons and 3 switches in addition to the box. Here it is important that the bistable switch is printed with random seams, Classic wall generator and NOT detect thin walls.
The switch is also best printed in PETG, but PLA will also work, but might break earlier after extended use.
If printing multicolour, please make sure to add another model as a purge object to minimize filament wasted as poop.
Assembly
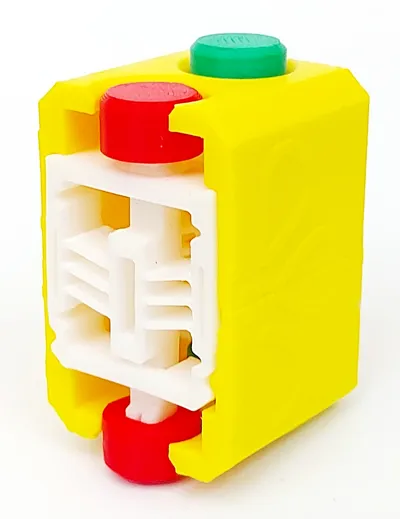
1. To assemble the 3 switches, you need to first connect two buttons to each “bistable switch” part. Make sure to align the protruding shape within the button with the indentations in the shaft of the bistable switch (see photos below). If done correctly both buttons should click into place.

2. Importantly, you now need to “loosen” the switch up, so that it will “pop” satisfyingly back an forth. To do this, press the switch firmly against a surface to move it to the other side. Then repeat this 10-20 times as seen in the .gif below. It will continue to become “better” during regular use when the fidget has been fully assembled.

3. After the assembly of the 3 switches you need to insert them into the bottom box part. The switch has a protruding guide with will fit into the cut-out of the bottom box to ensure correct orientation (see photos below).

4. Insert each switch and press firmly down to make sure they click into place “on both sides”. Now orient the top part of the box and press it firmly into place until it clicks in place. Here it is possible to orient the top box wrong, but you will then quickly realize that it does not align.

You have now build the Pop Fidget and can enjoy popping the buttons back and forth for the satisfying feeling.
Enjoy!
If you like this model, please have a look at some of my other work:


Point Break - Desk Toy by kidaMakerWorld: Download Free 3D Models
Animal Series by kida | Collection - MakerWorld
Musical Fidget Generator by kida MakerWorld: Download Free 3D Models
License
You shall not share, sub-license, sell, rent, host, transfer, or distribute in any way the digital or 3D printed versions of this object, nor any other derivative work of this object in its digital or physical format (including - but not limited to - remixes of this object, and hosting on other digital platforms). The objects may not be used without permission in any way whatsoever in which you charge money, or collect fees.
Comment & Rating (13)