Air Purifier for 120mm fan


Print Profile(1)

Description
I originally designed this air purifier for laser engraving indoors during winter, when opening a window to vent fumes wasn’t an option.
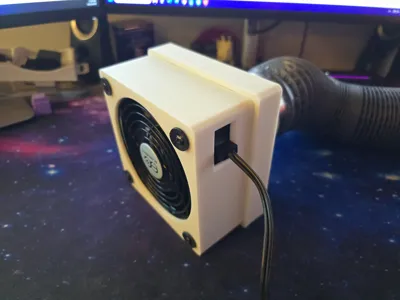
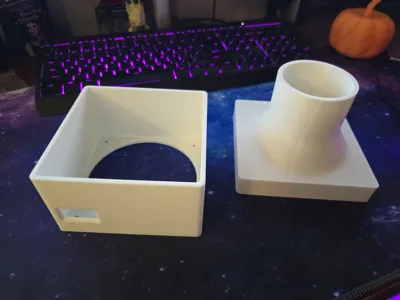
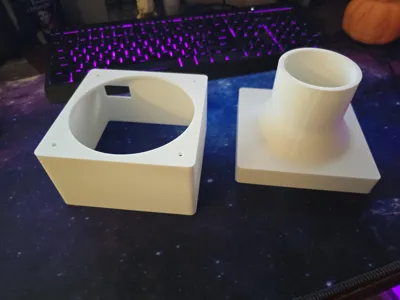
This 3D-printed housing turns a standard 120 mm AC Infinity fan and 120 mm HEPA filter into a compact, efficient filtration system. It’s ideal for small enclosures, desktops, or workspaces where you need cleaner air — especially around 3D printers, laser engravers, or resin stations.
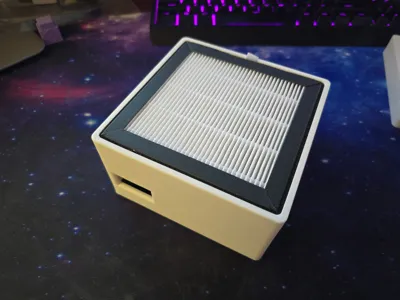
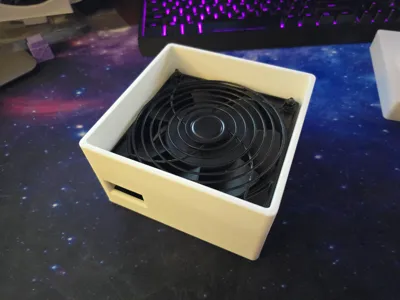
The enclosure features a tight-fitting snap-lock lid that securely holds the HEPA filter in place. The snug seal is intentional to minimize air leaks and ensure that all airflow passes directly through the filter. The fan mounts inside the housing using standard screws, and a side power port makes it easy to connect power.
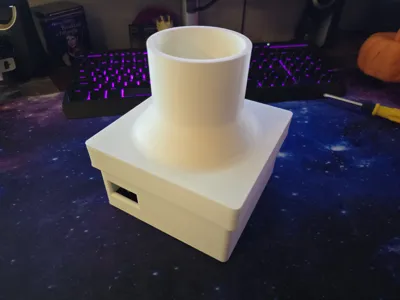
A duct adapter on top connects to 3 mm vent hose, allowing you to route filtered air or fumes out of an enclosure as needed.
I have included the Fusion 360 file in case you want to modify it to fit your own fan!
Features
- Compatible with 120 mm AC Infinity fan and 120 mm HEPA filter
- Snap-fit locking lid minimizes air escape for maximum efficiency
- Side power port for quick access and clean cable routing
- 3 mm vent hose adapter for exhaust or airflow redirection
- Screw-mounted fan installation for durability and easy service
Printing Notes
- Supports are already included in the 3MF file.
- To remove supports, use needle-nose pliers: gently squeeze the sides together and pull — they release easily.
Assembly
- Mount the 120 mm fan into the base with M4 × 20 mm screws.
- Insert the HEPA filter into the top recess.
- Snap the lid firmly into place — it will be tight by design.
- Connect the power cable through the side opening.
- Attach the 3 mm vent hose to the outlet adapter.
Parts Used
- Fan: AC Infinity 120 mm Fan on Amazon
- HEPA Filter: Replacement Filter Pack on Amazon
- Ducting: 3 mm Vent Hose on Amazon
License
You shall not share, sub-license, sell, rent, host, transfer, or distribute in any way the digital or 3D printed versions of this object, nor any other derivative work of this object in its digital or physical format (including - but not limited to - remixes of this object, and hosting on other digital platforms). The objects may not be used without permission in any way whatsoever in which you charge money, or collect fees.
Comment & Rating (12)