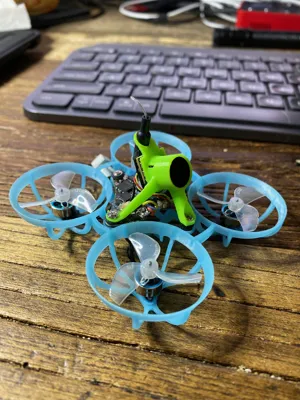
Bee Bird Tripod CO3 Canopy


Print Profile(1)

Description
Note, this canopy is meant to work with the BetaFPV CO3 camera. It may fit on others but I haven't tried anything else yet. I am currently working on a version for the Bee Eye. I know I will need to change the design for that camera because it is wider than the CO3.
The motivation for this camera holder/canopy was to solve a problem with the NewBeeDrone HummingBird V4 AIO. During a livestream CiottiFPV noticed the front leg of other canopies contact the camera connector on the flight controller board. Here is an example:

This new design solves this problem by routing the front leg over the connector.

An additional goal of the design was to reduce weight while improving strength. The print of the 25 degree version weighs about 0.75 grams. I have flow at least 30 batteries on it while doing inverted freestyle tricks like powerloops, matty flips and split-s in my house (plenty of crashes). So far it is holding up. I went through several design iterations before I got it to this point.
But the 25 degree version is the only one I've tested. The zip file attached to this project contains several other angle options:10 degrees through 50 degrees at 5 degree increments. I would really like to get feedback from people who like those other angles. I anticipate needing to do some tweaks to the geometry to get the durability to match what I've achieved on the 25 degree version. Also, the weight will probably be different. Also, I've been printing this using Bambu TPU for AMS which is a bit harder than the TPU most people use in FPV so I am interested in hearing how it works out using the softer grade TPU.
For printing, I have gotten the best results (for ruggedness) by printing it with the axis of the camera section perpendicular to the print sheet as shown. I was getting layer separation during hard crashes especially on the front leg when printing it other ways. Also this makes the area where the camera gets inserted cleanly shaped.

To install the camera, I heat up the print with a hot air gun (I find this helps with the layer bonding a little also). The camera will slip in easily. Heads up, it will also cool quickly and once it does, the canopy is basically shrink fitted onto the camera. I have to cut it off to get the camera out. You will notice a square shape on the back where the camera is inserted. This is mean to accept the square base of the camera.

You will slide the camera in all the way until the PCB touches the TPU.

Some other features: It has a loop to catch the antenna as shown. I'm still tweaking this part but it basically works. If you don't want it, you can always cut that part off (and save a little weight). Also, I added some indicators on each version so you can easily tell what angle it is meant to be. Each of the holes shown refers to a 5 degree increment. In this case, five holes are shown so you know this is a 25 degree canopy. A ten degree canopy would have only two holes. A forty degree canopy would have eight, etc. So if you print several of them to try, you won't have to wonder which is which.

Comment & Rating (9)