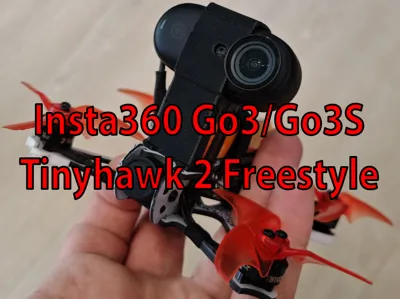
Tinyhawk 2 Freestyle Insta360 Go3 / Go3S Mount


Print Profile(2)


Description
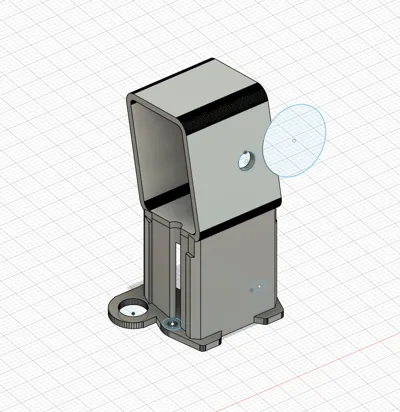
EMAX Tinyhawk 2 Freestyle Insta360 Go3 / Go3S + Battery + VTX Antenna Mount
As I couldn’t find any existing Insta360 Go3/Go3S mounts for the Tinyhawk 2 Freestyle, I decided to design my own.
This model is influenced by a few existing designs (for older cameras or different drones) but is not a remix.
There are two versions available:
- One with a VTX antenna mount
- One without, in case you’re not using the stock VTX antenna placement
Features:
- Insta360 Go3 & Go3S Camera Compatibility
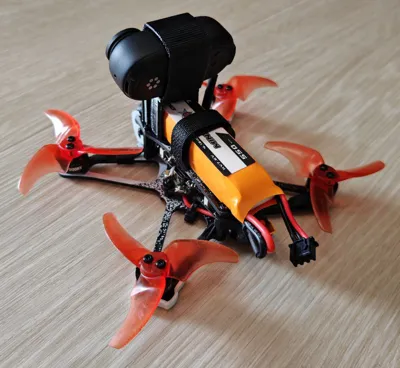
- Integrated Battery Mount, which supports:
- 2× 1S batteries (designed for 2× Teranty 850 mAh)
- 1× 2S battery (tested with CNHL Ministar 550 mAh 2S)
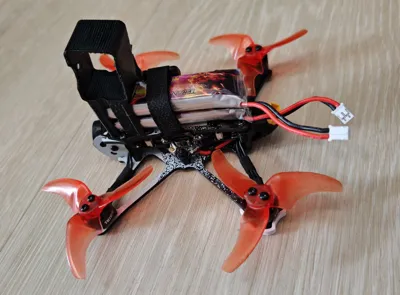
- Optional VTX Antenna Mount for stock antenna placement
- Keeps the antenna clear of the props
- Optimized Center of Gravity, with batteries mounted closer to the front and below the camera for improved balance
Printing Recommendations:
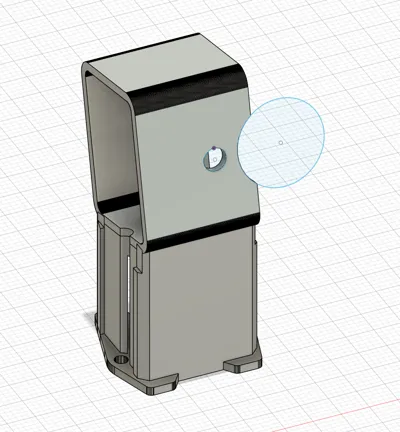
I strongly recommend printing in TPU, as the flexibility is essential for proper camera fit and crash resistance.
TPU can be tricky to print, so ensure your printer settings are dialed in — but if you’re not chasing perfect surface finish, Bambu’s Generic TPU preset works fine.
My print settings:
- Layer Height: 0.2 mm
- Wall Order: Inner / Outer / Inner
- Wall Generator: Arachne
- Wall Loops: 3
- Infill Density: 35%
- Infill Type: Gyroid
- Supports: Tree Supports (on build plate only)
IMPORTANT: Even if your TPU filament arrived vacuum-sealed, dry it thoroughly before printing. Moist TPU will cause print quality issues — don’t blame the model!
Assembly & Fit
Installation is straightforward:
- Remove the two screws on the front part of the top plate.
- Slide the printed mount over the VTX antenna (if using the antenna version).
- Reattach the screws through the mount — everything should fit perfectly.
To mount the Insta360 Go3/Go3S, simply slide it in from the side. The flexible TPU provides enough friction to hold the camera securely in place. To mount the Batteries, simply slide them in from the back through the strap as usual.
I’ve flight-tested this design with the Insta360 Go3 and it performs flawlessly.
Although I don’t own the Go3S, it should fit and function just as well.
License
You shall not share, sub-license, sell, rent, host, transfer, or distribute in any way the digital or 3D printed versions of this object, nor any other derivative work of this object in its digital or physical format (including - but not limited to - remixes of this object, and hosting on other digital platforms). The objects may not be used without permission in any way whatsoever in which you charge money, or collect fees.
Comment & Rating (8)