P1S/P2S 5-in-1 riser 360° surround intake/exhaust, temperature control, heating, lighting, heightening


Print Profile(2)


Description
P1S/P2S 5-in-1 Riser for Personal Use (Version 3 - Updated 20251202: Front panel printability optimized)
!!!!! Please carefully check slicing before printing!!!!!
I. Features:
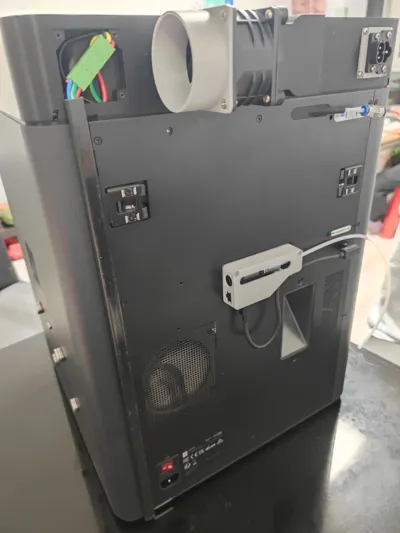
1. Negative pressure exhaust - Customizable exhaust fan speed (A controller that can define initial exhaust fan speed, acceleration temperature, and maximum speed temperature---currently only this one found), expelling print gases outdoors with an exhaust duct, preventing odors in the room
2. Exhaust to lower chamber temperature - ① Automatically increases fan speed with rising chamber temperature to accelerate air circulation; ② Manual vents on both sides can be opened. Suitable for PLA printing
3. Heating and temperature control - Heats according to a set target temperature to raise chamber temperature, suitable for PETG, ABS, ASA materials. (If not needed, choose the front right module without this opening / install a blanking plate)
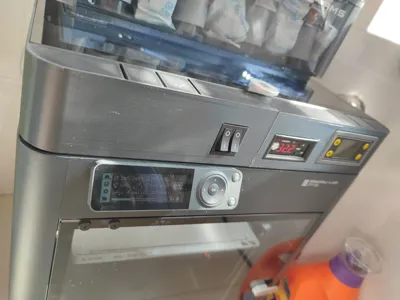
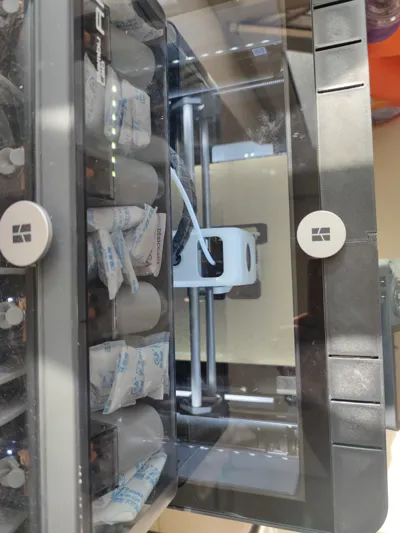
4. LED strips on three sides for increased illumination. (P1S has two switches, the front and side can be controlled separately for on/off)
5. Increases height by 64mm, preventing filament tube scraping
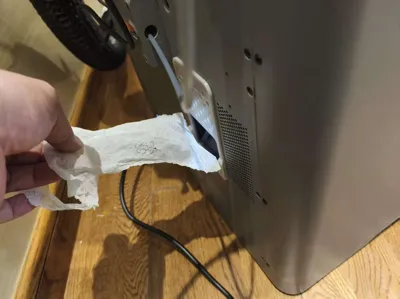
6. The P2S USB port can be connected to the top of the riser via an extension cable, for convenient USB drive use
II. Features
1. No modification to the printer is required, the riser is a module completely independent of the printer
2. Exhaust on three sides, front side for cooling air intake. No localized strong exhaust airflow will occur
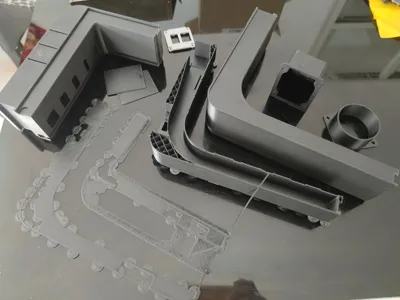
3. Simple assembly, a total of 11 parts, with only four main body parts. Only M3-12 self-tapping screws are needed for standard assembly
4. The adapter duct for exhaust gas is universally compatible for left and right side exhaust (this version cannot exhaust up or down), it can also be designed for top/bottom exhaust
5. Compact size, the rear exhaust structure only protrudes 64.5mm more than the printer body, suitable for small spaces with the rear against a wall
6. Low filament consumption, using PETG HF, only two plates for printing, total filament consumption 820g, total time 18h
7. Chamber temperature can be viewed on a mobile phone, allowing setting the target temperature for the heating module and controlling its on/off
8. P1S built-in chamber fan: ① Can be turned off by modifying the material G-code; ② Install the fan in reverse to blow inward, increasing cool air intake when printing PLA materials
III. Print plate instructions:
I. P2S has 7 plates in total, of which plates 5 and 6 are optional accessories
Plate 5:
Two optional parts, can replace parts from plate 7
1. One is a dual power interface, allowing the heater and 12v power supply to connect to 220V
2. The other is a 90° angled ventilation interface, ①: The part from plate 5 connects to the fan with through holes, requiring standard fan connectors (ask the seller for 4 extra standard connectors when buying the fan), the advantage is easy disassembly and assembly. ②: The part from plate 7 has self-tapping holes, the advantage is using standard connectors uniform with other positions
Plate 6:
① A blanking cover for the heating module, convenient for blocking the hole on the front right side of the main body when unsure if the heating module needs to be installed. ② The front right main body of the heating module is canceled, suitable for those who clearly do not need a heating module to print
II. P1S has 4 plates in total, of which plates 3 and 4 are optional accessories:
Plate 3:
Two optional parts, can replace parts from plates 1 and 2
1. One is a dual power interface, allowing the heater and 12v power supply to connect to 220V
2. The other is a 90° angled ventilation interface, ①: The part from plate 5 connects to the fan with through holes, requiring standard fan connectors (ask the seller for 4 extra standard connectors when buying the fan), the advantage is easy disassembly and assembly. ②: The part from plate 1 has self-tapping holes, the advantage is using standard connectors uniform with other positions
Plate 4:
① A blanking cover for the heating module, convenient for blocking the hole on the front right side of the main body when unsure if the heating module needs to be installed. ② The front right main body of the heating module is canceled, suitable for those who clearly do not need a heating module to print
IV. P2S Specific Instructions:
1. P2S with USB interface

① The light switch has been changed to a single switch (Taobao link unchanged, just choose KCD3)
② USB extension cable connection: https://detail.tmall.com/item.htm?from=cart&id=628824136856&mi_id=0000qJ3hNGftXskLTlxXCCoj0hoddrgDJsHvYoPPjTGefgw&skuId=4646579983829&spm=a1z0d.6639537%2F202410.item.d628824136856.17687484x5aXqE&upStreamPrice=880
(Choose 0.3m length, install with M3-12 self-tapping screws.)

2. Space for heater installation:
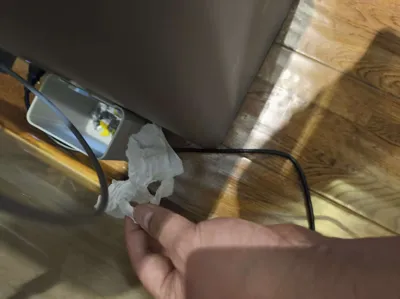
The auxiliary part cooling fan is on the left side for P1S, and on the right side for P2S. This results in different locations for installing the in-chamber heating module, and the left/right dimensions differ between the two machines. Measurements must be taken before purchasing. The maximum distance from the P1S right side chamber wall to the print bed is greater, but this gap is uneven on the P1S
V. See attachments for wiring/routing diagrams, and detailed control logic.


VI. See attachments for accessories required besides 3D printed parts, with Taobao links
VII. Tips:
1. Printing chamber temperature should be stable, I use about 40-45 degrees, too low can easily cause warping
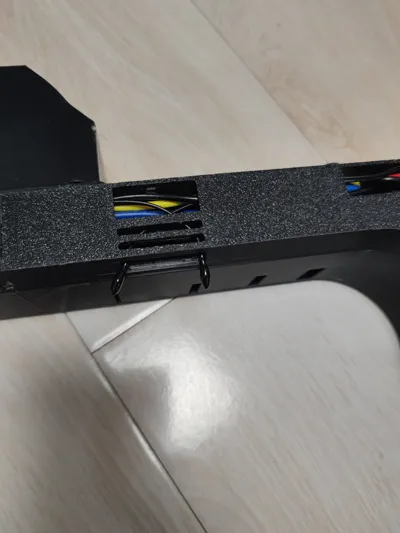
2. Electrical connections are required, and LED strip wires need to be soldered, please pay attention to safety
3. The connection of the four main body parts may require simple fitting and sanding (this is related to the filament flow rate), do not force installation, it will break
4. The side vents and their grooves may need sanding to ensure smooth sliding
5. For self-tapping holes, when installing self-tapping screws for the first time, screw them in and out gradually, screwing them in all at once may cause cracking
6. Do not choose overly thick wires, 1 square millimeter wire for 220V is sufficient for 300W chamber heating (I used 1 and 1.5 square millimeter wires)
7. When choosing an in-chamber heater, pay attention to the outlet temperature, the temperature resistance of the P1S side panel seems not high
8. Temperatures vary greatly at different locations within the chamber, it needs to be adjusted to the temperature monitored by the controller, with appropriate additions and subtractions
VIII. Regrets/Areas for Improvement:
1. I hope one screen can control all settings, and all settings can be operated remotely
2. Building on point 1, I hope it can interact with slicing software to automatically match chamber temperature according to the set material
3. A part of the top has poor printing quality (see right image), perhaps it can be optimized. (Optimized on 20251202)
4. Still quite wasteful of material and time, I want to further reduce the height to save material/time. However, all accessories have been purchased, and the power module and heating control module restrict the height reduction. Poor print quality locations
5. Interlocking socket: When the printer just starts, the print bed's heating status might cause large power fluctuations, the socket turns on and off intermittently, resulting in a very poor user experience
VII. Problems Encountered During Printing and Experience Summary:
1. Too low printing chamber temperature for PETG can cause warping, warping occurred in version one, later the temperature was set to around 45 degrees for printing, and brim was added, which solved the problem
2. Different filament flow rates can cause parts to be oversized/undersized, greatly affecting fit
3. The default bridge settings work very well, using thick bridges + increased flow rate will cause severe bridge collapse
4. Once the chamber temperature was not controlled, reaching 60 degrees, the filament ran out and it printed empty for an hour, wasting one part
5. Bridging on the front left panel was never set correctly, the software did not bridge according to the shortest distance. (Optimized on 20251202, bridging direction is normal)
6. Surface is not smooth, due to the influence of internal structure/wall thickness/structural ribs etc, at locations where the structure changes, the surface shows (how to say it, shrinkage marks?), there is an opportunity for careful optimization
7. Supports of the same material can save time, using PAL to support PETG will increase printing time. Currently, same-material support works well for this part
8. Sometimes when printing problems occur and the cause cannot be found, letting the machine perform a self-check once might solve the problem
9. Clean the print plate with dish soap to increase first layer adhesion
10. Lower first layer speed and increase print bed temperature to increase first layer adhesion
11. When calibrating flow rate in slicing software, it is necessary to complete feeding first (Device-Feed), otherwise AMS will know feeding
IX. Screenshots of attachment files (incomplete):


Matching Large Sealed Poop Bin:
Super Material-Saving 5-P1S/P2S Large Sealed Poop Bin (No supports needed)
1. Thin poop bin, originally designed for use when the printer is very close to a wall. The poop bin is removed by sliding it sideways, so the box has a handle for easy sideways pulling out
2. Two magnets can be placed on the back panel of the P1S/P2S to limit movement, controlling the sideways sliding distance. A line can also be drawn on the floor to indicate the position for sliding it in
3. The box opening is large enough to be compatible with both P1S and P2S machines

Boost Me (for free)
Thank you!
Documentation (1)
License
You shall not share, sub-license, sell, rent, host, transfer, or distribute in any way the digital or 3D printed versions of this object, nor any other derivative work of this object in its digital or physical format (including - but not limited to - remixes of this object, and hosting on other digital platforms). The objects may not be used without permission in any way whatsoever in which you charge money, or collect fees.
Comment & Rating (5)