Search models, users, collections, and posts


Print Profile(1)

0.2mm layer, 6 walls, 50% infill
Designer
8.8 h
5 plates
Open in Bambu Studio
Boost
7
11
0
0
1
0
Released
Description
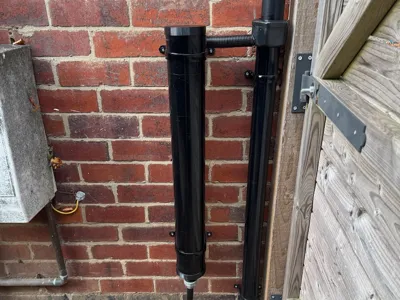
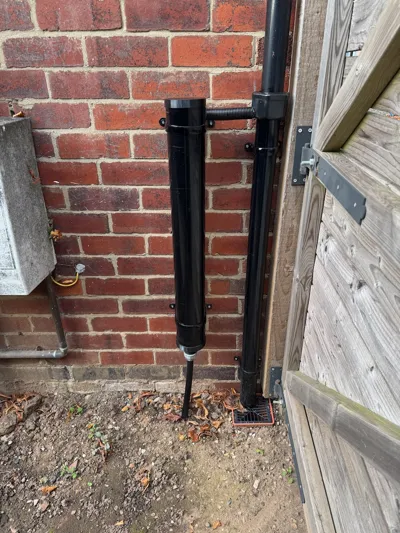
My rainwater pipe sits behind my garden gate leaving no room for a water butt. After previously linking water butts and understanding that providing they are all installed at the same level they will have even amounts of water in them using gravity, figured something would exist.
But after searching for a solution to this but couldn’t find anything so made something from scrap materials!
Materials needed:
- Rain water diverter kit - https://www.wickes.co.uk/Wickes-Water-Butt-Rain-Diverter-Kit/p/543003
- 110mm soil pipe - https://www.screwfix.com/p/floplast-push-fit-single-socket-soil-pipe-black-110mm-x-1m/79994
- 2x 110mm Brackets - https://www.screwfix.com/p/floplast-pipe-clips-black-110mm-5-pack/76037
- Silicone sealant - https://www.screwfix.com/p/no-nonsense-all-weather-sealant-clear-310ml/7876d
- Angle bracket to support the base - https://www.screwfix.com/p/essentials-corner-braces-zinc-plated-103mm-x-103mm-x-22mm-10-pack/14177
- 1” or 3/4” or 1/2” BSP adapter to connect to full size water butt
- Relevant pipe/adapters to link all the water butts together (could use MDPE pipe or even a hosepipe)
Installation instructions:
- Print 1 bottom piece with your desired BSP outlet size (the top piece is identical to the bottom with a hole, can add custom holes using the provided step file in TinkerCad/Fusion 360 etc)
- Make sure the bottom piece fits on the 110mm pipe! Should be quite snug but still removable
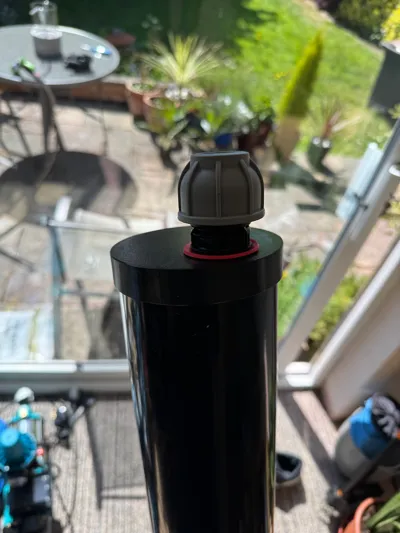
- Print 1 top piece
- OPTIONAL: print 1 side soil adapter to allow easier mounting of adapters on the curved surface
- Cut the soil pipe so the female section for another pipe is removed, also needs to be the same height as the actual water butt (a little shorter should be fine)
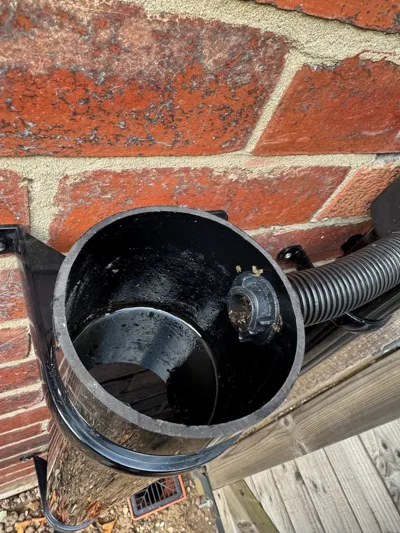
- Drill side hole for water inlet 50mm from the top of the soil pipe
- Install inlet adapter for purchased rain water diverter kit
- Install bottom outlet BSP fitting (some have a locking nut on the inside, if not you could do this after with PTFE tape)
- Fill the inner cavity in the bottom print with silicone (I didn’t hold back)
- Push it onto the soil pipe and leave to dry as per the silicon tube instructions. A little encouragement with a rubber mallet will help push the print fully onto the pipe
- Install you water butt(s) at their desired location making sure the height is identical if you have multiple (see provided Layout .pdf/png documentation)
- Decide the top level on your water butt and mark this on the wall where you plan on installing this (ideally with a laser level)
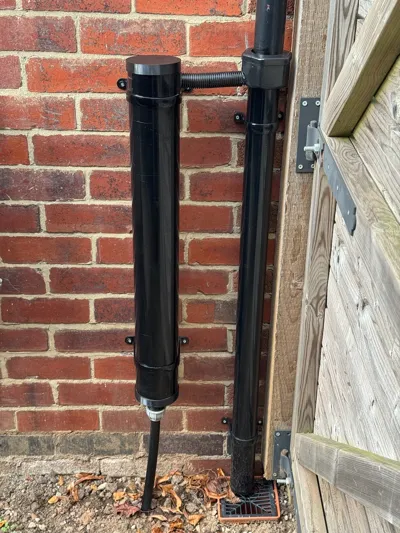
- Take the 110mm soil pipe and line the bottom of the side inlet up with the mark in the previous step.
- Install bottom bracket and 110mm soil pipe brackets
- Connect up bottom pipe work to your existing water butt
- Connect rain water diverter kit
- Fill it up with a hose pipe and make sure there’s no leaks!
- Put the top lid on
Notes
- Probably would be better printed in ABS or ASA, but didn't have any available at the time of producing this. Went with PETG instead and it's been fine throughout summer so far.
Documentation (2)
Assembly Guide (2)
Layout.pdf

License
This user content is licensed under a
Creative Commons Attribution-Noncommercial-Share Alike
Comment & Rating (0)