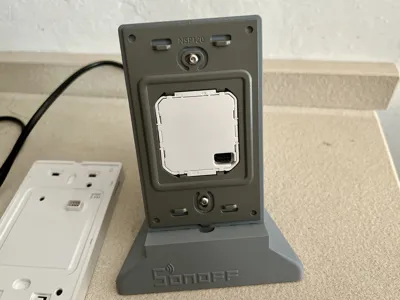
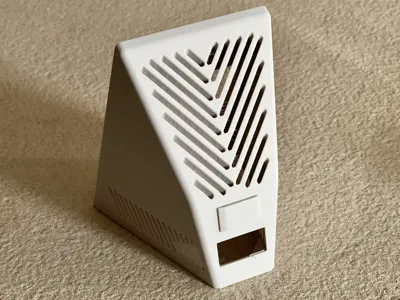
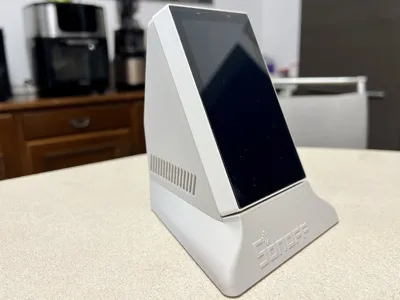
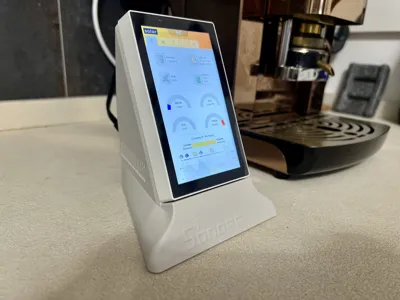
SONOFF NSPanel Pro 120 portrait mode desk stand


Print Profile(1)

Bill of Materials


Description
Update – All-In-One variant V2 added.
Read the specifications at the end of this description.
_________________________________________________________________
This is a portrait version of my SONOFF NSPanel Pro 120 table stand, which I previously mentioned in my other project.
The stand is made of two main parts:
- Upper body → NFP-Pro-120_portrait_upper_body.stl
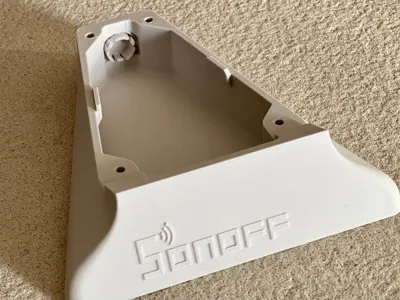
- Lower body (two variants):
- NFP-Pro-120_portrait_base_logo.stl → with raised SONOFF logo
- NFP-Pro-120_portrait_base.stl → plain version, no logo
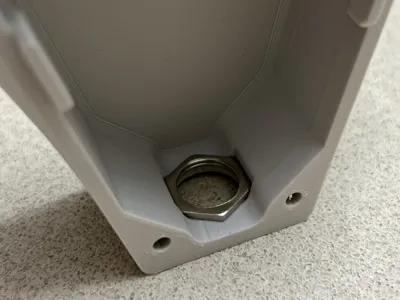
The two bodies are fastened with 4x M3x20 socket head screws.
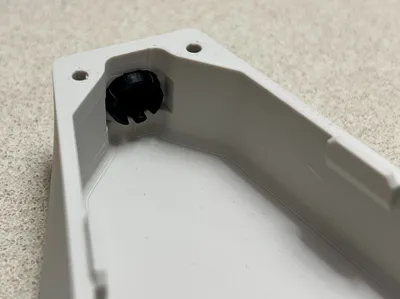
- The holes in the upper body use a three-lobe design to ease self-tapping.
- The overhanging holes in the lower body require no supports, thanks to a custom workaround using tangent bridges to avoid extrusion collapse.
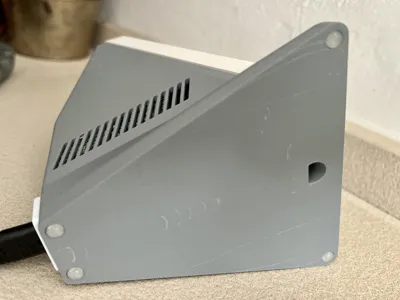
- On the underside of the lower body there are circular recesses to guide placement of three adhesive silicone feet (6 mm diameter) arranged in a triangle.
The front plate of the panel is fixed with 2x M3x10 pan head screws, also with the self-tapping hole design.
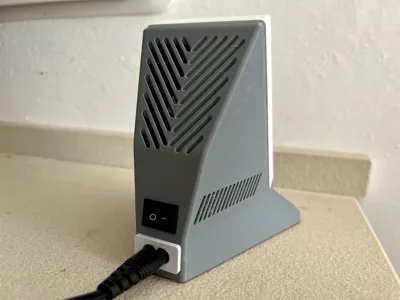
Extra components
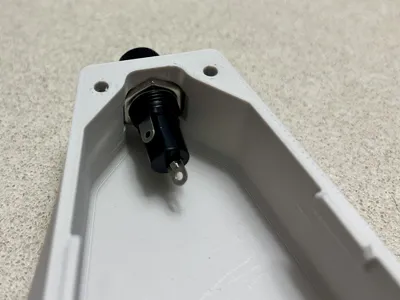
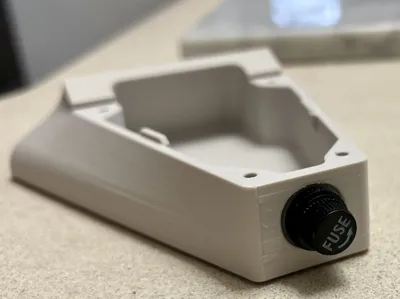
This stand is designed to house three optional parts:
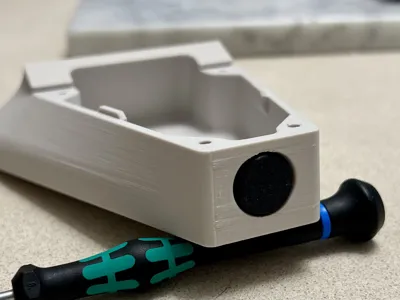
- IEC 320 C8 AC socket (upper body)
- Rocker switch (upper body)
- Cylindrical fuse holder for 5×20 mm fuses (lower body)
If you don’t want to use the switch or fuse holder, you can close the holes with:
- switch_cap.stl
- fuse_cap.stl → ⚠️ strongly recommended to print in PETG, since its three locking tabs are prone to breaking in PLA.
Print plates
Three print plates are provided:
- PLA – upper + lower body with logo, plus caps
- PLA – upper + lower body plain, plus caps
- PETG – only the caps (recommended material for durability)
Each object has custom print settings.
- Both upper and lower body require tree supports, easy to remove.
The project is released under CC BY-SA license.
Remixes are welcome! To make them easier, STEP files are included.
If you remix or adapt this design, consider leaving a comment or a ‘boost’ to share your improvements!
Update 10/1/2025 – Variant V2
- All-In-One design: the lower and upper parts have been merged: small internal modifications were made to reduce the need for additional supports.
- The fuse holder has been removed, while the snap-in AC socket and rocker switch remain unchanged.
- Also, this variant no longer requires the 4x M3x20 socket head screws.
- The lower front geometry has also been redesigned for a cleaner look, and the anti-slip system now relies on four silicone feet instead of three.
- As with the previous version, tree supports are required but very easy to remove.
- Both STL and STEP files (named NFP-Pro-120_portrait_stand_V2) are provided, along with a dedicated print profile for this variant.
- Print profile upgraded by adding a fourth print plate for the V2 version.
- Added an access hole on the base, allowing the panel to be removed using a flathead screwdriver (detail at the end of the video).
Wiring is straightforward: just solder two wires to the AC socket (one going to the display, the other ending with a faston terminal), then connect the faston to the rocker switch. On the other side of the switch, another faston cable goes to the display. Using the pre-crimped fastons usually supplied with the switch makes the process quick and clean.
Installation guide video
Boost Me (for free)
Love this project? A boost helps bring more ideas to life.
Comment & Rating (5)